- standing rigging
- rope and line
- cams, cleats and clutches
- head sail gear
- roller furling
- main sail control
- mast hardware
- eye straps and pad eyes
- fairleads and bulls eyes
- anchor and docking
- miscellaneous hardware
- Alexander Roberts
- My Wishlist
Rigging Only is a full service rigging shop. All running rigging, standing rigging, life lines, wire splicing, and custom hardware are assembled right here in our shop. We know our products, and we deliver that expertise with every job we do.
N ote: Some orders may incur additional shipping costs, particularly those with heavy or long items. INCLUDES ALL FURLERS
All prices are subject to change without notice.


Location & Hours

- Customer Service
- Order Tracking
- Your Account
- Store Policies & Info
- Privacy Policy
- Helpful Links
- Payment Methods
Shopping Cart: 0 Items
Wooden Boat Model Accessories
Products of wooden boat model accessories.

Electric Plank Bender

5mm JACKSTAY EYEBOLTS BRASS

DEADEYES WALNUT 4mm
")
Brass Rings 7mm (60)
 Wooden Boat Model Accessory #2312")
Deadeyes Boxwood 4mm (40)

Waterline Marker

4mm DOUBLE BLOCK WALNUT

8mm CLEAT TWO HORNED

RIGGING .018x30' TARRED

4mm SINGLE BLOCK WALNUT

Cotton Thread .15mm Beige 40 Meter

3mm SINGLE BLOCK WALNUT
")
Dead Eye 3.5mm (18)
")
Brass Rings 10mm (60)
")
Dead Eye 5mm (18)

12mm x 6mm Main Boom Fitting

RIGGING TARRED

7mm DOUBLE BLOCKS WALNUT

Fair-A-Frame Building Slip 24'

10yds X .028 WHITE RIGGING
Refine search, filters (4).
TM RC Boatyard

RC Sailboat Parts
RC Sailboat Parts We are extremely proud to be the Canadian Distributor of Joysway DF65 and DF95 Sailboat Kits and Parts. Among the fantastic things about the DF kits is the affordability of replacement parts. We pride ourselves with keeping parts in stock. The DF boats also have extra rigs available designed for you to sail as well as possible in different wind conditions. We are also excited to sell DF upgrade sails from HOT RC Sails. If you own one of the very popular IOM, Marblehead, 36/600 and others kits we sell fittings from KDH (Germany) and Sails Etc (UK). Sails Etc. also has upgrades for the DF boats. These RC Sailboat Fittings are of the highest quality! Please Note: All Prices are in Canadian Dollars.
Showing 1–20 of 365 results
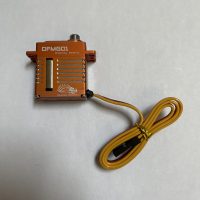
DFMGD1 – DF65/95 Rudder Servo DFMGD1
Out of stock
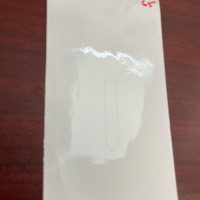
DS65KS – DF65 Keel Sticker
13 in stock
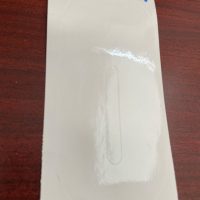
DS95KS – DF95 Keel Sticker
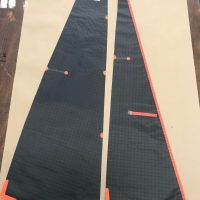
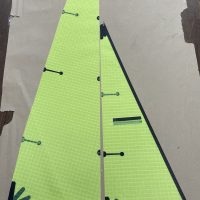
DSDF65A+BO – DF65 “A+” Black W/Orange Trim Sail
DSDF65A+BW – DF65 “A+” Black W/White Trim Sail
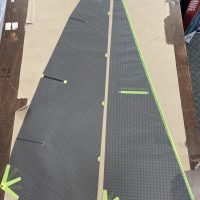
DSDF65A+CO – DF65 “A+” Charcoal W/Orange Trim Sail
DSDF65A+CY – DF65 “A+” Charcoal W/Yellow Trim Sail
DSDF65A+SB – DF65 “A+” Silver W/Black Trim Sail
DSDF65A+SBL – DF65 “A+” Silver W/Blue Trim Sail
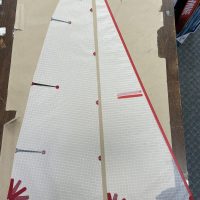
DSDF65A+WR – DF65 “A+” White W/Red Trim Sail
DSDF65A+WY – DF65 “A+” White W/Yellow Trim Sail
DSDF65A+YB – DF65 “A+” Yellow W/Black Trim Sail
DSDF65A+YBL – DF65 “A+” Yellow W/Blue Trim Sail
DSDF65ASY – DF65 “A” Silver W/Yellow Trim Sail

DSDF65AWB – DF65 “A” White W/Black Trim Sail
DSDF65AWBL – DF65 “A” White W/Blue Trim Sail
DSDF65AWR – DF65 “A” White W/Red Trim Sail
DSDF65AYB – DF65 “A” Yellow W/Black Trim Sail
DSDF95ACY – DF95 “A” Charcoal W/Yellow Trim Sail
DSDF95AWR – DF95 “A” White W/Red Trim Sail
RC Sailboat Rigging Setup- Briefed in 17 Easy Steps
Table of Contents
Introduction
To build a model sailboat, you’ll need a lot of time, patience, and talent. Remote control sailboat beginners should start by altering or fixing a pre-existing model. It is possible to create a quicker and more sophisticated sailboat by rigging an existing model.
What to do for the rc sailboat rigging setup ?
Tether the retaining bolt and wire mainsail luff. Insert the mast stub and slide the entire main boom assembly. Push the masthead and backstay crane. Adjust the sail to match the mast reinforcement ring. Attach the eye in the mainsail clew. Close the hooks. Set the backstay’s length to the right.
To get the overall understanding, read the entire article.
Things to Bring
- Stitching Device
- Sailboat Controlled via Remote
- Thread Made From Polyester
- Fisherman’s Spectra Line
- Dacron Sails
- Utility knife
Procedure for Rigging
Use these rigging guidelines to their full extent. This ensures that the boat will sail with the qualities and performance that its creators intended. You can also check the RC dirt oval setup guide to ease your work.
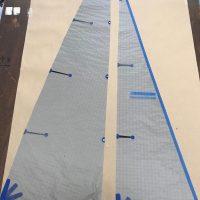
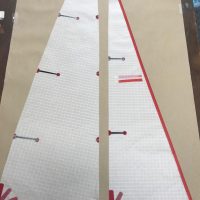
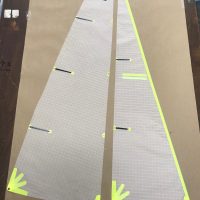
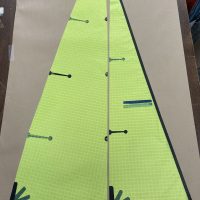
Step 1: Replace Old Sails
Remove and replace the old sails. Cut out the new main and headsails from Dacron. Measure the old ones from the model and add a half-inch on each side to the new measurements. Tether the retaining bolt.
Step 2: Wire Mainsail with Eyelets
All six eyelets on the mainsail luff should have wired mainsail luff rings attached to them.
Step 3: Place the Mast Stab
Be careful not to get the plastic collar’s bevelled edge. Insert the mast stub into the bottom of the mast.
Step 4: Slide Main Boom
From the bottom, slide the entire main boom assembly onto the mast stub.
Step 5: Slide Rings Under the Mast
Starting at the luff of the mainsail, slide all rings beneath the mast one at a time.
Step 6: Assemble Plug
Push the masthead and backstay crane. Assemble the plug into the mast. Cut a 250mm Dyneema length and tie the mainsail’s head to the backstay crane.
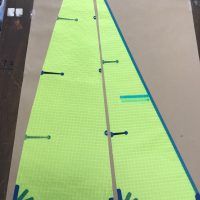
Step 7: Layout the Sail
Adjust the sail to match the mast reinforcement ring at its highest point. The sail’s head may readily swivel. Poles are sheeted out at an angle of 80 degrees when the boat’s sailing with the breeze.
Step 8: Attach the Cunningham
Attach the Cunningham (downhaul) as demonstrated by cutting a 300mm length of Dyneema. Tie a cord to the eye in the gooseneck fitting’s uppermost eye.
Step 9: Tie Bowsie’s Eye
Follow this path: First, tie one end to a Bowsie’s eye. Then, tie a second Bowsie’s eye; finally, tie a third Bowsie’s eye.
Step 10: Attach the Mainsail Clew
Attach the eye in the mainsail clew (bottom right corner) to the mainsail clew using a line.
Step 11: Close the Hook
Close the hook’s open end with thin-nosed pliers. Keep your sail from falling off while you’re out on the water.
Step 12: Replace the Sail If Needed
If you need to replace the sail, simply use a flat-bladed screwdriver to pry it open once again.
Step 13: Cut Dyneema
For the Backstay, cut a 900mm length of Dyneema. The Backstay Crane’s end hole has a loop where you can tie a piece of string.
It’s time to attach one of our 6mm stainless steel rings to its bottom end. Using a Mast Socket, insert the mast and the rigged Mainsail into the hull.
Step 14: Attach the Loop
Once you’ve cut a 500mm piece of Dyneema, tie a loop in one end. Weave the other end through the first small gaps in a Bowsie. Then throw the rim at the bottom of the Backstay.
Finish it back at the Bowsie. Using a metal hook in the Transom (rear edge of the hull), attach the loop to the backstay. Then put the Bowsie nearly halfway along the bottom rope and secure it.
Step 15: Tighten the Leech
To allow the leech (back edge) of the main to twist a little, lightly tighten the compression strut. Such that the leech (back edge) is under mild tension. Adjust the Cunnigham such that the luff of the sail is just slightly strained.
Step 16: Adjust the Position of the Rings
Set the backstay’s length to the right. A spacing of roughly 25 millimetres between the boom tube’s centre. Achieve the sail foot midway by adjusting the position of the silicon rings (SR5) and the mainsail clew hook.
Step 17: Connect the Foresail
Use the spectra fishing line to loop between the grommet and the eyebolt. Connect the foresail to the top of the mast before the mainsail.
To make use of the foresail, equip the boat’s bow with a second, shorter boom. Connect the sail’s grommets to the short boom’s front and back eye bolts with spectra lines.
You can check these suggested rigging tools. You need these tools for rigging setup-
Apply a few drops of thin CA adhesive into the Dyneema cord at the point of the cut. Then cut through it at an angle. The cut end will be firm and pointed, making it simple to weave through the Bowsies.
A dollop of thin CA adhesive applied to the knot can help keep it in place. Once you’ve tied it, trim any extra rope.
Don’t use hot gun glue as it doesn’t stick to this type of surface. If you take the time to secure all knots now, you’ll have a long-term reliable vessel.
Tips for Better Setup
A Dacron sleeve should be added where the lines come into contact with the hulls or plastic parts. Because Spectra is extremely powerful and can shred into the material.
Ask sailmakers for scraps or old, ripped sails that you may use to build the remote control boat sails. Only if they are willing to part with them.
There are a few things to keep in mind when it comes to rigging more sophisticated rigs. Like double mast designs or using spinnakers until you’ve gained some experience in the activity. Always clean your RC boat as you clean your RC car to avoid rusting.
How tight should the rigging on a sailboat be?
If you push or tug on them, they shouldn’t wiggle about too much. So make sure they’re snug. Tighten them up if they’re still slack or floppy.There is no need to tighten any of the other shrouds after the cap shrouds are in place. Because they follow in consecutive order.
What’s the simplest way to sail a boat?
The Lateen Rig is a great starting sailboat. It only requires 2 ropes in its basic form.The Lateen Rig is one of the most basic sailing rigs. A spar, boom, and mast are all part of this rig. As are a single jib sheet and mainsheet.
How much does it take to replace a sailboat’s rigging?
Re-rigging a sailboat can cost anything from $1,000 to $5,000. Re-rigging a 40-foot boat with wire is estimated to cost roughly $100 per foot. Which includes the round-trip costs of hauling, launching, and unstepping the rig (about $2,500).
Final Words
We’ve discussed here in detail on the rc sailboat rigging setup. This should help with the rigging setup, and we sincerely hope it does.
OK, so the above may look a little daunting. You’ll be able to recall this procedure with ease after completing it five or six times. Be familiar with and comfortable with your tools, settings, and methods.
The very best to you!
Travis Murray
Leave a Comment Cancel reply
Save my name, email, and website in this browser for the next time I comment.
- Join Newsletter & Get 10% Off Your First Order
Join / Login
Rigging tips for building a model ship.
- Updated on: 25th January 2021
- Written by Gary Renshaw
Introduction
Rigging is a significant part of the process of building a model ship. It can be tedious and time-consuming however putting the effort in adds to the beauty of your finished model.
In general, the instructions on rigging provided by the manufacturers of model ship kits are fairly sparse. Whilst there are several specialised and very detailed books on masting and rigging, they are more concerned with matters of historical and technical accuracy than with the sort of advice that might help the beginner to understand the best way of going about what might appear to be quite a daunting task.
Highly recommended is a 3 DVD set available from Modellers Shipyard on Masting and Rigging . This is a comprehensive set which shows all aspects of preparing the masts, spars and yards and the rigging for a period model. For further information call our office or visit our website.
We do strongly recommend “Ship Modelling Simplified” by Mastini – it contains excellent advice on ship modelling in general and has a good section on rigging. Modeller’s Shipyard has produced the following information as an introduction to the Rigging of a model ship. The following points should be noted:
- This is a general guide only and is to be used in conjunction with any instructions and plans provided by the kit manufacturer. In particular, it must be emphasised that any illustrations used in this leaflet are purely for the purpose of example and may not relate to your specific model.
- The approaches described are not the only way of doing things and the order in which the various processes are carried out may be varied, within reason, to suit the individual modeller.
Building a model ship is as much an exercise in using the mind as it is in using your fingers and hands. In this small leaflet, we can’t hope to cover all the problems and queries that may be encountered in the construction of your model. It is necessary to spend as much time thinking about the task at hand as actually doing it. If having thought about it, you still have a problem then contact us. We’ll either be able to advise you ourselves or refer you another modeller in your area who’ll be happy to help you with “hands-on” assistance.
TYPES OF RIGGING
The rigging of a ship can be divided into two main parts:
- “Standing” or “Fixed” rigging, which is used to support the Masts and Bowsprit.
- “Running” rigging, which is used to manipulate spars and sails.
On an “actual” ship any Rigging which didn’t pass through a pulley block was coated with tar to help prevent it rotting. For this reason, standing rigging is often, although not always, black on ship models.
If you do want your standing rigging black, and black cord is not supplied in the kit then you can consider these options:
- You can purchase Black cord.
- The use of black rigging “wax” gives a very authentic tarred look but it is difficult to do well.
- The cord supplied with the kit can be coloured using black dye or “Raven Oil” as used by leatherworkers/saddlers.
- Black felt-tipped “Texta” is an easy way to colour the cord.
- Black “Padawax” shoe colour is also very satisfactory.
When any liquid dye has been used it will be necessary to stretch the cord by hanging it on a clothesline, with weights, to prevent it going slack after installation on the model. It will also probably be necessary to use clear wax to eliminate any furry look in the cord.
STANDING RIGGING
This includes the rigging of the Stays, Backstay, Bowsprit and Gammoning. This is fairly straightforward and should present few difficulties. Work from the centre of the ship out and try to avoid difficult and confined spaces. A Rigging Tool presented in the Tools section of our Catalogue will be helpful when rigging. The various names for the standing rigging are presented below.
- Fore topmast stay
- Fore topgallant stay
- Flying-jib stay
- Fore royal stay
- Fore skysail stay
- Main topmast stay
- Main topgallant stay
- Main royal stay
- Main skysail stay
- Mizzen stay
- Mizzen topmast stay
- Mizzen topgallant stay
- Mizzen royal stay
- Mizzen skysail stay
- Mizzen topmast backstay
- Mizzen royal backstay
- Mizzen skysail backstay
- Main topmast backstay
- Main topgallant backstay
- Main royal backstay
- Main skysail backstay
- Fore topmast backstay
- Fore topgallant backstay
- Fore royal backstay
- Fore skysail backstay
- Bowsprit shrouds (bobstays)

Source: “Ship Modeling Simplified” by Mastini Pages 143 –144
FITTING OF BLOCKS, EYE PINS & CLEATS
Before proceeding further fit all the eye pins and rigging blocks to the bowsprit, masts, yards, and deck – also to the insides of the bulwarks if required. Cleats may be required on the lower masts, deck or bulwarks. Pay particular attention to any area which will be relatively inaccessible once the shrouds and other standing rigging ropes are in place.
It is as well to drill out the holes in the blocks and deadeyes to facilitate the threading of the rigging cord when the time comes.
For the most inaccessible blocks, insert a short piece of thin rigging cord through the hole and glue it to itself forming a loop. Later, when you wish to insert the permanent running rigging you cut the loop, glue the new cord to one end and pull it through the hole using the other end of the pilot cord. No awkward threading
DEADEYES (LOWER) AND CHAIN STRAPS/ DEADEYE STRAPS
In most models, the lower deadeyes are fitted into “deadeye loops” which are inserted into gaps in the outer edge of the “Channel”. Once the complete row of deadeyes are installed a capping strip is fixed along the front.
From the bottom of the deadeye loop either a straight ”Deadeye Strap” or a “Chain Strap” goes to the side of the hull at a lower level. The style of this fitting will depend on the period to which the particular ship belongs and also the price/ quality of the ship being built.

There are several points to keep in mind when setting up these “deadeye assemblies”
The deadeye strap (or chain strap) is rarely, if ever, perpendicular. Rather, it should be at an angle which is an extension of the angle of the shroud which will eventually be attached to the deadeye above it. The diagram on the left of this page should make that mouthful clearer!!
The lower deadeyes, the ones being attached at present, should be placed so that the three holes are positioned with the lowest one being the centre of the three. When at a later stage the upper deadeye is fitted, it is equally important that the centre hole is the highest of the three. Refer to the diagram on the right-hand side of this page.

These together with the “forestays” and “backstays” are the ropes that support the masts. Shrouds, which are the group of ropes to which the ratlines are attached, are made up in pairs with a deadeye at each end of a single rope.
First cut a piece of cord to an appropriate length and with the help of an alligator clip or a small clamp glue one end around a deadeye. This deadeye should then be temporarily connected to the front portside (left hand) lower deadeye using a wire jig. This jig will provide the correct spacing between the upper and the lower deadeye.

The loose end of the rope then goes up, around the mast and down to the position of the lower deadeye immediately behind the first. Using glue, alligator clip and another wire spacer, the upper deadeye is attached to the shroud. At a latter stage, the double thickness of cord immediately above the upper deadeye will be bound with fine thread as shown as shown in some of our diagrams. The “Lanyards”, made of the thinnest rigging cord, are then installed as shown in the adjoining drawing. Because on the “real thing” the lanyards were constantly used to take up tension on the shrouds they were never tarred and should not be black.
Once the first pair of shrouds has been completed, the exercise is repeated on the other (starboard) side, then, back to the port side and so on.
If, when the others have been done there remains a single lower deadeye on each side then the final pair of shrouds goes from one side of the ship to the other with a large seized eye around the masthead. In all of this, it is important to ensure that the deadeyes are in straight rows parallel with the channels and with each other.

SEQUENCE OF SHROUDS

The forestays should now be fitted paying attention to the particular fittings used. Quite commonly “heart deadeyes” and lanyards will be used for tensioning purposes.

These are always rigged with a large seized eye around the masthead as with the “odd” shrouds (if any). As with the shrouds they are rigged with deadeyes and lanyards but the upper deadeye will normally be at a higher level than that of the shroud deadeyes.
The colour of the ratline cord is grey or fawn. The tying of ratlines can be fairly tedious but it is worth going to some trouble to ensure that it is done well. Among the points to keep in mind are:
- They should not be too tight otherwise they will pull the shrouds together.
- They should be parallel to the waterline.
- On the “real thing” the spacing between each row was about 400mm so, on a model at a scale of say 1:50, the gap would be approximately 10mm.
- Avoid tying knots tightly until all the ratlines are in place. This will allow some “fine tuning” before placing a tiny dab of glue on each knot. Placing a sheet of white plain paper behind the shrouds will assist with gaining contrast to make the tying of the ratlines a tad easier on the eyes.

ATTACHING RIGGING LINE TO BELAYING PINS
The adjacent diagram demonstrates clearly the method best used to attach the cord to the belaying pins.
If you have any difficulties determining which belaying pin a rope is intended to go to, a good rule of thumb is that the higher up the mast it starts then the further back it finishes.

ROPE COILS
Plenty of rope coils draped over the belaying pins provide a finishing touch. These can be made from odd lengths of offcuts. If placed into the shapes you require they can be (fixed) permanently by using hair lacquer or nail polish.
WHAT SIZE ROPE TO USE
In the plans or in the instructions there should be a key or description of the size of cord to be used for various purposes. In the unlikely event that no indication is given, then the following can serve as a guide:
Forestays & Anchor ropes – Heavy cord
Shrouds & Backstays – Medium cord
Ratlines & Running Rigging – Lightest cord
RUNNING RIGGING
Once the standing rigging has been completed you can now start the Running Rigging. You will have enlarged the holes in the blocks which are already in place. Do the same with all other blocks as you come to use them.
When threading cord through blocks, you will find that a needle threader (available from sewing shops) will be very handy. Also, a smear of super glue on the end of the cord can stiffen it and make it easier to thread. Work from the centre of the ship out and try to avoid locking yourself into difficult positions. A Rigging Tool presented in the Tools section of our Catalogue will be helpful when rigging.
The various names for the Running Rigging are presented below.
- Fore brace
- Fore lower topsail brace
- Fore upper topsail brace
- Fore lower topgallant brace
- Fore upper topgallant brace
- Fore royal brace
- Fore skysail brace
- Fore yard lift
- Fore topsail yard lift
- Fore topgallant yard lift
- Fore royal yard lift
- Fore skysail yard lift
- Main lower topsail brace
- Main upper topsail brace
- Main lower topgallant brace
- Main upper topgallant brace
- Main royal brace
- Main skysail brace
- Main yard lift
- Main topmast yard lift
- Main topgallant yard lift
- Main royal yard lift
- Main skysail yard lift
- Mizzen yard brace
- Mizzen lower topsail brace
- Mizzen upper topsail brace
- Mizzen lower topgallant brace
- Mizzen upper topgallant brace
- Mizzen royal yard brace
- Mizzen skysail yard brace
- Mizzen topmast yard brace
- Mizzen topgallant yard lift
- Mizzen royal yard lift
- Mizzen skysail yard lift

Source: “Ship Modeling Simplified” by Mastini Pages 145 –146
TYPICAL RUNNING RIGGING APPLICATIONS

NAMES OF MASTS & SPARS
- Fore lower mast
- Fore topmast
- Fore topgallant mast
- Fore royal and fore skysail mast
- Main lower mast
- Main topmast
- Main topgallant mast
- Main royal & main topgallant mast
- Mizzen lower mast
- Mizzen topmast
- Mizzen topgallant mast
- Mizzen royal & mizzen skysail mast
- Fore topsail yard
- Fore upper topsail yard
- Fore lower topgallant yard
- Fore upper topgallant yard
- Fore royal yard
- Fore skysail yard
- Main lower topsail yard
- Main upper topsail yard
- Main lower topgallant yard
- Main topgallant yard
- Main royal yard
- Main skysail yard
- Crossjack yard
- Mizzen lower topsail yard
- Mizzen upper topsail yard
- Mizzen lower topgallant yard
- Mizzen upper topgallant yard
- Mizzen royal yard
- Mizzen skysail yard
- Gaffsail boom
- Flying-jibboom
- Martingale boom, dolphin striker

Source: “Ship Modeling Simplified” by Mastini Pages 142 –143
Key Takeaways
- The article provides practical rigging tips for model ship builders, focusing on both standing and running rigging techniques.
- Emphasizes the importance of understanding different types of rigging and their applications in model ship construction.
- Offers advice on materials and tools needed for effective rigging, including how to choose the right cord size for various rigging parts.
- Highlights techniques for making rigging tasks simpler and more efficient, such as coloring cords and preparing blocks.
- Advises on the order of operations for rigging, suggesting starting with standing rigging before moving to running rigging.
Learn The Art Of Building A Model Ship
Get started in wooden model ship building today
Join 18,543 other modelers to hear about specials, new products and modeling tips
- Become a Member
- Modeling Hub
- Model Ship Building
- Maritime History
- Affiliate Program
Information
- Terms & Conditions
- Privacy Policy
Copyright © 2023 Modelers Central. ABN: 31 114 830 732
- Claim 10% Off First Order
- Get 5% off ALL orders with a Membership
- Gift Vouchers
- Help & Advice
Modelers Central. 2023, All rights reserved.
- Claim 10% Off Your First Order
- Get 5% Off All Orders With A Membership
Get 10% off
Your first order.
10% off applies only to full-price items. By providing your email address, you agree to our Terms & Privacy Policy
10% off applies only to full-price items. By providing your email address & mobile number, you agree to our Terms & Privacy Policy and consent to receive marketing messages from Modelers Central at the addresses provided. You can unsubscribe at any time by replying STOP.
Rigging - Turnbuckles , Toggles , Wire & Rod Components, Norseman Cones & Fittings.
Furling Systems - Systems and replacement parts from a variety of Manufacturers.
Traveller Systems - Adjustable Track Systems for Mainsheet and other applications.
Sailboat Hardware - Rope Clutches, Blocks, Track & Fittings, Winches, etc.
Custom Parts - Custom items, or those out of production or otherwise unavailable.
Consultation - Special projects, research, or information not detailed on-site.
Copyright 1996 - 2024, Rig-Rite, Inc. Disclaimer Web Site maintained by The WATER Group
Sailboat Parts Explained: Illustrated Guide (with Diagrams)
When you first get into sailing, there are a lot of sailboat parts to learn. Scouting for a good guide to all the parts, I couldn't find any, so I wrote one myself.
Below, I'll go over each different sailboat part. And I mean each and every one of them. I'll walk you through them one by one, and explain each part's function. I've also made sure to add good illustrations and clear diagrams.
This article is a great reference for beginners and experienced sailors alike. It's a great starting point, but also a great reference manual. Let's kick off with a quick general overview of the different sailboat parts.
General Overview
The different segments
You can divide up a sailboat in four general segments. These segments are arbitrary (I made them up) but it will help us to understand the parts more quickly. Some are super straightforward and some have a bit more ninja names.
Something like that. You can see the different segments highlighted in this diagram below:

The hull is what most people would consider 'the boat'. It's the part that provides buoyancy and carries everything else: sails, masts, rigging, and so on. Without the hull, there would be no boat. The hull can be divided into different parts: deck, keel, cabin, waterline, bilge, bow, stern, rudder, and many more.
I'll show you those specific parts later on. First, let's move on to the mast.

Sailboats Explained
The mast is the long, standing pole holding the sails. It is typically placed just off-center of a sailboat (a little bit to the front) and gives the sailboat its characteristic shape. The mast is crucial for any sailboat: without a mast, any sailboat would become just a regular boat.
I think this segment speaks mostly for itself. Most modern sailboats you see will have two sails up, but they can carry a variety of other specialty sails. And there are all kinds of sail plans out there, which determine the amount and shape of sails that are used.
The Rigging
This is probably the most complex category of all of them.
Rigging is the means with which the sails are attached to the mast. The rigging consists of all kinds of lines, cables, spars, and hardware. It's the segment with the most different parts.
The most important parts
If you learn anything from this article, here are the most important parts of any sailboat. You will find all of these parts in some shape or form on almost any sailboat.

Okay, we now have a good starting point and a good basic understanding of the different sailboat parts. It's time for the good stuff. We're going to dive into each segment in detail.
Below, I'll go over them one by one, pointing out its different parts on a diagram, listing them with a brief explanation, and showing you examples as well.
After reading this article, you'll recognize every single sailboat part and know them by name. And if you forget one, you're free to look it up in this guide.

On this page:
The hull is the heart of the boat. It's what carries everything: the mast, the sails, the rigging, the passengers. The hull is what provides the sailboat with its buoyancy, allowing it to stay afloat.
Sailboats mostly use displacement hulls, which is a shape that displaces water when moving through it. They are generally very round and use buoyancy to support its own weight. These two characteristics make sure it is a smooth ride.
There are different hull shapes that work and handle differently. If you want to learn more about them, here's the Illustrated Guide to Boat Hull Types (with 11 Examples ). But for now, all we need to know is that the hull is the rounded, floating part of any sailboat.
Instead of simply calling the different sides of a hull front, back, left and right , we use different names in sailing. Let's take a look at them.

The bow is the front part of the hull. It's simply the nautical word for 'front'. It's the pointy bit that cuts through the water. The shape of the bow determines partially how the boat handles.
The stern is the back part of the hull. It's simply the nautical word for 'back'. The shape of the stern partially determines the stability and speed of the boat. With motorboats, the stern lies deep inside the water, and the hull is flatter aft. Aft also means back. This allows it to plane, increasing the hull speed. For sailboats, stability is much more important, so the hull is rounded throughout, increasing its buoyancy and hydrodynamic properties.
The transom is the backplate of the boat's hull. It's the most aft (rear) part of the boat.
Port is the left side of a sailboat.
Starboard is the right side of a sailboat
The bilges are the part where the bottom and the sides of the hull meet. On sailboats, these are typically very round, which helps with hydrodynamics. On powerboats, they tend to have an angle.
The waterline is the point where the boat's hull meets the water. Generally, boat owners paint the waterline and use antifouling paint below it, to protect it from marine growth.
The deck is the top part of the boat's hull. In a way, it's the cap of the boat, and it holds the deck hardware and rigging.
Displacement hulls are very round and smooth, which makes them very efficient and comfortable. But it also makes them very easy to capsize: think of a canoe, for example.
The keel is a large fin that offsets the tendency to capsize by providing counterbalance. Typically, the keel carries ballast in the tip, creating a counterweight to the wind's force on the sails.
The rudder is the horizontal plate at the back of the boat that is used to steer by setting a course and maintaining it. It is connected to the helm or tiller.
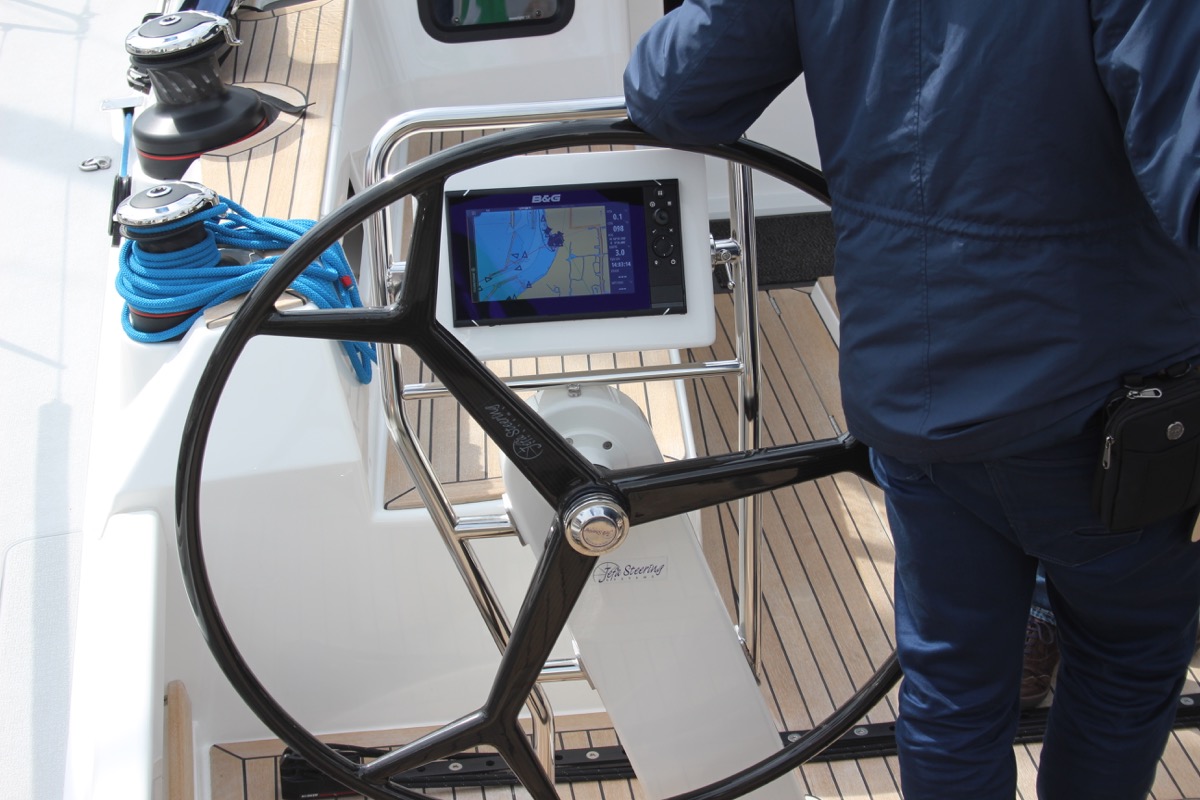
Tiller or Helm
- The helm is simply the nautical term for the wheel.
- The tiller is simply the nautical term for the steering stick.
The tiller or helm is attached to the rudder and is used to steer the boat. Most smaller sailboats (below 30') have a tiller, most larger sailboats use a helm. Large ocean-going vessels tend to have two helms.
The cockpit is the recessed part in the deck where the helmsman sits or stands. It tends to have some benches. It houses the outside navigation and systems interfaces, like the compass, chartplotter, and so on. It also houses the mainsheet traveler and winches for the jib. Most boats are set up so that the entire vessel can be operated from the cockpit (hence the name). More on those different parts later.
Most larger boats have some sort of roofed part, which is called the cabin. The cabin is used as a shelter, and on cruising sailboats you'll find the galley for cooking, a bed, bath room, and so on.
The mast is the pole on a sailboat that holds the sails. Sailboats can have one or multiple masts, depending on the mast configuration. Most sailboats have only one or two masts. Three masts or more is less common.
The boom is the horizontal pole on the mast, that holds the mainsail in place.
The sails seem simple, but actually consist of many moving parts. The parts I list below work for most modern sailboats - I mean 90% of them. However, there are all sorts of specialty sails that are not included here, to keep things concise.

The mainsail is the largest sail on the largest mast. Most sailboats use a sloop rigging (just one mast with one bermuda mainsail). In that case, the main is easy to recognize. With other rig types, it gets more difficult, since there can be multiple tall masts and large sails.
If you want to take a look at the different sail plans and rig types that are out there, I suggest reading my previous guide on how to recognize any sailboat here (opens in new tab).
Sail sides:
- Leech - Leech is the name for the back side of the sail, running from the top to the bottom.
- Luff - Luff is the name for the front side of the sail, running from the top to the bottom.
- Foot - Foot is the name for the lower side of the sail, where it meets the boom.
Sail corners:
- Clew - The clew is the lower aft (back) corner of the mainsail, where the leech is connected to the foot. The clew is attached to the boom.
- Tack - The tack is the lower front corner of the mainsail
- Head - The head is the top corner of the mainsail
Battens are horizontal sail reinforcers that flatten and stiffen the sail.
Telltales are small strings that show you whether your sail trim is correct. You'll find telltales on both your jib and mainsail.
The jib is the standard sized headsail on a Bermuda Sloop rig (which is the sail plan most modern sailboats use).
As I mentioned: there are all kinds, types, and shapes of sails. For an overview of the most common sail types, check out my Guide on Sail Types here (with photos).
The rigging is what is used to attach your sails and mast to your boat. Rigging, in other words, mostly consists of all kinds of lines. Lines are just another word for ropes. Come to think of it, sailors really find all kinds of ways to complicate the word rope ...
Two types of rigging
There are two types of rigging: running and standing rigging. The difference between the two is very simple.
- The running rigging is the rigging on a sailboat that's used to operate the sails. For example, the halyard, which is used to lower and heave the mainsail.
- The standing rigging is the rigging that is used to support the mast and sail plan.
Standing Rigging

Here are the different parts that belong to the standing rigging:
- Forestay or Headstay - Line or cable that supports the mast and is attached to the bow of the boat. This is often a steel cable.
- Backstay - Line or cable that supports the mast and is attached to the stern of the boat. This is often a steel cable.
- Sidestay or Shroud - Line or cable that supports the mast from the sides of the boat. Most sailboats use at least two sidestays (one on each side).
- Spreader - The sidestays are spaced to steer clear from the mast using spreaders.
Running Rigging: different words for rope
Ropes play a big part in sailing, and especially in control over the sails. In sailboat jargon, we call ropes 'lines'. But there are some lines with a specific function that have a different name. I think this makes it easier to communicate with your crew: you don't have to define which line you mean. Instead, you simply shout 'mainsheet!'. Yeah, that works.
Running rigging consists of the lines, sheets, and hardware that are used to control, raise, lower, shape and manipulate the sails on a sailboat. Rigging varies for different rig types, but since most sailboats are use a sloop rig, nearly all sailboats use the following running rigging:

- Halyards -'Halyard' is simply the nautical name for lines or ropes that are used to raise and lower the mainsail. The halyard is attached to the top of the mainsail sheet, or the gaffer, which is a top spar that attaches to the mainsail. You'll find halyards on both the mainsail and jib.
- Sheets - 'Sheet' is simply the nautical term for lines or ropes that are used to set the angle of the sail.
- Mainsheet - The line, or sheet, that is used to set the angle of the mainsail. The mainsheet is attached to the Mainsheet traveler. More on that under hardware.
- Jib Sheet - The jib mostly comes with two sheets: one on each side of the mast. This prevents you from having to loosen your sheet, throwing it around the other side of the mast, and tightening it. The jib sheets are often controlled using winches (more on that under hardware).
- Cleats are small on-deck hooks that can be used to tie down sheets and lines after trimming them.
- Reefing lines - Lines that run through the mainsail, used to put a reef in the main.
- The Boom Topping Lift is a line that is attached to the aft (back) end of the boom and runs to the top of the mast. It supports the boom whenever you take down the mainsail.
- The Boom Vang is a line that places downward tension on the boom.
There are some more tensioning lines, but I'll leave them for now. I could probably do an entire guide on the different sheets on a sailboat. Who knows, perhaps I'll write it.
This is a new segment, that I didn't mention before. It's a bit of an odd duck, so I threw all sorts of stuff into this category. But they are just as important as all the other parts. Your hardware consists of cleats, winches, traveler and so on. If you don't know what all of this means, no worries: neither did I. Below, you'll find a complete overview of the different parts.
Deck Hardware

Just a brief mention of the different deck hardware parts:
- Pulpits are fenced platforms on the sailboat's stern and bow, which is why they are called the bow pulpit and stern pulpit here. They typically have a solid steel framing for safety.
- Stanchons are the standing poles supporting the lifeline , which combined for a sort of fencing around the sailboat's deck. On most sailboats, steel and steel cables are used for the stanchons and lifelines.
Mainsheet Traveler
The mainsheet traveler is a rail in the cockpit that is used to control the mainsheet. It helps to lock the mainsheet in place, fixing the mainsails angle to the wind.
If you're interested in learning more about how to use the mainsheet traveler, Matej has written a great list of tips for using your mainsheet traveler the right way . It's a good starting point for beginners.
Winches are mechanical or electronic spools that are used to easily trim lines and sheets. Most sailboats use winches to control the jib sheets. Modern large sailing yachts use electronic winches for nearly all lines. This makes it incredibly easy to trim your lines.
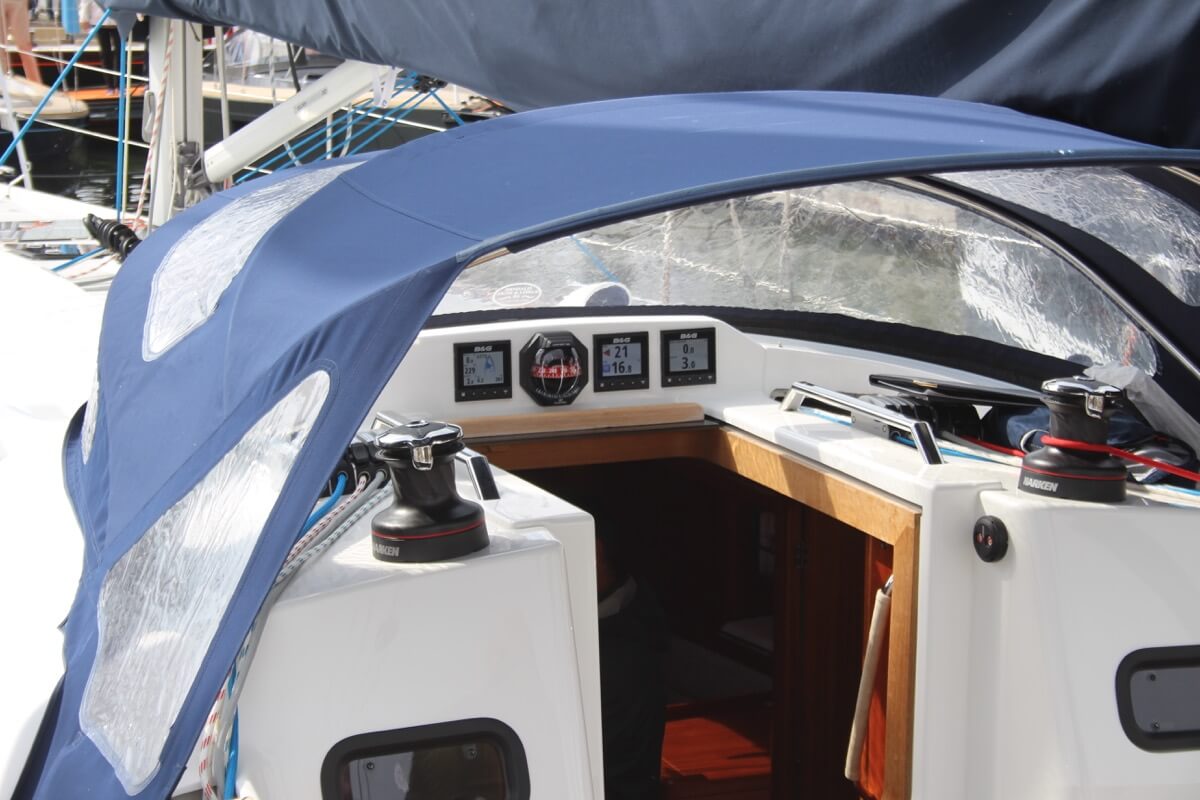
You'll find the compass typically in the cockpit. It's the most old-skool navigation tool out there, but I'm convinced it's also one of the most reliable. In any way, it definitely is the most solid backup navigator you can get for the money.
Want to learn how to use a compass quickly and reliably? It's easy. Just read my step-by-step beginner guide on How To Use a Compass (opens in new tab .
Chartplotter
Most sailboats nowadays use, besides a compass and a map, a chartplotter. Chartplotters are GPS devices that show a map and a course. It's very similar to your normal car navigation.
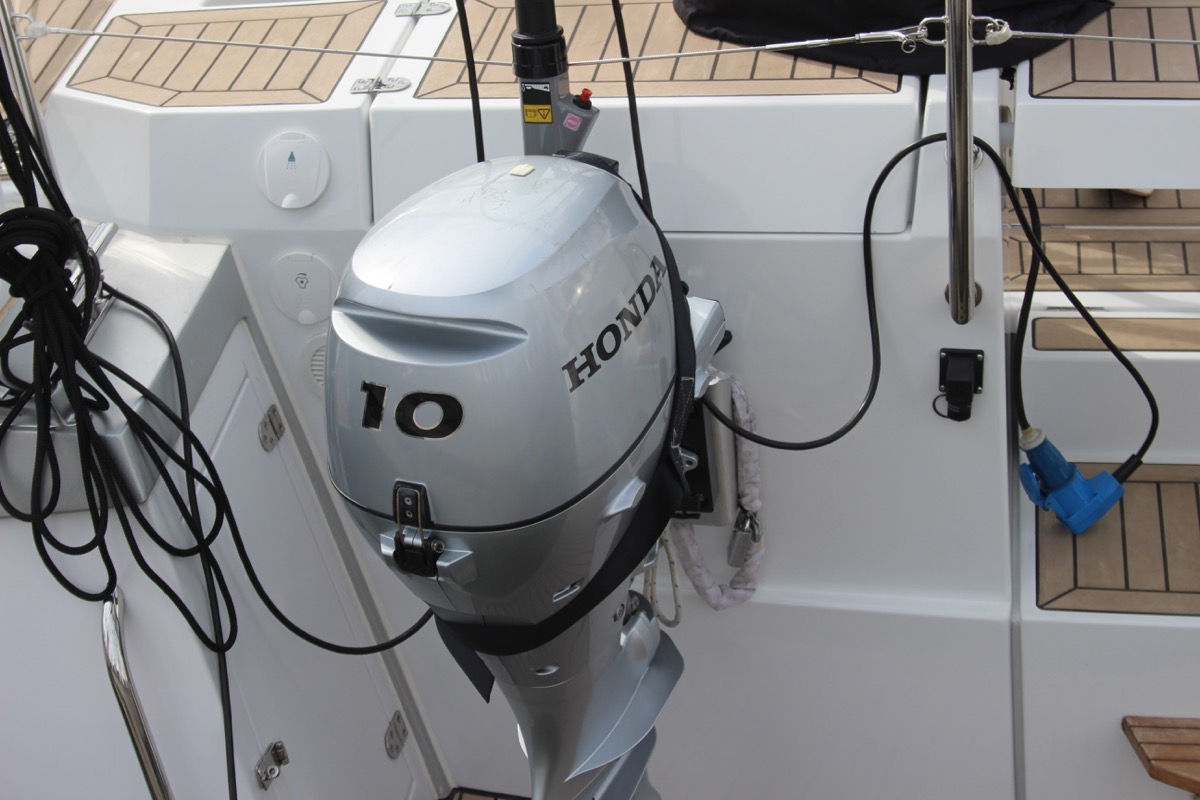
Outboard motor
Most sailboats have some sort of motor to help out when there's just the slightest breeze. These engines aren't very big or powerful, and most sailboats up to 32' use an outboard motor. You'll find these at the back of the boat.
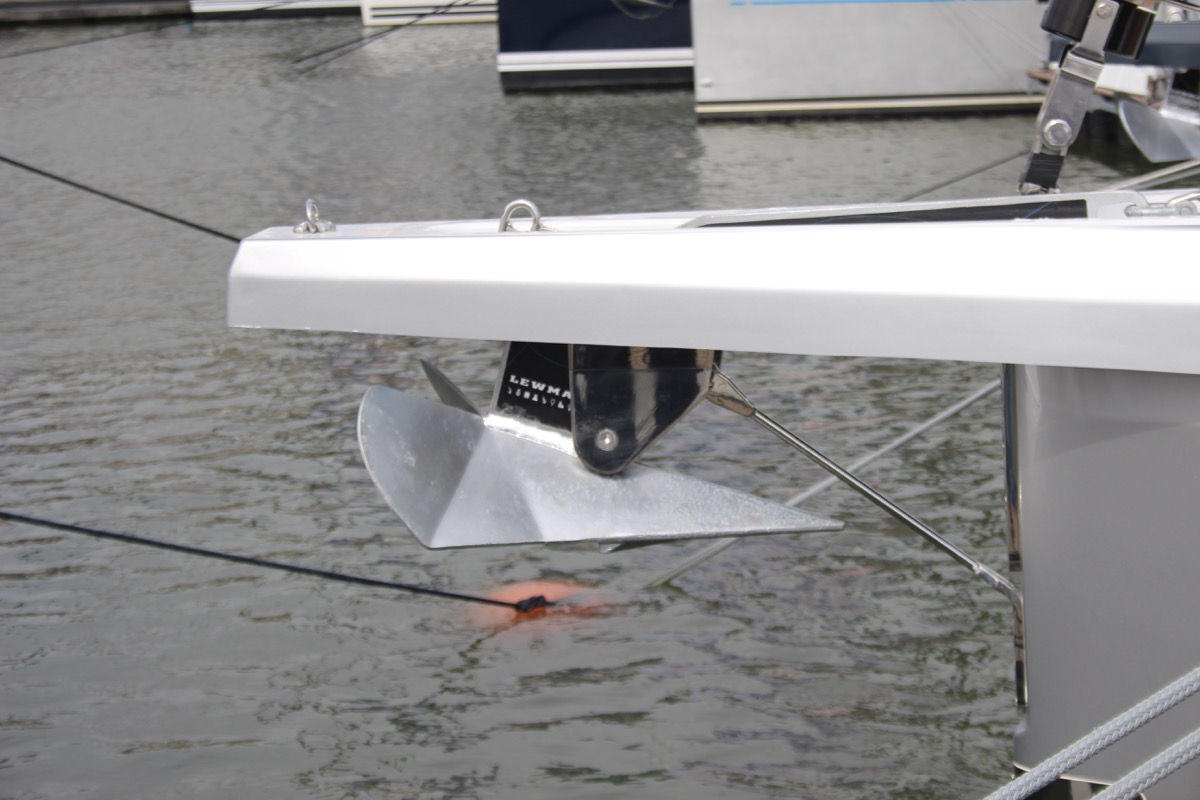
Most sailboats carry 1 - 3 anchors: one bow anchor (the main one) and two stern anchors. The last two are optional and are mostly used by bluewater cruisers.
I hope this was helpful, and that you've gained a good understanding of the different parts involved in sailing. I wanted to write a good walk-through instead of overwhelming you with lists and lists of nautical terms. I hope I've succeeded. If so, I appreciate any comments and tips below.
I've tried to be as comprehensive as possible, without getting into the real nitty gritty. That would make for a gigantic article. However, if you feel I've left something out that really should be in here, please let me know in the comments below, so I can update the article.
I own a small 20 foot yacht called a Red witch made locally back in the 70s here in Western Australia i found your article great and enjoyed reading it i know it will be a great help for me in my future leaning to sail regards John.
David Gardner
İ think this is a good explanation of the difference between a ”rope” and a ”line”:
Rope is unemployed cordage. In other words, when it is in a coil and has not been assigned a job, it is just a rope.
On the other hand, when you prepare a rope for a specific task, it becomes employed and is a line. The line is labeled by the job it performs; for example, anchor line, dock line, fender line, etc.
Hey Mr. Buckles
I am taking on new crew to race with me on my Flying Scot (19ft dingy). I find your Sailboat Parts Explained to be clear and concise. I believe it will help my new crew learn the language that we use on the boat quickly without being overwhelmed.
PS: my grandparents were from Friesland and emigrated to America.
Thank you Shawn for the well written, clear and easy to digest introductory article. Just after reading this first article I feel excited and ready to set sails and go!! LOL!! Cheers! Daniel.
steve Balog
well done, chap
Great intro. However, the overview diagram misidentifies the cockpit location. The cockpit is located aft of the helm. Your diagram points to a location to the fore of the helm.
William Thompson-Ambrose
An excellent introduction to the basic anatomy and function of the sailboat. Anyone who wants to start sailing should consider the above article before stepping aboard! Thank-you
James Huskisson
Thanks for you efforts mate. We’ve all got to start somewhere. Thanks for sharing. Hoping to my first yacht. 25ft Holland. Would love to cross the Bass Strait one day to Tasmania. 👌 Cheers mate
Alan Alexander Percy
thankyou ijust aquired my first sailboat at 66yrs of age its down at pelican point a beautifull place in virginia usa my sailboat is a redwing 30 if you are ever in the area i wouldnt mind your guidance and superior knowledge of how to sail but iam sure your fantastic article will help my sailboat is wings 30 ft
Thanks for quick refresher course. Having sailed in California for 20+ years I now live in Spain where I have to take a spanish exam for a sailboat license. Problem is, it’s only in spanish. So a lot to learn for an old guy like me.
Very comprehensive, thank you
Your article really brought all the pieces together for me today. I have been adventuring my first sailing voyage for 2 months from the Carolinas and am now in Eleuthera waiting on weather to make the Exumas!!! Great job and thanks
Helen Ballard
I’ve at last found something of an adventure to have in sailing, so I’m starting at the basics, I have done a little sailing but need more despite being over 60 life in the old dog etc, thanks for your information 😊
Barbara Scott
I don’t have a sailboat, neither do l plan to literally take to the waters. But for mental exercise, l have decided to take to sailing in my Bermuda sloop, learning what it takes to become a good sailor and run a tight ship, even if it’s just imaginary. Thank you for helping me on my journey to countless adventures and misadventures, just to keep it out of the doldrums! (I’m a 69 year old African American female who have rediscovered why l enjoyed reading The Adventures of Robert Louis Stevenson as well as his captivating description of sea, wind, sailboat,and sailor).
Great article and very good information source for a beginner like me. But I didn’t find out what I had hoped to, which is, what are all those noisy bits of kit on top of the mast? I know the one with the arrow is a weather vane, but the rest? Many thanks, Jay.
Louis Cohen
The main halyard is attached to the head of the mainsail, not the to the mainsheet. In the USA, we say gaff, not gaffer. The gaff often has its own halyard separate from the main halyard.
Other than that it’s a nice article with good diagrams.
A Girl Who Has an Open Sail Dream
Wow! That was a lot of great detail! Thank you, this is going to help me a lot on my project!
Hi, good info, do u know a book that explains all the systems on a candc 27,
Emma Delaney
As a hobbyist, I was hesitant to invest in expensive CAD software, but CADHOBBY IntelliCAD has proven to be a cost-effective alternative that delivers the same quality and performance.
https://www.cadhobby.com/
Leave a comment
You may also like, guide to understanding sail rig types (with pictures).
There are a lot of different sail rig types and it can be difficult to remember what's what. So I've come up with a system. Let me explain it in this article.

The Ultimate Guide to Sail Types and Rigs (with Pictures)

The Illustrated Guide To Boat Hull Types (11 Examples)

How To Live On a Boat For Free: How I'd Do It

How To Live on a Sailboat: Consider These 5 Things
Own your first boat within a year on any budget.
A sailboat doesn't have to be expensive if you know what you're doing. If you want to learn how to make your sailing dream reality within a year, leave your email and I'll send you free updates . I don't like spam - I will only send helpful content.
Ready to Own Your First Boat?
Just tell us the best email address to send your tips to:
Parts of a Sailboat Rigging: A Comprehensive Guide
by Emma Sullivan | Aug 6, 2023 | Sailboat Maintenance
Short answer: Parts of a Sailboat Rigging
The sailboat rigging consists of various components essential for controlling and supporting the sails. Key parts include the mast, boom, shrouds, forestay, backstay, halyards, and sheets.
Understanding the Basics: A Comprehensive Overview of the Parts of a Sailboat Rigging
Title: Understanding the Basics: A Comprehensive Overview of the Parts of a Sailboat Rigging
Introduction: Sailboats have been a symbol of freedom and adventure for centuries. Whether you are an avid sailor or an aspiring skipper, understanding the various components that make up a sailboat rigging is essential. In this insightful guide, we will dive into the world of sailboat rigging, unraveling its intricacies while shedding light on its importance and functionality. So tighten your mainsails and let’s set sail on this knowledge-packed journey!
1. Mast: The mast is the vertical spar that supports the sails . It provides structural integrity to the entire rigging system and enables harnessing wind power effectively. Constructed from materials such as aluminum or carbon fiber, modern masts are designed to be lightweight yet robust enough to withstand varying weather conditions .
2. Standing Rigging: The standing rigging refers to all fixed parts that support the mast. This includes stays (fore, back, and jumper) which run between the masthead and various points on the hull or deck, like chainplates or tangs. Shrouds (cap shrouds, intermediate shrouds) help counteract lateral forces by providing lateral support to prevent excessive sideward movement of the mast.
3. Running Rigging: Unlike standing rigging, running rigging comprises lines that control sails’ deployment and trim dynamically during sailing maneuvers . The halyard raises or lowers a sail along its respective track within the mast groove while keeping it securely fastened in place when needed.
4. Sails: Of course, we can’t discuss sailboat rigging without mentioning sails themselves! They are like wings for your boat – converting wind energy into forward motion efficiently . Main sails typically attach through slides onto a mast track using luff cars for easy hoisting and lowering during different conditions.
5. Boom: The boom plays a crucial role in sail control , as it connects the aft end of the mainsail to the mast. By controlling the angle of the boom, sailors can adjust the shape and trim of the main sail for optimum performance against varying wind conditions.
6. Spreader: Spreader arms are horizontal poles extending from some point up the mast’s length. They serve two purposes: keeping shrouds apart to improve sail shape and reducing compressive loads on the rigging by forcing them away from each other.
7. Turnbuckles: Turnbuckles are adjustable devices used to tension standing rigging elements such as shrouds and stays. These fittings allow sailors to fine-tune rigging tensions while maximizing stability and overall performance based on prevailing weather conditions.
8. Winches: Winches are mechanical devices primarily used for easing or trimming running rigging lines under high loads. With a simple rotation, winches convert human effort into mechanical advantage, allowing efficient handling of lines for adjusting sails in different situations.
Conclusion: Understanding your sailboat rigging is not just essential for safe sailing but also for harnessing its maximum potential during every voyage. From deciphering various components like masts, standing and running rigging, booms, spreaders, turnbuckles, and winches – each element plays a crucial role in ensuring a smooth sailing experience. So next time you find yourself out on open waters, take a moment to appreciate these intricate systems that keep you powered by nothing but wind!
Step by Step Guide: How to Properly Assemble and Install the Various Parts of a Sailboat Rigging
Welcome fellow sailors and enthusiasts! Today, we are diving into the intricate world of sailboat rigging. Whether you are an experienced sailor or a newcomer to the sailing community, understanding how to properly assemble and install the various parts of a sailboat rig is essential for smooth and safe sailing. So, grab your tools and let’s get started on this step-by-step guide !
Step 1: Gather Your Tools and Materials Before embarking on this rigging journey, it’s crucial to have all your tools and materials ready. Here is a list of essentials you’ll need:
– Stainless steel wire rigging – Turnbuckles – Fittings and hardware such as clevis pins, shackles, and thimbles – Measuring tape or ruler – Wire cutters – Crimping tool or swaging machine (depending on your preference) – Electric drill (if required) – Lubricant or anti-seize compound
Make sure you have everything organized before starting. A well-prepared sailor is a successful one!
Step 2: Inspect Existing Rigging (If Applicable) If you own a used boat or are replacing old rigging, take some time to inspect the current setup. Look out for any signs of wear, frayed wires, or damaged fittings. It’s crucial to address these issues before proceeding with installation as they can compromise safety at sea.
Step 3: Measure Twice; Cut Once! Now that everything is set up let’s proceed by measuring the length needed for each piece of wire rigging carefully. Tinier inaccuracies in measurement during this step can lead to major inconveniences later.
Ensure you give yourself ample space for adjusting tension using turnbuckles. Pro-tip: It’s better to cut the wire slightly longer than needed rather than cutting it too short!
Step 4: Attach Fittings – The Devil Lies in Details Once you have measured and cut the rigging wire, let’s start attaching the fittings. This is where precision comes into play. Begin with inserting thimbles onto each end of the wires to avoid kinks or fraying. Next, connect the turnbuckles and fittings according to your sailboat’s specific rigging plan.
Step 5: Tension Matters Now that you have installed all the necessary fittings, it’s time to tension the rigging. This step requires a bit of finesse as over-tightening can damage equipment, while under-tightening can compromise performance.
Using a tension gauge, ensure that you achieve optimal tension on all parts of your sailboat’s rigging. It might take some trial and error, but finding that sweet spot is worth it!
Step 6: Inspect and Lubricate Before setting sail , always double-check everything! Look for any loose fittings or signs of wear once again. You wouldn’t want to go through these steps all over again out in the middle of nowhere!
Additionally, apply lubricant or anti-seize compound to prevent corrosion and ensure smooth operation of turnbuckles and other moving parts.
And there you have it – a professionally and properly assembled sailboat rigging! Sit back for a minute or two to appreciate your workmanship before feeling that excitement rush through as you’ll soon set sail smoothly onto those horizon-stretching waters.
Remember, practice makes perfect when it comes to mastering this skill. Over time, you’ll develop your own techniques and become a maestro at sailboat rigging assembly. Happy sailing!
Top Frequently Asked Questions about Sailboat Rigging Components Answered
Are you new to sailing or considering purchasing a sailboat? No matter your experience level, understanding the rigging components of a sailboat is crucial for safe and successful navigation on the water. In this blog post, we aim to answer some of the top frequently asked questions about sailboat rigging components. So, let’s dive in!
1. What are sailboat rigging components? Sailboat rigging components refer to the various parts and systems that help support and control the sails on a sailboat. These components include standing rigging (the fixed parts) and running rigging (lines that can be adjusted). Some common examples of rigging components are the mast, boom, shrouds, stays, halyards, sheets, and blocks.
2. What is the purpose of each rigging component? Each component serves a specific purpose in sailing . The mast supports the sails and provides leverage for controlling their shape. The boom holds down the bottom of the mainsail and allows adjustment for different points of sail . Shrouds provide lateral support to prevent excessive side-to-side movement of the mast. Stays offer fore-and-aft support to keep the mast from leaning too far forward or backward. Halyards raise and lower sails while sheets control their angle in relation to wind direction.
3. How often should I inspect my sailboat’s rigging ? Regular inspection is crucial for ensuring your safety on the water . We recommend conducting visual inspections before every sailing trip and more thorough inspections at least once a year or per manufacturer recommendations. Look out for any signs of wear, corrosion, loose fittings, or frayed lines that may indicate potential issues.
4. Can I replace my own rigging components? While minor repairs or adjustments can typically be done by boat owners with some knowledge and experience, replacing major rigging components should ideally be done by professionals who specialize in sailboat rigging services. They have the expertise and equipment necessary to properly install and tension components, ensuring your safety.
5. How long do sailboat rigging components typically last? The lifespan of rigging components depends on various factors such as usage, maintenance, and exposure to environmental conditions. Stainless steel stays can last for 10-15 years or longer with regular inspections and maintenance, while synthetic running rigging (such as ropes made from high-performance fibers) may have a shorter lifespan of 3-5 years.
6. Are there any safety tips related to sailboat rigging? Absolutely! Always wear appropriate personal protective equipment when working with or near rigging components. Take care not to overload or overstress the rig by correctly tensioning lines within manufacturer specifications . Avoid standing under or in close proximity to the mast while raising or lowering it, as it can be dangerous if it accidentally drops.
7. What are some common signs of rigging failure? Rigging failures can be catastrophic, so being able to identify potential issues is vital. Look out for visible cracks, rust, elongation, broken strands on wires, loose fittings, excessive wear on ropes, or unusual noises while sailing. Any of these signs should prompt an immediate inspection and possible replacement of affected components.
In conclusion, understanding sailboat rigging components is crucial for any sailor looking to navigate safely on the water. By familiarizing yourself with these frequently asked questions and following proper inspection and maintenance practices, you’ll enjoy a smooth sailing experience while prioritizing your safety at all times!
Exploring the Essential Components: An In-Depth Look at Key Parts of a Sailboat Rigging
Sailing is a thrilling and age-old activity that has fascinated adventurers and seafarers for centuries. At the heart of every sailing vessel lies its rigging, which is a complex system of ropes, wires, and equipment that hold the sails in place and allows for precise control over the boat’s movement. In this blog post, we will take an in-depth look at the key components of a sailboat rigging to understand their importance and how they contribute to the overall sailing experience.
Mast: The backbone of any sailboat rigging is its mast. This tall vertical structure supports the sails and provides stability to the vessel . Made from materials such as aluminum or carbon fiber, masts are designed to withstand strong winds and carry considerable loads. They come in various shapes and sizes depending on the type of boat and intended use.
Boom: Attached horizontally towards the bottom of the mast, the boom serves as a critical component in controlling the position of the mainsail – typically the largest sail on board. Acting as an extension of the mast, it allows for adjustments in sail trim by pivoting up or down.
Shrouds: These sturdy wire cables are attached to either side of the mast at multiple levels, forming a crucial part of sailboat rigging’s structural integrity. Shrouds keep the mast upright by counteracting lateral forces created by wind pressure on sails . Adjustable tensioning systems enable sailors to fine-tune shroud tension according to prevailing conditions.
Stay: Similar to shrouds but located further forward on most boats, stays provide additional support for maintaining mast stability. Fore-stay runs from top-to-bow while back-stays run from top-to-aft; together they prevent excessive forward or aft bending movements during intense wind pressures.
Turnbuckles: Within sailboat rigging systems lie turnbuckles – mechanical devices used for adjusting tension in wires or ropes like shrouds or stays. These clever devices simplify the task of tightening or loosening rigging components, enabling sailors to optimize sail shape and boat performance with ease.
Halyards: Essential for hoisting sails up and down, halyards are ropes used to control the vertical movement of the sails . They are typically operated through winches, which increase mechanical advantage and make raising and lowering large sails manageable.
Blocks: Also known as pulleys, these simple yet crucial devices help redirect the path of ropes within a sailboat rigging system. Blocks increase mechanical advantage by changing the direction of applied force, making it easier for sailors to control different aspects such as sail trim or adjusting tension.
Running Rigging vs Standing Rigging: Sailboat rigging can be classified into two main categories – running rigging and standing rigging. Running rigging refers to all movable lines and ropes that control sail position, while standing rigging encompasses all stationary components that give structure to the mast. Both elements work in harmony to ensure efficient maneuverability and safety at sea .
Understanding these key components within a sailboat’s rigging is essential for any aspiring sailor or seasoned mariner alike. It not only allows them to appreciate how these intricately designed systems function together but also helps enhance their sailing skills by leveraging each component’s unique role.
So next time you set foot on a sailboat or watch one glide gracefully across the water, take a moment to admire the finely tuned rigging – a mesmerizing web of interconnected parts that enable humans to harness the power of wind and embark on unforgettable nautical adventures.
The Crucial Role of Each Part: Unveiling the Functionality and Importance of Sailboat Rigging Components
Sailboat rigging components may seem simple and insignificant at first glance, but anyone who has sailed knows just how crucial each part is to the overall functionality and performance of a sailboat. From the mast to the shrouds, every component plays a vital role in ensuring safe navigation, efficient sailing, and maximum performance on the water.
One of the most essential parts of any sailboat rigging system is the mast. Serving as the backbone of the entire structure, the mast provides vertical stability and supports various sails that catch the wind . The mast’s height and shape significantly impact a boat’s performance, affecting not only its speed but also its ability to handle different wind conditions. A sturdy mast ensures that forces are properly distributed throughout the rigging system, preventing excessive strain or potential failure.
Connected to both sides of the mast are what are known as shrouds. These cables or wires act as primary support structures for restraining lateral movement and maintaining balance in heavy winds. Shrouds come in different sizes and tensions depending on factors such as sail size and boat length. Proper tensioning of shrouds is crucial for maintaining structural integrity and minimizing flexing under intense force.
Another integral part is the forestay – a cable or wire running from near or at the top of the mast down to the bow area of a sailboat . The forestay supports forward strength and controls stay sag- an essential factor for optimizing aerodynamics by shaping how sails interact with wind. It helps maintain proper sail geometry while limiting unnecessary heel (leaning) during maneuvers or gusts.
The backstay is another component critical for stability and control. Running from either side of the stern up to near or at the top of the mast, it helps counterbalance fore-aft bending forces created by wind pressure against a boat’s sails pushing it forward. By adjusting backstay tension, sailors can fine-tune their boat’s responsiveness to changes in wind speed or balance.
The boom, a horizontal spar attached to the mast, plays a crucial role in controlling the angle and shape of the mainsail. It acts as a pivot point for adjusting sail trim, allowing sailors to maximize lift and minimize drag based on wind conditions. With its connection to the gooseneck at the foot of the mast, it enables easy raising and lowering of the mainsail for quick adjustments or docking maneuvers .
Moreover, various blocks and pulleys are scattered throughout a sailboat’s rigging system playing essential roles in creating mechanical advantages. These components reduce friction and redirect forces generated by sails and lines during sailing operations, making it easier for sailors to handle heavy loads while preserving their energy. Choosing high-quality blocks with low-friction bearings is crucial for efficient sail handling while maintaining control.
Understanding how each part functions individually is significant; but more importantly, appreciating how they work in harmony is where true seamanship resides. Rigging components must be designed and maintained carefully to ensure safety, performance, and optimal functionality on any sailing adventure.
In conclusion, sailboat rigging components may appear simple to some extent but hold tremendous importance in enhancing a boat’s capabilities on water. From providing vertical stability with masts and dampening lateral movement with shrouds to shaping sails’ interaction with wind using forestays and backstays – every component has a crucial role to play. Understanding how these parts function individually and collectively helps sailors navigate safely while maximizing performance out on the open sea
Troubleshooting Tips: Common Issues and Solutions related to different parts of a sailboat rigging
Introduction: The rigging of a sailboat is an essential component that allows for safe navigation and optimal performance on the water. However, like any mechanical system, it can experience issues from time to time. In this blog post, we will provide detailed professional troubleshooting tips for common problems related to various parts of a sailboat rigging. Whether you’re an experienced sailor or just starting out, these solutions will help keep your rigging in top shape and ensure smooth sailing on every adventure.
1. Mast and Standing Rigging: One common issue sailors face is the presence of squeaking noises coming from the mast or standing rigging while underway. This can be quite bothersome and distracting during a peaceful sail. To resolve this problem, start by checking the connections between different components of the rigging and tighten any loose fittings appropriately. Additionally, using lubricants specifically designed for marine environments can significantly reduce friction between movable parts, eliminating annoying creaks and groans as you ride the waves.
2. Shrouds and Forestay: Another issue frequently encountered involves misaligned shrouds or forestay tension that affects the overall stability of the mast. If you notice your mast leaning slightly to one side or backward, it’s likely due to incorrectly adjusted shrouds or an improperly tensioned forestay. To rectify this, use a tension gauge to ensure consistent tension across all shrouds while avoiding excessive strain on either side of the mast base. By maintaining proper alignment and equal tension distribution, your rigging will provide maximum support when experiencing strong winds or rough conditions.
3. Running Rigging (Lines): Running rigging encompasses all lines used for controlling sails such as halyards, sheets, and control lines – crucial elements for proper sail handling. A typical problem associated with running rigging is line chafing caused by repeated friction against sharp edges or abrasive surfaces onboard. Inspect your lines regularly for signs of wear, paying close attention to areas exposed to constant rubbing. To prevent chafing, secure protective coverings or install specialized guards where necessary. Regularly washing and lubricating your lines will also extend their lifespan and ensure smooth operation.
4. Block and Tackle Systems: Block and tackle systems play a vital role in distributing loads and facilitating the movement of sails, particularly in larger sailboats. A common issue arises when blocks become jammed or fail to rotate freely due to debris buildup or lack of proper maintenance. To address this problem, inspect all blocks systematically, disassembling them if required, and clean out any accumulated dirt or salt crystals thoroughly. After cleaning, applying a liberal amount of marine-grade grease will promote smooth rotation and reduce the likelihood of future blockages.
Conclusion: Effective troubleshooting is essential for maintaining a sailboat rigging system that performs optimally and ensures a safe experience on the water. By following these detailed professional tips, you can address common issues associated with different parts of your sailboat rigging promptly and efficiently. Remember to conduct regular inspections, prioritize preventive maintenance, and seek professional assistance whenever needed. With a well-maintained rigging system at your disposal, you can embark on each sailing journey confidently, knowing that you’re prepared to overcome any challenges that may arise along the way.
Recent Posts

- Sailboat Gear and Equipment
- Sailboat Lifestyle
- Sailboat Maintenance
- Sailboat Racing
- Sailboat Tips and Tricks
- Sailboat Types
- Sailing Adventures
- Sailing Destinations
- Sailing Safety
- Sailing Techniques
Free Shipping Over $99* - 366 Day Returns - Dedicated Customer Support
- Call Us +1-503-285-5536
- Sign in & Register
- Recently Viewed
General Parts
General Parts, Fittings, and Accessories for Small Sailboats. We offer a full range of sailboat hardware, blocks, cleats, shackles, dollies and trailers, accessories, and more. These parts are not necessarily specific to any one model of sailboat, but rather are general fittings that often work on a variety of boats for a variety of applications.

- Qty in Cart

Ronstan Horn Cleat 8 Inch

Ronstan Horn Cleat 6-1/2 Inch

Ronstan Horn Cleat 5 Inch

Ronstan Horn Cleat 4 Inch

Ronstan Horn Cleat 3 Inch

Fabric Guard Waterproofing Spray

Dynamic Dollies Dock Cradle

Dynamic Combo Rail System Rack Over and Spar Deck Double Tongue Dolly

Dynamic Combo Rail System Rack Over and Spar Deck Single Tongue Dolly

Dynamic Combo Rail System Rack Over Double Tongue Dolly

Dynamic Combo Rail System Rack Over Single Tongue Dolly

Dynamic Combo Rail System Double Tongue Dolly

Dynamic Combo Rail System Single Tongue Dolly

Gill Marine Tool

Gill Harness Rescue Tool

ILCA Cunningham / Outhaul Upgrade Kit Harken
- Total: items /
- Add all to cart
Adding your products to cart
Subscribe to our newsletter.
Sign up for our newsletter to receive exclusive discounts, new product announcements, and upcoming sales.
FREE SHIPPING ON ALL ORDERS OF $150, UNDER 50LBS
- Shop Products ▼
- Order Status
- Shipping Return
- Request Quote

Welcome to US Rigging Supply, your premier destination for top-quality rigging supplies and solutions. At US Rigging, we pride ourselves on being a trusted source for a wide range of rigging products, from wire rope and slings to hoists and hardware. With a commitment to excellence and safety, we cater to the diverse needs of industries such as construction, maritime, and manufacturing. Whether you are a seasoned professional or a DIY enthusiast, our user-friendly platform offers a comprehensive selection of reliable rigging equipment, accompanied by expert guidance and resources. Explore our extensive catalog and experience unparalleled service as you embark on your rigging projects with confidence. At US Rigging, we elevate your lifting and rigging experience to new heights.

TRENDING ITEMS

Gripple No. 1 Express Wire Rope Grip Joiner
 - Wire Rope Joiner (G-RG-04)")
Gripple Gripple® Lockable Wire Rope Grip - For 1/8”

DuraBrite 316 Stainless Steel Eye Bolt
")
DuraBrite 316 Stainless Steel Eye Nuts

Gripple No. 2 - Express Wire Rope Grip

Gripple Gripple Replacement Standard Wire Rope Grip - No. 3 - WLL 200 lbs.

Safe-T-Strap 4' Low Rise Safety Strap w/ D-Ring
")
Gripple Gripple Standard Loop Hangers - No. 2 - WLL 100 lbs. HVAC, lighting, electrical - (SOLD IN PACKS)

Gripple Gripple Express Loop Pipe Hangers - XP 1 - WLL 25 lbs. - Ideal for signage, shop fitting, lighting, and other lightweight fixtures

DuraBrite 5/8" - Tactical 316 Stainless Steel Trigger Snap

Safe-T-Strap 4' Residential Choker Strap w/ D-Ring & Loop

SWAGE-IT Swage-Right Swager - Light-Duty, Single Cavity - 1/16" Wire Rope
U.S. Rigging Supply is your trusted partner for rope, safety and rigging products. Trusted for over 40 Years. U.S. Rigging Supply is a certified ISO 9001:2015 standard company.
SHOP ROPE BY CONSTRUCTION

GEAR YOU WILL LOVE

Kong KNG-538-12

ProClimb Twist Lock Oval I-Beamer

ProClimb Triple Lock Oval I-Beamer

Swage-Right Deluxe SRS Hand-Swaging Tool Kit w/ Cutter
")
Swage-Right 7x19 | 304 Stainless Steel Guy Wire Rope (Aircraft Cable)

Pelican Rope 1/2" - Arborist-16™ Freedom Arborist Climbing Line

Pelican Rope 5/8" - 3 Strand Composite Vertical Lifeline - Hook & Thimble

ProClimb Twist Lock Modified D Steel Carabiner

ProClimb Copper Head Carabiner

ProClimb Large Aluminum Rope Pulley

Swage-Right Medium-Duty 6-Cavity Swager

Shop Arborist
U.S. Rigging Supply offers quantity price breaks on most items and special quotes for orders exceeding our price breaks. If you currently are or would like to become a distributor of our products, please call 888-260-7444 for current distributor pricing.
Recent Blog Posts

The Ultimate Guide to Gripple Seismic Bracing Systems: Ensuring Safety and Efficiency
In regions prone to seismic activity, the resilience of a building's structure is paramount. Not onl
Continue Reading

How to Buy Rope from US Rigging - A guide on how to find the right rope for your next job - Rope for Every Situation
Pelican Rope is a leading manufacturer of high-quality ropes for a variety of applications. Their ro
U.S. RIGGING CINEMA

DESIGN AND MANUFACTURING OF QUALITY DRILLING TOOLS AND EQUIPMENT

T-Wrex Senior

T-Wrex Junior

Hawkjaw Senior and Junior

Spinnerhawk

Product Highlights
Ideally suited to the harsh environments of off-shore drilling, as well as large scale land-based application, the T-WREX is an efficient system that can significantly reduce your trip time.
The T-WREX Make-up/Break-out System provides all the proven performance, reliability, and safety features of our HAWKJAW in a pedestal mounted configuration for remote operation.
The HAWKJAW Power Tong was the industry’s first fully integrated Drill Pipe Make/Break Machine. With its proven spinning wrench and patented torque wrench, it remains a favorite of drillers and floor hands alike due to its speed, ease of operation, and inherent safety.
SPINMASTER, one of the fastest, safest, most efficient drill pipe spinners on the market today. Available in pneumatic or hydraulic models in two sizes.
Spinnerhawk has different models available to handle every pipe size from 2 7/8” tp 10 1/2 “ diameter including non-standard diameters or out of round pipe.
A New Generation of Oil Specialty Products
We manufacture drilling tools for the oil and gas industry. Period. For 65 years now. We focus on a select group of customers, each a significant portion of our business. So when we say your total satisfaction with our product, our service and our responsiveness is important to us, you know it’s true. Hawk designs, manufactures and services 100% of the equipment we sell. From our agents, distributors, and from our original location in California, we stock parts for every model we’ve ever sold, ready for immediate shipment anywhere in the world.
Practicality. Dependability. Cost-effective pricing. Lifetime support. Hawk Industries. The obvious choice.
How may we help you?
How may we contact you.
Prolift Rigging
Industry expertise for industry leaders full-service industrial rigging , transport , and warehousing solutions to safely complete your mission-critical projects with exacting precision & uncompromising success.
Discover The Many Different Ways We Can Help You
Heavy Lifting and Rigging
Warehousing
Project Management
Crane Service
Project Buffering

ProLift Rigging
With a growing international footprint of strategically placed locations, ProLift is uniquely positioned to help you wherever your job site may be.
The Prolift Promise
ProLift Rigging is committed to helping you minimize risk in your projects by providing safe and innovative solutions to navigate both expected and unexpected obstacles. Our continuing promise is to always be an honest, transparent and professional partner, as we help meet mission-critical deadlines and deliver predictable outcomes to our clients.
Jesse Taylor, ProLift CEO
Featured Projects
Crane install with custom cantilever.
View Project
Phoenix Data Center Construction
Jack and slide transformer install, discover how prolift can help you.
FREE SHIPPING WHEN YOU BUY 2 PRINTS
WORLDWIDE SHIPPING

- SHOP BY REGION
- DESIGN MY OWN MAP
- For Business
- For AirBnb's
- For Churches
- Wallpaper Consultation
- z AUD CAD DKK EUR GBP HKD JPY NZD SGD USD

GEOGRAPHIC ART PRINTS
- CITY MAP ART
- EARTH PHOTOGRAPHY
- STATE ILLUSTRATIONS
- ALL ROADS MAPS
- 3D CITY MODELS
- STATE WORD ART

MODERN ART PRINTS
- NEW! M.O.V. Archive Collection
- BOTANICAL ILLUSTRATIONS
- ZODIAC SIGNS ART
- ANIMAL ALPHABET ILLUSTRATIONS
- GEODE STONE ART PRINTS

ACCESSORIES
- WOVEN FLAG BLANKETS
- WOVEN STATE BLANKETS
- THROW PILLOWS
- PHONE CASES

Custom City Map Designer
Can't find the city map you were looking for? We can create a map of any place on planet Earth! Start designing your map now!

Love Travels Custom Maps
Valentines or an Anniversary coming up? Love maps are a great way to personalize your story. Build yours now!

Search for your city by region; we have over 1,000 cities mapped! Or, create your own custom map of any city on the planet!
UNITED STATES
- WESTERN USA
- SOUTHWEST USA
- MIDWEST USA
- SOUTHEAST USA
- NORTHEAST USA
- ALL UNITED STATES
- WEST COAST CANADA
- PRAIRIES CANADA
- CENTRAL CANADA
- ATLANTIC CANADA
- NORTHERN CANADA
- WESTERN EUROPE
- EASTERN EUROPE
- SCANDINAVIA
REST OF WORLD
- LATIN AMERICA
- MIDDLE EAST

CUSTOM MAP WALL MURALS

SATELLITE WALL MURALS
Moscow 3D City Model

These 3D Moscow city models are the brainchild of Luis Dilger, one of our designers and mapping specialists. Luis applies his skills with 3D printing technology and modelling to our vast database of geographic and architectural data. The result is a Moscow 3D cityscape work of art so detailed it feels as though you’re hovering right above the city.
Each 3D City Drawing is made with state-of-the-art architectural software, employing the use of GIS mapping data as well as NASA’s Shuttle Radar Topography Mission. With a 1-arc-second data range, we are able to show within a 30 metre degree of accuracy both the geographic landscape of a city as well as its urban contexts.
Hang up this 3D Moscow model print at home or in the office and prove to everyone that it’s cool to be an urban design geek.
Notify me when this product is available:
Current holiday processing times here.
- Paper Types
Paper options for this Moscow 3D City Model: Photographer's Grade Metallic Paper- 250 gsm cotton rag, museum quality, archival inks. Using a new method for cyan dispersion, our metallic paper offers a wider color range. Darks appear deeper and lights more luminous. Premium Matte Paper- 200 gsm paper, vibrant color contrast, soft matte finish, archival and ec-friendly inks. Our classic paper finish is perfect for framing and offers a smooth and bold finish with a high color contrast.
Free standard shipping worldwide for all paper prints!
Listed times are estimated days for delivery and include processing and printing time. Time listed in business days. Please allow extra time near holidays.
Our paper prints are made and shipped locally wherever possible. At this time we are producing and shipping from the following countries: United States, Canada, France, Germany, Spain, Belgium and Denmark.
Each order is made custom, just for you upon placing your order. This allows us to ensure we’re sending you the highest quality artwork possible.

city model prints
Art prints that make you feel like you're really there
OUR PROMISE
We guarantee the safe delivery of every order. If your order is lost in transit or arrives damaged, we will happily replace the lost or damaged items right away.
TOP-NOTCH PIGMENTS AND PAPERS
Bold ink saturation, bright beautiful colors, gorgeous papers.
Photographer's Grade Metallic Paper: 200 gsm Kodak paper, museum quality, archival inks. Using a new method for cyan dispersion, our metallic paper offers a wider color range. Darks appear deeper and lights more luminous.
Premium Matte Paper: 200 gsm paper, vibrant color contrast, soft matte finish, archival and eco-friendly inks. Our classic paper finish is perfect for framing and offers a smooth and bold finish with a high color contrast.

FLYING OVERHEAD
These 3D city models are an interactive experience allowing our designers the ability to 'fly' overhead each city looking for the perfect vantage point for beautiful pictures of each 3D city model. Every building and road having been modeled means each captured image is a stunningly intricate representation of a city.

Customer Reviews
You may also like.
Eco-Friendly
Premium Quality
Intricate Detail
Reliable Support
Free shipping
IMAGES
VIDEO
COMMENTS
The largest range of wooden model ship & model boat fittings, accessories & parts available. Modelers Central is the no.1 destination for scratch model ship builders.. There are over 90 model ship fittings categories from anchors to wire, the scratch model boat builder will find what they need here. All items are listed as single items unless ...
Running Rigging . SHOP NOW . Featured Products. Select Options. 11.1 mm Jib boom, anodized black - 410 mm long . $6.50. Out of Stock. ... Welcome to Midwest Model Yachting your source for R/C Model Sailboat Fittings from around the world. Shop. Product Index; Category Index; Information. Terms and Conditions; Product Index; Category Index ...
Rig Box Fittings; Tools; Rig Hardware. Boom Hardware; Booms; Boom Tools; Goosenecks; Rigging Line; Running Rigging; Turnbuckles & Rigging Screws; Variant boom; Gizmo Set; Rigging tools; Rig Kits. EC12 Rig Kit; IOM Rig Kits; ODOM Rig Kit and Hardware; RG65; Santa Barbara Rig Kit; Soling 50 Rig Kit; Star 45 Rig Kit; U.S. One Meter Rig Kits ...
If you are looking for high-quality rigs and parts for your radio-controlled sailboat, look no further than Sailboat RC. We offer a wide range of products, from masts and booms to sails and fittings, to suit your needs and preferences. Sailboat RC is the home of 3x World Champions and a trusted source of RC sailing expertise. Shop now and enjoy the poetry of sails!
Ring - Brass - 15/64″ (6mm) - P100. $ 11.56 Add to cart. Model Ship Rings Fittings Come in a Range of Sizes. Modelers Central Is The Home Of Wooden Model Boat Builders. Order Online For Fast Delivery.
1-48 of 121 results for "model sailboat rigging" Results. Price and other details may vary based on product size and color. 5-Piece Rigging Tool Set Miniature Fingers for Ship Modelers. ... Special Ship Model Copper Nails Wooden Boat Parts Model Accessories 9 Figure Nail Hook Net Weight : 5 g. 4.4 out of 5 stars. 7. $6.99 $ 6. 99.
Ship Model Paint Sets. Cast Your Anchor acrylic based paint/primer formulas deliver high-performance, one-coat coverage that dry in one hour. Our matte sheen has a flat, low-reflective finish that touches up well and hides minor surface imperfections while our satin sheen creates a pearl-like finish that's durable and resists fading.
Let us help. 206-632-4462. Email. Equip yourself with sailboat rigging hardware from Fisheries Supply. Shop products from top brands like Hayn, Johnson, Alexander Roberts, Ronstan, and more.
Rigging Only is dedicated to providing quality sailboat hardware and sailboat rigging at affordable prices to sailors through out the world. Checkout View Cart (0) (508) 992-0434 ... we cannot provide estimates or build a replacement rig based solely on the model of your boat. Please call or see our Measurement Guides section for help on ...
The primary sailboat rigging parts include the mast, boom, standing rigging (such as shrouds and stays), running rigging (halyards and sheets), blocks or pulleys, turnbuckles, cleats, winches, and various fittings. Each of these components has its specific purpose in controlling the sails' position and tension. 2.
The most popular wooden boat model accessories brands include Model Shipways, Latina Ship Models, Stevens Model Boat Lights, and Constructo. Boats. Wooden Boat Models. ... RIGGING .018x30' TARRED. $6.99 $5.59 * currently unavailable. Model-Shipways # msw1204. Pre-Order: Wish List: 4mm SINGLE BLOCK WALNUT. $6.99 $5.59. Model-Shipways # msw303 ...
Rigging Cord - Grey - 1.75mm x 10m - Mantua. $ 12.56 Add to cart. Home > Fittings > Rigging Cord & Thread. Model Ship Rigging Cord Comes in a Range of Sizes. Modelers Central Is The Home Of Wooden Model Boat Builders. Order Online For Fast Delivery.
Dragon Sailing DFMGD1 - DF65/95 Rudder Servo DFMGD1 $ 52.99 Read more. Out of stock. DF65 Parts - Joysway, Dragon Sailing DS65KS - DF65 Keel Sticker $ 5.99 Add to cart. 13 in stock. DF95 Parts - Joysway, Dragon Sailing DS95KS - DF95 Keel Sticker $ 5.99 Add to cart. 8 in stock. Dion RC Sails DSDF65A+BO - DF65 "A+" Black W/Orange Trim ...
Re-rigging a sailboat can cost anything from $1,000 to $5,000. Re-rigging a 40-foot boat with wire is estimated to cost roughly $100 per foot. Which includes the round-trip costs of hauling, launching, and unstepping the rig (about $2,500). Final Words. We've discussed here in detail on the rc sailboat rigging setup. This should help with the ...
The rigging of a ship can be divided into two main parts: "Standing" or "Fixed" rigging, which is used to support the Masts and Bowsprit. "Running" rigging, which is used to manipulate spars and sails. On an "actual" ship any Rigging which didn't pass through a pulley block was coated with tar to help prevent it rotting.
Spars, Rigging, and Hardware for Sailboats. Rig-Rite, Inc. Phone: (001) 401-739-1140 -- FAX: (001) 401-739-1149 www.RigRite.com ... Furling Systems - Systems and replacement parts from a variety of Manufacturers. Traveller Systems - Adjustable Track Systems for Mainsheet and other applications. Sailboat Hardware - Rope Clutches, ...
The running rigging is the rigging on a sailboat that's used to operate the sails. For example, the halyard, which is used to lower and heave the mainsail. The standing rigging is the rigging that is used to support the mast and sail plan. Standing Rigging. Here are the different parts that belong to the standing rigging:
Sailboat rigging components refer to the various parts and systems that help support and control the sails on a sailboat. These components include standing rigging (the fixed parts) and running rigging (lines that can be adjusted). Some common examples of rigging components are the mast, boom, shrouds, stays, halyards, sheets, and blocks. 2.
Here at West Coast Sailing we have parts locators and rigging guides for most sailboat brands. Free Shipping Over $99* - 366 Day Returns - Dedicated Customer Support ... accessories, and more. These parts are not necessarily specific to any one model of sailboat, but rather are general fittings that often work on a variety of boats for a ...
SWAGE-IT Swage-Right Swager - Light-Duty, Single Cavity - 1/16" Wire Rope. Was: $19.99. U.S. Rigging Supply is your trusted partner for rope, safety and rigging products. Trusted for over 40 Years. U.S. Rigging Supply is a certified ISO 9001:2015 standard company.
Hawk designs, manufactures and services 100% of the equipment we sell. From our agents, distributors, and from our original location in California, we stock parts for every model we've ever sold, ready for immediate shipment anywhere in the world. Practicality. Dependability. Cost-effective pricing. Lifetime support. Hawk Industries. The ...
We provide full-service rigging, transportation, and warehousing solutions to streamline your business operations and increase your project success. Skip to main content Request Quote. Prolift Rigging (855) 900-9111 [email protected]. About Our Story; News; Projects; Services ...
Hang up this 3D Moscow model print at home or in the office and prove to everyone that it's cool to be an urban design geek. Paper options for this Moscow 3D City Model: Photographer's Grade Metallic Paper-250 gsm cotton rag, museum quality, archival inks. Using a new method for cyan dispersion, our metallic paper offers a wider color range.