You are using an outdated browser. Please upgrade your browser or activate Google Chrome Frame to improve your experience.


How to restore a classic sailboat
Restoring a classic sailboat can be a fulfilling and rewarding process, allowing you to create a personalized vessel for exploring the open sea with your family.
How to Restore a Classic Sailboat
Restoring a classic sailboat is a labor of love that can bring immense satisfaction and pride to those who embark on this journey. It’s a chance to breathe new life into a vessel that has seen better days, and to create a unique and personalized space for you and your family to enjoy the open sea. In this article, we’ll guide you through the process of restoring a classic sailboat, from finding the right boat to the final touches that make it truly your own.
Table of Contents
Finding the right sailboat, assessing the condition, creating a restoration plan, hull and deck repairs, interior restoration, rigging and sails, electrical and plumbing systems, engine and propulsion, final touches.
The first step in restoring a classic sailboat is finding the right boat. This can be a challenging process, as there are many factors to consider, such as the size, age, and condition of the boat, as well as your budget and personal preferences.
When searching for a sailboat, consider the following:
- Size : Think about how much space you and your family will need, both for living and storage. A larger boat may offer more comfort and amenities, but it will also require more work and expense to restore and maintain.
- Age : Older boats may have more character and history, but they may also require more extensive restoration work. Be prepared to invest more time and money into an older boat.
- Condition : Assess the overall condition of the boat, including the hull, deck, rigging, sails, and interior. A boat in poor condition may be a good candidate for restoration, but it will also require more work and expense.
- Budget : Determine your budget for both the purchase of the boat and the restoration process. Keep in mind that restoration costs can quickly add up, so it’s important to have a realistic understanding of what you can afford.
Once you’ve found a sailboat that meets your criteria, it’s time to assess its condition in more detail. This will help you determine the extent of the restoration work required and whether the project is feasible for your budget and skill level.
Consider hiring a marine surveyor to conduct a thorough inspection of the boat. They can provide valuable insights into the condition of the hull, deck, rigging, sails, and other components, as well as identify any potential safety issues or structural problems.
Take note of any areas that require immediate attention, such as leaks, cracks, or signs of rot. These issues should be addressed before any cosmetic work is done, as they can compromise the integrity of the boat and lead to more serious problems down the line.
With a clear understanding of the boat’s condition, you can now create a restoration plan. This should outline the work that needs to be done, the order in which it should be completed, and an estimated timeline and budget for the project.
Start by prioritizing the most critical repairs, such as fixing leaks or addressing structural issues. Then, move on to less urgent tasks, such as cosmetic improvements and upgrades.
Be realistic about your abilities and the amount of time you can dedicate to the project. Restoring a sailboat can be a time-consuming and labor-intensive process, so it’s important to have a clear understanding of what you’re getting into before you begin.
The hull and deck are the foundation of your sailboat, and any issues with these components should be addressed as soon as possible. Common problems include cracks, blisters, and signs of rot or corrosion.
To repair cracks or holes in the hull or deck, you’ll need to clean the area thoroughly, remove any damaged material, and fill the void with an appropriate filler or epoxy. Once the repair has cured, sand the area smooth and apply a protective coating, such as paint or gelcoat.
For more extensive repairs, such as replacing large sections of the hull or deck, it may be necessary to consult with a professional boatyard or shipwright. They can provide guidance on the best materials and techniques for your specific boat and ensure that the repairs are done correctly.
Restoring the interior of your sailboat can be a rewarding process, as it allows you to create a comfortable and personalized space for you and your family. Start by assessing the condition of the interior, including the cabinetry, upholstery, and flooring.
If the cabinetry is in good condition, you may be able to simply refinish or paint the surfaces to give them a fresh look. If the cabinets are damaged or outdated, consider replacing them with new, custom-built units that meet your needs and preferences.
Upholstery can be cleaned or replaced, depending on its condition and your personal taste. New cushions, curtains, and other soft furnishings can make a big difference in the overall appearance and comfort of the interior.
Flooring options for sailboats include marine-grade carpet, vinyl, or teak. Choose a material that is durable, easy to clean, and complements the overall aesthetic of the boat.
The rigging and sails are essential components of your sailboat, and their condition will have a significant impact on the boat’s performance and safety. Inspect the rigging for signs of wear or damage, such as frayed lines, corroded fittings, or bent or cracked hardware. Replace any components that are in poor condition or no longer meet safety standards.
Sails should be inspected for tears, fraying, or signs of UV damage. Small repairs can often be made with sail tape or by sewing, but larger issues may require professional repair or replacement. Consider upgrading to modern sail materials and designs for improved performance and durability.
The electrical and plumbing systems on a classic sailboat may require updating or replacement to meet modern standards and ensure safety and reliability. Inspect the wiring, switches, and electrical components for signs of wear or damage, and replace any outdated or faulty parts.
Plumbing systems should be checked for leaks, corrosion, or other issues. Replace any damaged hoses, fittings, or fixtures, and consider upgrading to modern materials and designs for improved performance and ease of maintenance.
The engine and propulsion system are critical to the performance and safety of your sailboat. Inspect the engine for signs of wear or damage, and perform any necessary maintenance or repairs. This may include changing the oil and filters, replacing belts or hoses, or overhauling the entire engine.
The propeller and shaft should also be inspected for signs of wear or damage, and any issues should be addressed promptly. Consider upgrading to a modern, efficient propulsion system for improved performance and fuel efficiency.
With the major restoration work complete, it’s time to add the final touches that make your sailboat truly your own. This may include installing new electronics and navigation equipment, adding custom artwork or graphics, or outfitting the boat with personalized accessories and gear.
Take the time to celebrate your hard work and enjoy the fruits of your labor. Your restored classic sailboat is now ready for new adventures and memories with your family.
Restoring a classic sailboat is a challenging but rewarding endeavor that can provide you and your family with a unique and personalized vessel for exploring the open sea. By carefully assessing the condition of the boat, creating a detailed restoration plan, and tackling the project one step at a time, you can breathe new life into a once-neglected boat and create a lasting legacy for future generations.

DIY Boat Restoration: Tips and Tricks for a Budget-Friendly Makeover
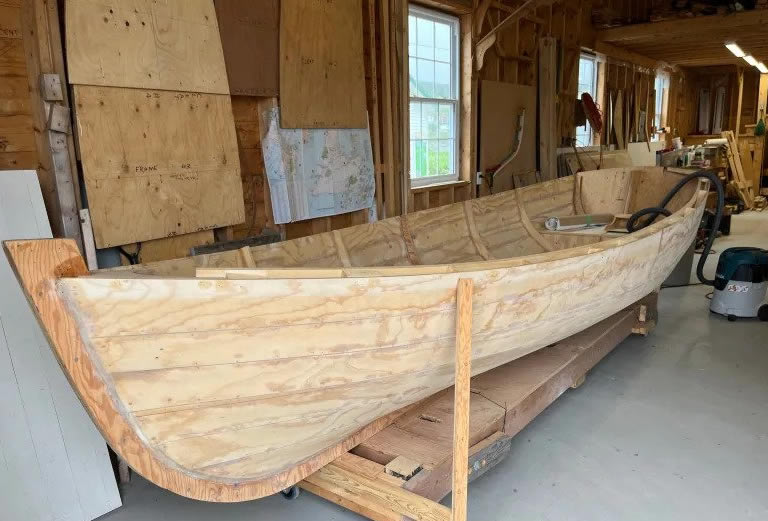
Restoring an old boat can be a rewarding and cost-effective way to breathe new life into a beloved vessel.
While it may seem like a daunting task, with the right tips and tricks, you can embark on a DIY boat restoration project that’s easier on your wallet and more satisfying than you might expect.
Helpful Boat Restoration Guides
1. set clear goals, 2. create a detailed plan, 3. prioritize safety, 4. do your own research, 5. salvage and recycle, 6. budget-friendly materials, 7. diy fiberglass repairs, 8. refinishing and painting, 9. upholstery on a budget, 10. routine maintenance.
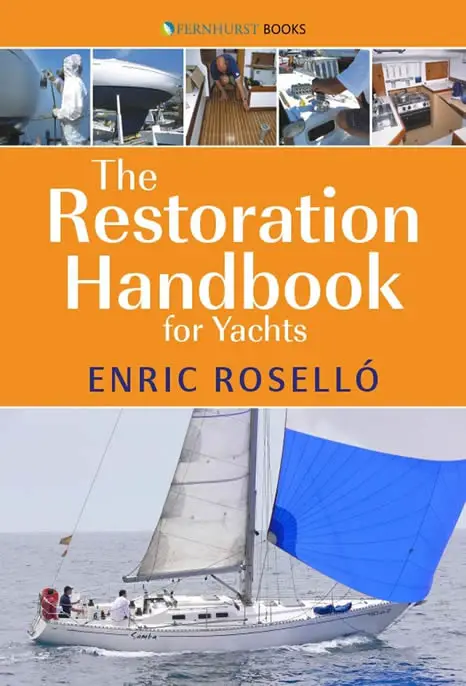
Boat Restoration Guide
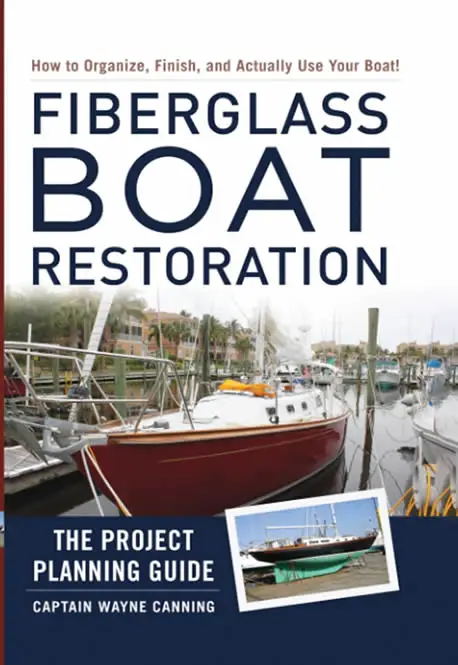
Fiberglass Boat Restoration Guide

Metal Shape Welding Instructions For Boat Building
10 Tips To Make Boat Restoration Simple
In this guide, we’ll share valuable insights and cost-saving strategies to help you navigate your boat restoration journey with confidence.
Before you dive into your boat restoration, determine the scope of your project.
Are you looking for a complete overhaul or just some minor repairs and cosmetic touch-ups?
Setting clear goals will help you avoid overspending and stay focused on your budget.
A well-thought-out plan is essential. Take the time to assess the boat’s condition and identify areas that require attention.
Create a checklist of tasks, including materials and tools needed.
A comprehensive plan will prevent impulse purchases and keep you on track.
Safety should always be a top priority.
Inspect the boat for structural issues, such as rot or damage, and address them first.
This ensures that your boat is safe for use, and you won’t compromise your safety while on the water.
Become a savvy researcher. Look for DIY boat restoration resources, such as books, online forums, and video tutorials.
Learning from others’ experiences can save you from common pitfalls and provide valuable insights.
When possible, salvage and recycle materials from your boat. Old hardware, wood, and even upholstery can often be refurbished or repurposed.
This not only saves money but also adds character to your project.
Shopping for materials doesn’t have to break the bank.
Consider marine-grade plywood alternatives, explore second-hand stores for décor, and compare prices from different suppliers to find the best deals.
Don’t forget to inquire about discounts or bulk rates.
Many small fiberglass repairs can be done at home.
Learning basic fiberglass repair techniques will save you money on hiring professionals.
Invest in a fiberglass repair kit and follow instructional videos to tackle small cracks or holes.
For cosmetic improvements, you can save money by refinishing and painting your boat yourself.
Proper sanding, priming, and using quality marine paint can make your boat look as good as new. Don’t forget to choose colors that won’t fade quickly under the sun.
Reupholstering your boat’s seats and cushions can be expensive. Consider buying discounted marine-grade vinyl and learning basic sewing skills to make your own seat covers.
Alternatively, look for deals on pre-made seat covers.
After your boat is restored, keep it in top condition by following a regular maintenance schedule.
Routine care will extend the life of your boat and prevent costly repairs in the future.
Embarking on a DIY boat restoration project can be both a labor of love and an excellent way to save money.
By setting clear goals, creating a detailed plan, and implementing these tips and tricks, you can transform your old boat into a source of pride without breaking the bank.
Remember that patience and perseverance are key to a successful boat restoration, and the satisfaction of sailing in a vessel you’ve restored with your own hands is truly priceless.
You may also be interested in reading our guide that shows you how to build a flat bottom boat and also our boat building plans .
Mick McGrath
Recent Content
518 Illustrated Boat Plans
518 boat plans for less than the price of your lunch! MyBoatPlans Reviews MyBoatPlans is a comprehensive collection of 518 boat plans, 40 videos and about 500 pages of boat building guides. I've...
Set Sail with Confidence: Essential Boat Safety Tips for All Ages and Furry Friends
Picture yourself gliding over crystal-clear waters, the wind in your hair, and the sun kissing your skin. The open sea offers endless possibilities for adventure, but before you hoist the sails, it's...

12 Tips For Restoring an Old Boat: Costs, Time, And Expert Advice
Looking at restoring an old boat chris mccall shares his expert advice..

So, you’re thinking of buying an old boat and bringing her back to her former glory? Awesome! Get ready for hard work and frustration culminating in an ultra-rewarding experience.
Buying and refitting an old sailboat is totally worth it! You won’t build a ton of equity in the boat, but you will know every square inch of that vessel, and the skills you gain will be invaluable.
My wife and I just finished the three-year refit of our 1972 Nauticat 38, Drifter, and now live aboard in Portland Oregon. As soon as the weather cooperates, we plan to take him (Yep, Drifter’s a fella) south and begin cruising full-time.
Feel free to check out our progress along the way and the results of our labor; you can find us on YouTube at YouTube.com/SailingAdrift

As an Amazon Associate, we earn from qualifying purchases. We also earn from other affiliate programs. This means we may receive a small commission on products purchased through our links at no extra cost to you.
Here are my top tips to help with your refit. Most I followed; some I wish I would have.
During The Buying Process
Get one of the best knives for sailing
Before you buy your perfect renovation project boat, here are a few tips to follow so you don’t fall short at the first hurdle.
#1 Know what you’re getting into

Refitting a boat is not an easy undertaking, and the single biggest thing keeping you from success is your tenacity to see it through. There are so many boats for sale, half-finished, because the undertaking was a lot more than their owners predicted. So….
#2 Plan, Plan, Plan.
This post is a great place to start. Start taking notes and tour as many boats as you can to gather ideas.
Talk to people that know. Read books. Read articles. Watch YouTube refit videos. Join social media groups focusing on refits, interior design, electrical systems, electronics, and boat makes you’re interested in.
I know the excitement is high but take a beat and make sure you make a logic driven decision based on research. There will be time to fall in love later.
#3 Make a core list of what you want from restoring an old boat

List the makes, lengths, characteristics, and price range and stick to it.
Then make a list of “nice to haves” and look for boats that have as many as you can find. If you go in with a clear understanding of what you want, and the deal breakers associated, it’s much easier to make a smart decision.
#4 Let someone else take the depreciation if you can
If you’re going to be refitting, you’ll be taking on plenty of depreciation as soon as you start installing your new electronics, appliances, and equipment, so minimize it by finding a boat where the previous owner has installed as much of this stuff as possible.
New engine? Awesome! Just upgraded all the navigation equipment? Great. New refrigeration unit? That helps. Let the last guy take the hit for 50 cents on the dollar.
Wondering how much sailboats cost ? Get a rough idea here.
#5 Buy cheap and pay cash if you can

Boats are not like houses. There isn’t nearly as much competition for boats that need a fair bit of work, because you won’t build a bunch of equity refitting like you would flipping a home.
Don’t expect to save tons of money refitting the boat yourself. You may save yourself a little but the real value is in the knowledge of the vessel and the skills you’ll gain.
So be ready to offer significantly less than asking, and don’t be surprised if they take it.
#6 Include a survey contingency and evaluate your prospective project from top to bottom
Do you have to hire a surveyor? No. But if you don’t, get ready to learn all you can about the process, and go over every square inch.
Know someone super knowledgeable you can ask to help? DO IT! Do not be afraid to walk away. Getting attached leads to bad decisions.
Now That You’ve Got Your Boat Restoration Project

So you’ve found your dream boat (to be!) Here are the next steps in restoring an old boat.
#7 Create a conservative budget
Take your number and pad it by 30%. It is all too easy to let costs get out of hand. Do your homework. The more knowledge that goes into that budget, the less costs will surprise you. Front end work pays huge dividends.
#8 Come up with an educated guess at the timeline in total work hours
And then multiply it by 4 (If you know someone who does this work a lot, take their estimate and double it; they are faster than you)!
Then break it down into phases to make the overall project less daunting. Tracking your working time in hours keeps focus and doesn’t punish you for life getting in the way.
I made a game of it by tracking my active work-on-the-boat time in hours with an app called Toggl. If you’re at all competitive, this really pushes you to keep getting out there to beat your weekly and monthly bests. Celebrate the small victories; don’t punish the shortcomings.
#9 Build in expandability, especially in your electoral system (think battery space)

Make sure you have spare breakers on your panel and room in your conduits. Always install pull strings. No one in the 70s could have imagined the electrical needs of the modern boat, so don’t make the same mistake.
Future you will thank you.
If you’re reinstalling batteries then check out the best lithium marine batteries . Aim for a slightly bigger bank than you think you’ll need! ⚡ We highly recommend BattleBorn LiFePO4 batteries ⚡
#10 Experiment with clever ideas for maximizing your space
Keep what works. Tweak what needs adjusting. And scrap the flops. This is your opportunity to get creative. Test your original ideas.
Copy what others have done on their boats and modify what you find when researching tiny living and RV sources. Sometimes building a custom solution is the right way to go, but they often don’t work as expected.
If a production solution is available, it may cost slightly more but will save you more in time and headache.
As an example, we built our own propane alarm and on/off solenoid because the commercially available one seemed so expensive (and I thought it was ugly).
Finding all the components took hours and hours, and when I had collected them all, I’d only saved about 25%. Installing everything, and getting the sniffer, switches, and solenoid to all work together, was a huge headache. If I could do it all again, I’d just buy that ugly thing.
#11 Stick with it

The paradox of a major boat refit is that with little exception, every job sucks. Some suck a lot. You’ll have your head below your ass, sanding for hours, crammed in a tiny locker, but the satisfaction you’ll feel at the end of the day makes it all worthwhile.
Over the weeks and months of our old sailboat restoration, I experienced periods of high motivation where working on the boat was the only thing I wanted to do.
Things like eating, sleeping, and my day job just got in the way.
Other times, making myself get out there was like getting a 6-year-old to eat peas: damn near impossible. Motivational ebb and flow is a natural part of any long undertaking, but you have to push through it and keep going.
Don’t be another person selling a partially refitted boat. STICK WITH IT!
#12 Use perfection as the unachievable goal that it is

Instead, focus on safety and functionality. The goal is to get out there and enjoy your hard work, not worry away over every imperfection. You’re the only one that will notice anyway.
You’re never going to actually finish the boat refit; there will always be items on the to-do list. Once she’s fully functional and safe, go enjoy her. You can work on the never-ending list as you go.
Refitting Drifter was one of the single most rewarding undertakings I’ve ever done.
We live aboard, so every day I’m surrounded by the fruits of our labor. While there are flaws, the good far exceeds the bad. I know every system, and every nook and cranny. Get out there and find your opportunity. In the end, you’ll be so glad that you did!
Conclusion: Tips For Restoring an Old Boat
If you’re lucky enough to find an old boat that’s still in good shape, then you’re well on your way to having a great time out on the water. With just a little bit of elbow grease and know-how, you can have your boat sailing like new again.
Thanks for reading and we hope these tips helped!
Wondering what it’s like to live on a boat on land in a boatyard? Give this article a read to prepare you!

Chris and his wife Kelly bought their 1972 Nauticat 38 in April of 2017, and in May of 2019 went full steam ahead with an extensive refit in the driveway of their home in Portland OR.
They splashed and christened Drifter in the summer of 2022 and moved aboard full-time that September.
They are awaiting a weather window to tackle the wild west coast of the United States and begin cruising full-time starting with Mexico and Central America with the intent of continuing west.
Find their whole refit adventure documented along the way at YouTube.com/SailingAdrift. Feel free to contact them directly with any thoughts and questions through their website: www.SailingAdrift.com or by emailing [email protected]
Similar Posts

Sailboat Living: 10 Things To Know Before Moving On Board

Starlink On A Sailboat 2024: Is It Possible To Use Starlink At Sea?

How To Learn To Sail For Free

How To Start A Life At Sea

101 Awesome Boat Puns And Yacht Captions For Instagram 2024

Gill OS2 Jacket Review: Tried And Tested Offshore Gear 2024
One comment.
Should be able to pay moorage before launching and make the rest of us look like vagrants with 3 kids
Comments are closed.

The $tingy Sailor
Diy trailerable sailboat restoration and improvement without throwing your budget overboard.

Refinish Your Interior Teak to Better Than New
One of the things about older sailboats that I appreciate most is their abundance of teak woodwork. As a woodworker, I admire good craftsmanship, creative design, and a fine finish. It’s harder to find on today’s modern sailboats. Teak is in short supply so it’s more expensive than it once was and most modern sailors don’t want to spend time maintaining their brightwork. For the rest of us, beautiful teak appointments are an opportunity to set our sailboat apart from the rest and a sign of pride of ownership. Few improvements freshen up a sailboat’s interior like well maintained woodwork.
Before I continue, a bit of legal housekeeping. This post contains affiliate links. That means I receive a small commission if you make a purchase using those links. Those commissions help to pay the costs associated with running this site so that it stays free for everyone to enjoy. For a complete explanation of why I’m telling you this and how you can support this blog without paying more, please read my full disclosure .

Catalina Yachts was generous with the teak woodwork in their first generation sailboats, less so in the “new design.” The forward bulkheads and removable panels except for the locker lids are marine grade teak veneer plywood. Solid wood was used where it made the most sense: handrails, trim, compression post, and moldings.
The down side of wood in a sailboat is, of course, water damage. Teak is very water resistant; it contains a lot of natural oil. But it’s not invincible and if neglected for too long it will begin to look more like firewood. Ultraviolet light can bleach the color, persistent deck leaks can delaminate plywood, and sustained humidity can foster mildew and add to that old boat smell. The best defense is a durable finish.
An inch of teak is a terrible thing to waste
You have a lot of options to choose from for a finish. They run the spectrum of cost, ease of application, performance, and appearance. Some finishes are better choices for some locations on a sailboat than others. Protection from the elements is most important for topside brightwork; UV resistant and waterproof. Below deck, the finish should also be water resistant but ease of application is also very important so that the finish can be repaired or reapplied without having to remove all of the woodwork from the sailboat as I show here.
Most experienced skippers have a favorite finish that they recommend and there is little consensus among them. Before you begin refinishing your own woodwork, it’s worth spending some time looking at other sailboats and talking to their owners to help you decide on a finish for your own sailboat. If your teak already has an aftermarket product on it like Cetol or a spar varnish, it might be best to stick with that product rather than try to strip it all off so that you can apply something else.
For woodwork that gets a lot of use and abuse, like the companionway step lid on a C-22, consider applying a more durable finish like polyurethane, epoxy, or non-skid material like I describe in Turn Carpet Remnants into Custom Floor Mats .
Get started on that finish
Here are the basic steps that I follow to refinish interior teak:
1. If the wood has never been refinished or if the existing finish is in poor condition, remove it all from the sailboat so that you can work on it easier and apply the finish to all the surfaces.

2. Remove all attached hardware (screws, snaps, etc.) and other non-wood materials like vinyl welting.
3. If there is any visible (black) mildew, apply a mild acid like white vinegar or diluted laundry bleach to remove it completely, especially in the grain and any recesses. Test first in an inconspicuous spot. You might have to bleach the entire part to get even coloring. For more about bleaching prior to applying a finish and using oxalic acid, see Restore Your Exterior Teak to Better Than New .

3. Use a sanding block with 220 and 320 grit open face paper to sand all the exposed surfaces smooth. Since the wood is so hard and oily, it takes such fine sandpaper to remove all the sanding marks and bring out the beautiful grain and coloring of the teak.
4. Wipe all the parts thoroughly with a tack rag to remove all sanding dust from the pores and grain.
5. Wipe all the parts thoroughly with a clean cloth wetted with acetone. This will remove surface oils that can prevent the finish from soaking into the wood.
6. Apply the first coat of finish. If you chose a spar varnish, thin it with the maximum amount of thinner recommended by the manufacturer. This will help the first coat to soak in more and provide an excellent base for the subsequent coats. With the first coat of teak oil, the color of the wood will really warm up and the grain will start to show some depth. It will get better with every coat.

7. When dry, if you chose a spar varnish, lightly sand with 220 or 320 grit open face sandpaper to remove any dust particles that may have settled on the surfaces.
8. Apply additional unthinned coats to achieve the desired thickness and appearance. If you chose a spar varnish, sand after each coat except for the last coat. If you chose teak oil, lightly polish after each coat with a clean cloth while it is still damp, then allow it to dry completely before applying the next coat.

9. If your sailboat has welting where the wood panels meet the fiberglass hull liner and they’re ugly or decaying, now is a good time to replace them. You can make new welting out of synthetic cord from a fabric store covered with vinyl or another material. For more on making welting, see How to Sew Cabin Cushion Covers .
10. Replace the parts in the sailboat but leave it open with good air circulation until all the fumes dissipate. If you chose teak oil, it is slow to harden and it can take a couple of weeks for the fumes to go away completely.
After you refinish your interior teak, it might make the exterior woodwork look worse. To read about my different process for refinishing topside brightwork, see Restore Your Exterior Teak to Better Than New .
I’ve worked with tropical woods before in various woodworking projects, but I’ve come to love teak for its golden, irregular coloring, interesting grain patterns, weather resistance, and durable hardness. After you work with it, you’ll understand why it’s been the go-to wood of boat builders for hundreds of years. I plan to use it in several future projects that I have in mind. For some easy and practical woodworking projects and how to use other hardwoods that look like teak but are more economical, see:
Make a Door to Storage Space Under the V Berth Make a Door for More Storage Under the Galley Make this Easy and Elegant Wine Glass Rack Add More Cockpit Seating With DIY Stern Perch Seats Make This Fold-Up Paper Towel Holder
Would you like to be notified when I publish more posts like this? Enter your email address below to subscribe to this blog and receive notifications of new posts by email. You will also receive occasional newsletters with exclusive info and deals only for subscribers and the password to the Downloads page. It’s free and you can unsubscribe at any time but almost nobody does!
Share this:
19 thoughts on “ refinish your interior teak to better than new ”.
Just this morning I removed all of the interior wood on my Precision 23 and plan to follow your good instructions. Just curious – did you treat the mildew the same as you explained for your outdoor teak restoration project?
My interior teak was in pretty good shape so I didn’t have to, but I would have done it the same.
Good luck with your project!
OK, the mildew in your “before” picture must have come off during sanding. I’ll hope for the same. By the way, the links to Daly’s Wood Finish in your exterior teak page are dead – you might want to update these especially if it helps pay for a few bills!
Exactly right, Tom. It was just on the surface and came right off with light sanding. The exterior mildew had penetrated deep into the wood so it had to be treated chemically.
Thanks for the heads-up about the links. They’re fixed now.
Love your site! I am a Navy Veteran in SoCal looking to buy a cheap Catalina 25 for my first boat. You have given me inspiration to not only go ahead searching but great ideas for getting a great discount for things that look like easy DIY.
Dear Stingy Sailor,
I bought a Catalina 22 ( 70-something) just a few weeks ago. I’m toatally in love with it.
The bed in the front is just to small for me, so I’m thinking about removing the ‘wall’ between the front and the bench on the stirn side. All catalina 22 but one that I’ve seen on the net have this metal bracket that seems to connect the mid stay to this wall.
Do you have a reccomendation: is it really neccesary the keep it there or not so much? . Hope I’ll here from you.
Kind regards, Robert Amsterdam, Holland
Yes, the forward wooden bulkheads between the V berth and the main cabin area are CRITICAL structural components. They transfer the force of the upper shrouds down to the hull. If you remove them, you could severely damage your sailboat.
Instead, I’d recommend you remove the galley from the starboard berth so you can stretch your feet out under the cockpit. It’s narrow, but it should be long enough for you. Another alternative is to lower the dinette table to make the port berth and use the portable toilet compartment cover boards and an ice chest to fill in the center aisle and make a large berth in the salon area. This is how my wife and I sleep when anchored out. It’s quite spacious. You can see how we do it toward the end of How to Sew Cabin Cushion Covers
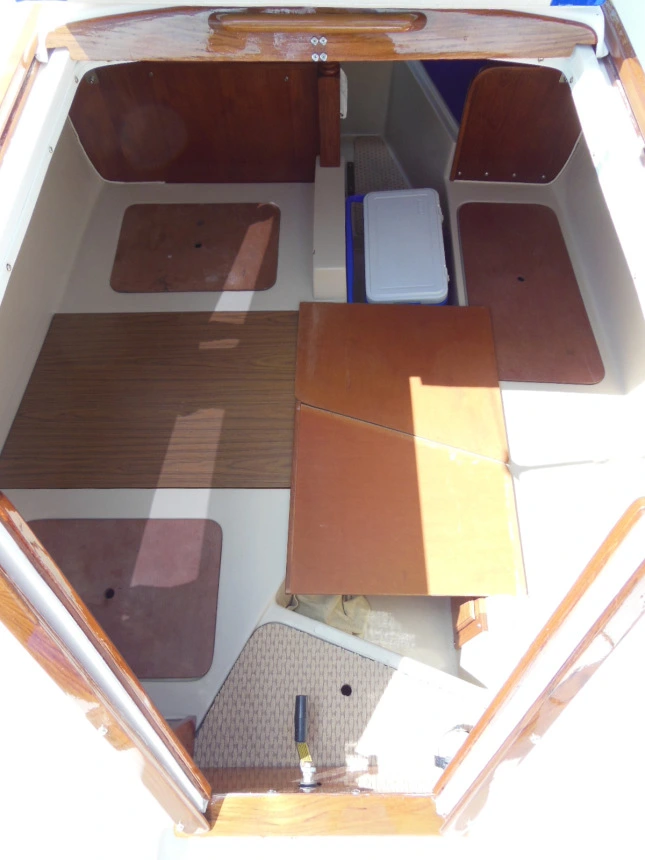
Thanks for your question.
Met Vriendelijke Groeten, $tingy
Am I understanding you correctly? You oil outside teak and then varnish it???
That’s right, Jim. Especially if you bleach it first. That takes almost all the color out of it. The oil brings it back.
$tingy, earlier this week I started the task of conditioning the teak on my Cat 22 with teak oil. I started with the crib boards and now am planning to move interior. I am a little apprehensive to pull the interior teak out. More so, just not sure how to go about it. Any tips?
Hello, Shanna
It all comes out pretty easily without many tricks. All of the fasteners are relatively easy to access except the four small machine screws along the bottom of each forward bulkhead. The nuts are inside the adjacent lockers so you have to be a bit of a contortionist to hold them yourself or have a helper hold them while you remove the screws.
Label each piece so that you know where it came from and keep the fasteners together for each piece. Sandwich bags work well for this. Taking pictures as you go can help too. There are several different sizes and types of fasteners used and it’s important that you replace the same sizes in the same locations.
The trickiest part of the job is reattaching the pieces. The screw holes can be randomly spaced and difficult to realign, especially for the long, thin strips along the hull/deck joint. But once you get a couple screws started, the rest should go easier.
It’s also important that the bulkheads are firmly anchored at the top by the chain plates and the bottom by those four machine screws. The bulkheads transfer the force from the upper shrouds to the hull so you don’t want them to be loose or your rig won’t stay in tune. For that reason, be sure the bottoms of the bulkheads aren’t rotted and soft.
Best of luck with your refinish. Let us know how it turns out! $tingy
Hello $tingy, I have my exterior teak sanded, bleached and ready for finish. Have you heard anything about using Starbrite teak sealer for a couple coats, then varnishing with the same varnish you used for another 5+ coats? Also did you use varnish on your interior or just the teak oil? If just teak oil, did it have a bit of gloss? Thanks for ALL the helpful tips!
Hi, Christian
I haven’t heard of anybody using sealer only under varnish but someone may well have tried it. I don’t see much purpose to it, though. Seal coats are typically just thinned varnish so that it penetrates, which is the same process that Epifanes recommends when applying their varnish.
I use only teak oil on my interior teak and yes, you can build it up to a nice gloss if you want to but it will take 3-5 coats to get there, whereas you could just apply one or two coats of varnish over one coat of teak oil and achieve much the same result.
Hope that helps!
Thank you for sharing this informative article! All the information provided by you is really very helpful for all. I agreed that by using tack cloth you can keep your project dust-free and it is useful for cleaning fine dust off a surface. Everyone should follow the tips provided by you, it will make their work easier. Keep Posting! Keep Sharing!
This couldn’t have come at a better time for me, just about to do some interior teak work before we fit a new teak and holly sole
I really appreciate your article. I am in the process of stripping all of the think varnish from the teak handrails and fittings on my grand banks trawler and was thinking about going with just teak oil instead of using a urethane finish. Does the oil leak on to the gelcoat over time? Was also considering maybe using awlwood which is water base but requires 8 or more coats.
No, it dries hard like the linseed oil in oil based paints.
Hello, We tried to take unbolt the starboard bulkhead where the chainplate is located due to some rot at the bottom the bulkhead after a leak started from the plate of the middle shroud the top of the chainplate on deck. It was very difficult to reach in and get a hold on the bolts! We also found that the bolts were not flush with the teak plywood wall. But were hanging out a few inches. Can the bulkhead be taken out by itself without removing other pieces? How do you get a grip on the bolts inside the interior area? We are fixing the deck leak with cleaning, polyurethane sealant, new slightly longer screws, backed up by Butyl tape. Also, I am considering using Git Rot for the bottom of the bulkhead rot for this season and taking out this bulkhead in the fall. Do you think that is a good solution? Thank you, Doris
Hi, Doris Yes, they’re hard to reach but critical that they provide a strong connection between the bulkhead and hull liner since they transfer all of the load of the upper shrouds to the hull structure. You might need to have a helper hold the nuts while you turn the screws. The original screws aren’t extra long so it sounds like a previous owner installed whatever they had on hand. You can remove the bulkhead for repair or replacement after slackening the shroud and disconnecting the chain plate. I recommend that over any quick fix that might not be strong enough.
Leave a comment Cancel reply
This site uses Akismet to reduce spam. Learn how your comment data is processed .
- Already have a WordPress.com account? Log in now.
- Subscribe Subscribed
- Copy shortlink
- Report this content
- View post in Reader
- Manage subscriptions
- Collapse this bar
- 2024 BOAT BUYERS GUIDE
- Email Newsletters
- Boat of the Year
- 2024 Freshwater Boat and Gear Buyers Guide
- 2024 Boat Buyers Guide
- 2024 Water Sports Boat Buyers Guide
- 2024 Pontoon Boat Buyers Guide
- Cruising Boats
- Pontoon Boats
- Fishing Boats
- Personal Watercraft
- Water Sports
- Boat Walkthroughs
- What To Look For
- Watersports Favorites Spring 2022
- Boating Lab
- Boating Safety

Easy Tips for Boat Restoration
- By Heather Steinberger
- Updated: February 10, 2020

If you’ve got an aging or damaged boat that has sentimental value, you might be ready to tackle a restoration project. Here are 11 tips to keep in mind when restoring an older boat.
1. Take an inventory of your tools, and then roll up your sleeves and start. It’s that simple.
2. Clean the boat from stem to stern so you can see exactly what you have to work with.
3. Remove all the water, leaves and debris from the boat. Organic material is your enemy.
4. Identify what’s broken. Seat bases? Fiberglass components? The steering system? Will you need fiberglass boat restoration?
5. Remove the old fuel from the fuel tank, as well as the old oil from the engine and gear case.
6. Remove the old belts and hoses on the engine and replace them with new ones.
7. Check the through-hull fittings to make sure they are still properly sealed. Also check the seacocks to make sure they are in working order. Replace any broken ones.
8. Look for cracking and crazing in the fiberglass around fixtures and fittings, such as cleats. Make sure load-bearing fixtures have a proper backing plate.
9. Old boats may have lots of rotting wood. Check the deck floor, seat bases and especially the transom for sagging, rot or decay. Strip old wood out of the boat and replace it with marine-grade plywood or a modern cored composite.
10. Go to YouTube and find at least three step-by-step DIY videos that say the same thing. These guys might not be “experts,” but they at least have experience.
11. Have a specific job in mind? Check out all of our content dedicated to DIY projects.
Boat refurbishing and boat restoration can be much more complicated than the tips above, but the checklist will allow you to work on basic exterior and boat interior restoration.
- More: diy projects , How-To , Used Boats
More How To

On Board With: Brian Grubb

Installing Clear Acrylic Livewell Lids

Captain of Dive Boat That Caught Fire Sentenced to Four Years

How to Make DSC Fully Functional on a VHF Radio

Boat Test: 2024 Solara S-250 DC

Boat Test: 2024 Checkmate Pulsare 2400 BRX

Cox 350 Diesel Outboard

- Digital Edition
- Customer Service
- Privacy Policy
- Cruising World
- Sailing World
- Salt Water Sportsman
- Sport Fishing
- Wakeboarding
Many products featured on this site were editorially chosen. Boating may receive financial compensation for products purchased through this site.
Copyright © 2024 Boating Firecrown . All rights reserved. Reproduction in whole or in part without permission is prohibited.
- New Sailboats
- Sailboats 21-30ft
- Sailboats 31-35ft
- Sailboats 36-40ft
- Sailboats Over 40ft
- Sailboats Under 21feet
- used_sailboats
- Apps and Computer Programs
- Communications
- Fishfinders
- Handheld Electronics
- Plotters MFDS Rradar
- Wind, Speed & Depth Instruments
- Anchoring Mooring
- Running Rigging
- Sails Canvas
- Standing Rigging
- Diesel Engines
- Off Grid Energy
- Cleaning Waxing
- DIY Projects
- Repair, Tools & Materials
- Spare Parts
- Tools & Gadgets
- Cabin Comfort
- Ventilation
- Footwear Apparel
- Foul Weather Gear
- Mailport & PS Advisor
- Inside Practical Sailor Blog
- Activate My Web Access
- Reset Password
- Customer Service

- Free Newsletter

Pearson Rhodes 41/Rhodes Bounty II Used Sailboat Review

Hallberg Rassy 42 Used Sailboat Review

How to Perform Your Own Pre-Buy Inspection

Beneteau 323 Used Boat Review


How Does the Gulf Stream Influence our Weather?

Can You Run a Marine Air-Conditioner on Battery Power?

Preparing Yourself for Solo Sailing

Your New Feature-Packed VHF Radio

Practical Sailor Classic: The Load on Your Rode
Anchor Rodes for Smaller Sailboats

Ground Tackle Inspection Tips
Shoe Goo II Excels for Quick Sail Repairs
What Oil Analysis Reveals About Your Engine

An Unusual Sailboat Shines a Light On A Sustainable Future

Is It Time to Get an Electric Dinghy Motor?
Bottom Paint 30-Month Update

Battle of the Teak Cleaners — Snappy Teak-Nu vs. Star Brite

New Seacocks for the Offshore Sailor
Bottom Paint Care

Are E-bikes Worth the Extra Weight and Cost?
How to Handle the Head

How to Select Crew for a Passage or Delivery

Preparing A Boat to Sail Solo
Re-sealing the Seams on Waterproof Fabrics

Waxing and Polishing Your Boat

Reducing Engine Room Noise

Tricks and Tips to Forming Do-it-yourself Rigging Terminals

Marine Toilet Maintenance Tips

Learning to Live with Plastic Boat Bits
- Boat Maintenance
- Sails, Rigging & Deck Gear
Simple Sail Repair
In the long-run, sticky tapes and epoxy out-perform polyurethane..
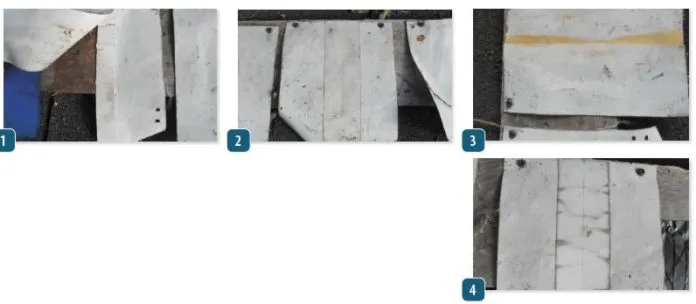
Often an old sail won’t hold stitches, and some sailors hate to sew. A number of products proved strong enough and flexible enough to make serviceable repairs. In Stitch-free Sail Repair , (see November 2017) we reviewed repair tapes, epoxy, polyurethane, and a few other common adhesives for usefulness as no-sewing options for sail repair, and in September 2017 we reviewed options for Sunbrella repair. After two years in the Maryland sun, the rankings have changed slightly.
Polyurethane Adhesives
To our surprise, all of them, including highly-rated products from 3M and Sika, failed completely, peeling apart under their own weight. This should not have been a surprise, since we have long known that polyurethanes make poor glazing adhesives unless the surface is properly primed with a UV blocker.
Sika specifies a UV-blocking primer when used as a glazing sealant. Although the sealants resist UV, the bond is extremely vulnerable when exposed, and the UV coming through the cloth destroyed the bond. In all cases, the non-exposed side was still tightly adhered to. The Sunbrella samples displayed a different trend, with the polyurethanes holding up well.
The difference, of course, is that Pacific Blue Sunbrella blocks UV. We did not test 3M 4000UV or Sika 295UV, and now it seem likely they may have done better; we will follow-up in a future investigation. Remember also that two years in the sun is a very long time for sails, equivalent to sailing around the world twice.
Bottom line: Recommended for Sunbrella repair and for temporary repair of sails. UV resistant blends might last longer.
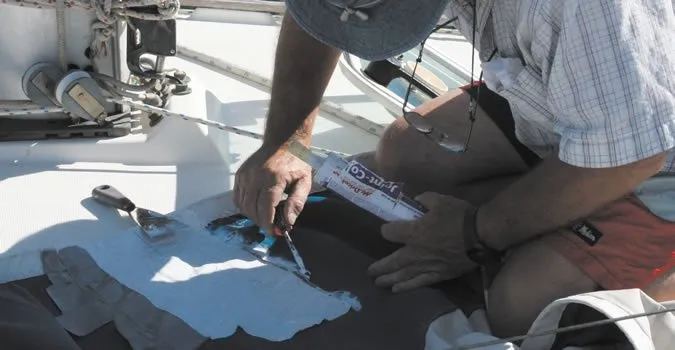
Contact Cement
Both Weldwood contact cement and Ailenes failed completely, the UV cooked the adhesive until it was crumbly. They did better on Sunbrella, but the exposed cement was still crumbly and no longer adhering
Bottom line: The repairs may be easy, but they wont last.
West Systems G-Flex was still strong, although in this application is a little stiffer than we would like. Dr. Sails from Sailing Technologies was also still strong and remained flexible.
Bottom line: Recommended for polyester sail repair and acceptable for Sunbrella repair.
The bond of Bainbridge Polyester Sail Repair Tape to sailcloth seems to get better with time, welding itself to the sail. On Sunbrella it was peeling off a little. Nylon Sail Repair Tape (also Bainbridge) is more vulnerable to UV and was starting to look sunburned, but the bond was still sound. However, since this product is typically used on nylon spinnakers, the UV resistance should be more than adequate.
We’ve flown old chutes patched up with yards of this stuff, and they always seemed to fail somewhere other than at the repair. Tear Aid Type B was distorted and peeling off.
Bottom line: Bainbridge Polyester Repair Tape is recommended for working sail repair, and Bainbridge Nylon Repair Tape is recommended for spinnaker repair. These belong in every sail repair kit. Apply to both sides and rub down hard.
So there you have it. Epoxies and polyester tape worked out well on polyester sails, nylon tape for chutes, and polyurethanes and Dr. Sails for Sunbrella.
Polyurethane failed on sailcloth in the long term, but truly, our test ran longer than required for most repairs. UV protected blends might do better, and be worth a try.
We have started testing materials for laminate sail repair. Since many of the repairs we have been making are along stitching lines, it seems clear that adhesives may offer the better solution. Dr. Sails looks strong, and we have some interesting film and reinforced tapes in the field. Stay tuned.
- Aleene’s
- West System
RELATED ARTICLES MORE FROM AUTHOR
Leave a reply cancel reply.
Log in to leave a comment
Latest Videos

What Is The Best Folding Bike For Your Sailboat?

The No Expense Spared Antigua 60 Cruising Sailboat Soolaimon

How To Buy Sails – With Joe Cooper

Bavaria C42: What You Should Know | Boat Tour
- Privacy Policy
- Do Not Sell My Personal Information
- Online Account Activation
- Privacy Manager
- PaddleWays App
Suggestions
More Products »
Repairs Department

Northwest River Supplies
The NRS Repair Department is here to help from our Moscow, Idaho headquarters. Read on for details on general repairs, pump repair options, latex dry wear gasket replacements, pressure testing, and more.
- General Repairs
- Gasket Replacement & Pressure Testing
- Pump Repairs
- Inflatable Boat, Raft & SUP Repair Facilities
GENERAL REPAIR
Does your NRS gear or apparel need a little TLC? Give us a call and we can let you know whether we can repair your stuff!
International Customers: If you are outside of the United States, please contact us before sending anything our way.
General repairs EXCLUDING shipping: $35.00 per hour
For repair needs or questions, please contact us .
GASKET REPLACEMENT & PRESSURE TESTING
If you would like NRS to repair your gaskets or test* for pinholes or potential leaks in your dry suit, please add the desired items below to you cart and checkout.
Agency Customers: If you are sending in multiple dry suits for an agency department, please use our Agency Dry Suit Intake Form .
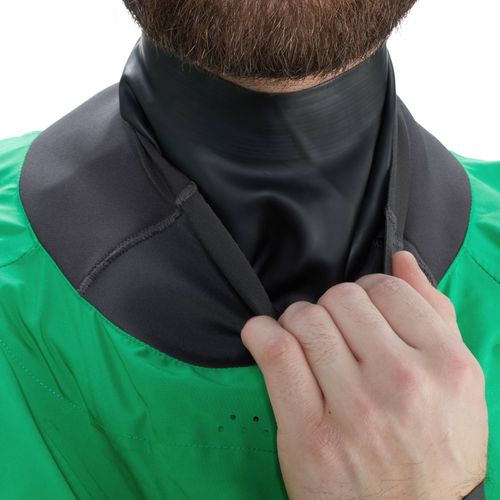
Latex Neck Gasket Repair Service for Dry Wear
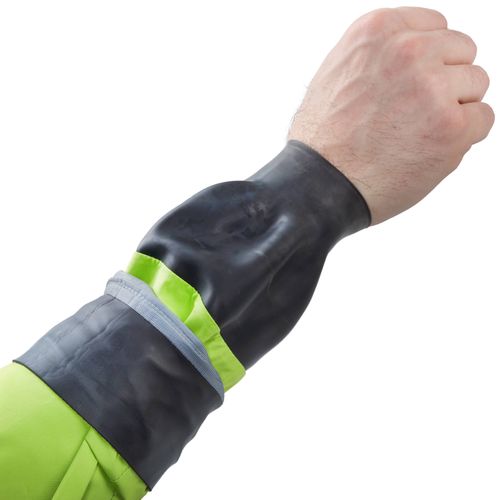
Latex Wrist Gasket Repair Service for Dry Wear

Latex Sock Repair Service for Dry Suits
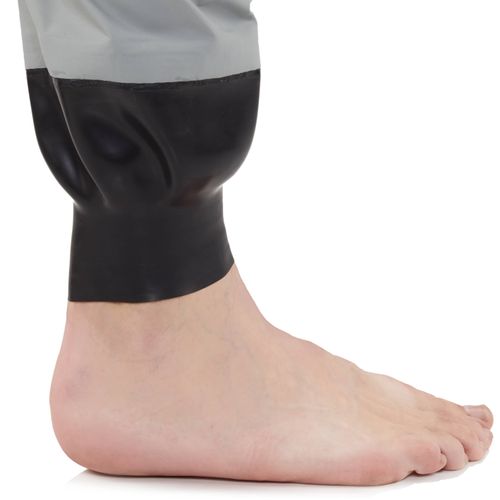
Latex Ankle Gasket Repair Service for Dry Suits
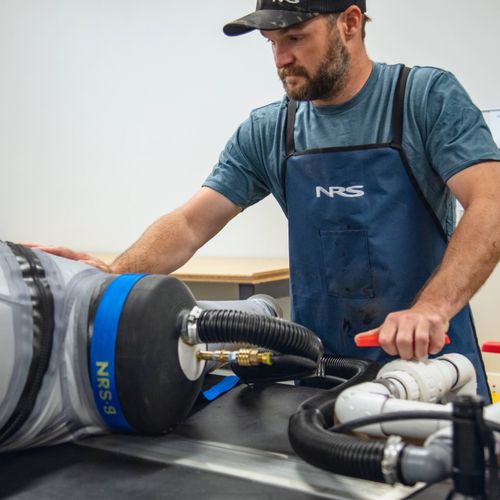
Leak Evaluation and Repair Service for Dry Suits
*Note: the leak evaluation service is only available for dry suits. Semi-dry suits featuring a neoprene neck closure (e.g.: Explorer, Navigator, Spyn, Nomad, Ascent SAR, Kokatat Supernova) or neoprene wrist closures (e.g.: Ascent SAR) are not compatible with this leak evaluation service.
U.S. customers: shipping is included in the purchase price of the repair. After your order is submitted, you will receive an email with a shipping label and instructions for shipping your dry wear to NRS.
International customers: shipping your dry wear to/from NRS in the United States will be your sole responsibility.
Squeaky-Clean Repair Policy
We are happy to repair your clean NRS gear, so be sure to rinse, dry and remove all dirt/sand/debris from the interior and exterior of your dry suits. (We’re lookin’ at you, sandy socks!) Any gear sent in for repair that has not been cleaned will result in a $30.00 cleaning fee.
For additional dry suit gasket needs or questions, please contact us.
DIY Gasket Repair
Gasket repair kits and an instruction video are available if you’re feeling adventurous.
PUMP REPAIR
Looking for some tips on what you can do to fix your own pump? Read about how to maintain and repair NRS Barrel Pumps . Replacement pump parts are available for purchase.
For additional pump needs or questions, please contact us.
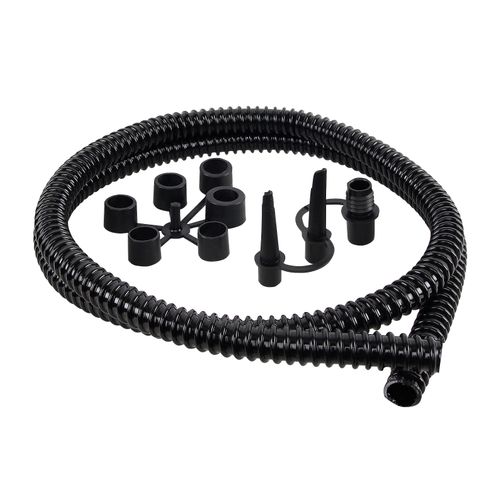
Wonder Pump 6 Hose
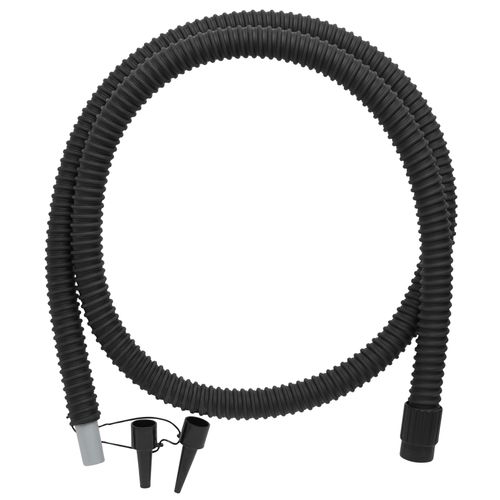
Bravo High Pressure Pump Replacement Hose
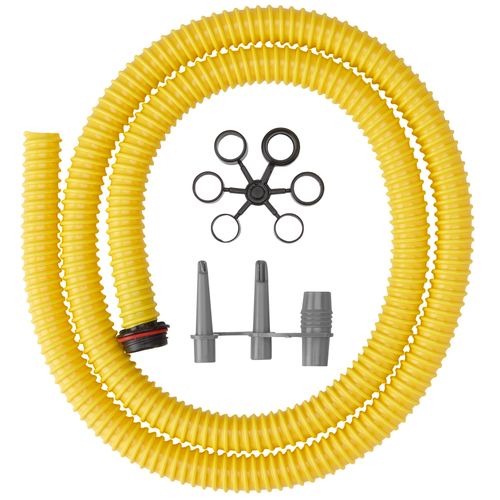
Scoprega GP 5 Foot Pump Hose
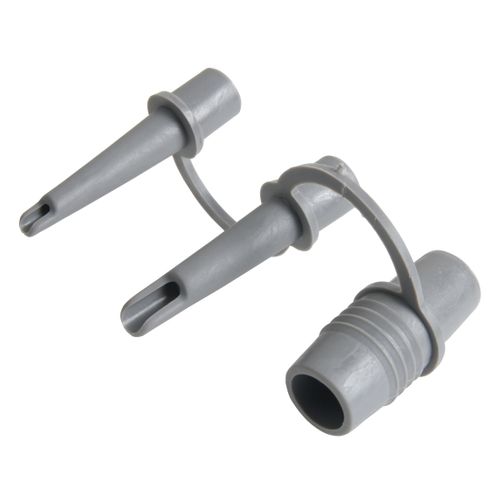
Foot Pump Nozzles
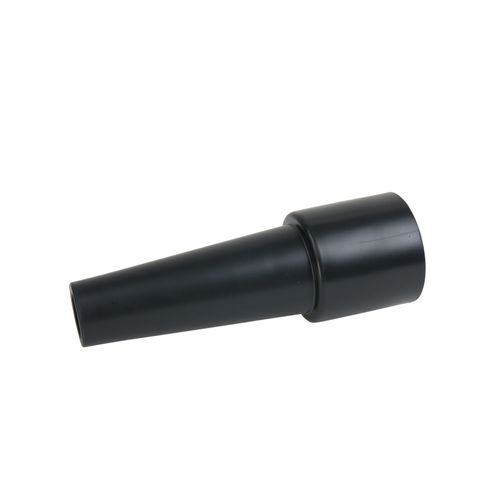
Big Blower Nozzle
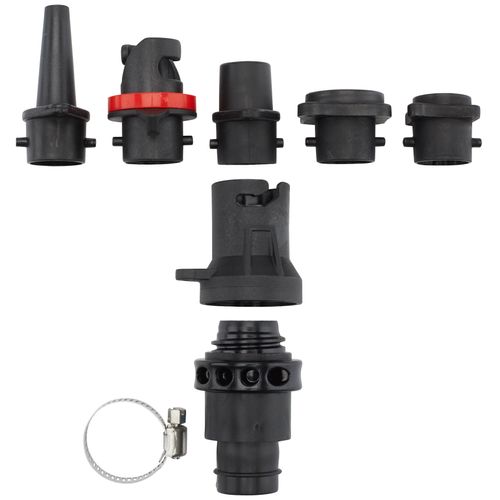
NRS Super Pump Adapter Set
More Pump Parts »
BOAT & SUP REPAIR FACILITES
We do not repair boats and SUPs, but are happy to refer you to some awesome folks who do! Visit the state- and region-specific list of NRS suggested boat repair facilities . You can also contact us for additional information.
Stay up to date on new arrivals, email exclusives, sales and more.
By providing this information, you are opting to receive email communications from nrs.com and agreeing that you have read our privacy & cookie policies.
877.677.4327
Give us a call.
Send an Email
Drop us a line anytime.
Find a Dealer
Locate our retail partners.
Learn Center
How-to articles, videos and more.
Flagship Store
Showcasing the best of NRS in Moscow, ID.
Let them pick exactly what they want.
- Duct Tape Diaries Blog
- Discount Programs
- International
- NRS Pro Deals
Customer Service
- Free Shipping*
- Rock Solid Guarantee
- Return Instructions
- Warranty Registration
- Notice at Collection
- Terms & Conditions
- Privacy & Security
- Cookie Policy
- Sun Protection
- Base Layers
- Jackets & Hoodies
- Splash Wear
- Life Jackets
- Safety Equipment
- Cleaning & Maintenance
- Apparel & Gasket Repair
- Warranty Info
- Logo T-Shirts
- Whitewater Kayaking
- Kayak Touring
- Stand-Up Paddleboarding
- Dry Duffels
- Map & Electronic Cases
- Yakima Racks
- Locks & Security
- Foam Rack Kits
- Whitewater Paddles
- Touring Paddles
- SUP Paddles
- Raft Paddles
- Canoe Paddles
- Paddle Accessories
- Rescue PFDs
- Fishing PFDs
- Low-Profile PFDs
- Women’s PFDs
- Kids’ PFDs
- Accessories
- Knives & Tools
- Rope & Webbing
- Carabiners & Rescue Hardware
- Touring Safety & Accessories
- Rescue Kits
- Medical Kits
- Safety Accessories
- Chairs & Tables
- Hammocks & Shelters
- Sleeping Pads
- Stoves & Firepans
- Camp Kitchen
- Purest Duffels & Bags
- Ground Mats
- Toilet & Waste Systems
- Water Filters
- Toys & Fun
- Lights & Headlamps
- Audio & Accessories
- Waterproof Cases
- Expedition Series
- Otter Series
- Otter Livery Series
- Slipstream Fishing Series
- Approach Fishing Series
- Outlaw Series
- Select Series
- Starlite Series
- NRS Catarafts
- STAR Catarafts
- AIRE Catarafts
- Cataraft Accessories
- Tributary IKs
- IK Accessories
- Raft Frames & Parts
- Oars & Accessories
- Outfitting & Accessories
- Dry Bags & Cases
- Inflatable SUP Boards
- SUP Accessories
- Fishing Rafts
- Fishing Raft Frames & Parts
- Personal Fishing Inflatables
- Fishing Outerwear
- Fishing Apparel
- Kayak Outfitting
- Roof Racks & Transport
- NRS Apparel
- Chaco Footwear
- Crazy Creek
- STAR Inflatables
- Used Apparel
- Used Inflatables

FIND IT, PLAN IT, PADDLE IT
- Skip to main content
Palouse-Clearwater Environmental Institute
“connecting people, place and community”

The Restoration Team welcomes volunteers, and volunteers are essential to completing the many projects the team implements. If you are interested in participating in a specific event/volunteer day or becoming a regular volunteer, visit our volunteer page or contact us at [email protected] .
Project Information
Ongoing Projects | Pullman Stream Clean-up | Learning Nursery | Adopt-A-Stream Programs | Rose Creek Nature Preserve | Thomas O. Brown Learning Greenhouse | Past Projects
Common Weeds | Palouse Native Plants | Noxious Weeds | Restoration Services
Headquarters:
1040 Rodeo Drive
Moscow, ID 83843
*Please do not mail donations or correspondence to our street address. USPS will not deliver them .
Mailing Address:
PO Box 8596
Contact Us:
Phone: (208) 882-1444
Email: [email protected]
The Palouse Nature Center and Rose Creek Nature Preserve are open to visitors 7 days a week, dawn to dusk. Office hours vary due to the nature of our work. Please call or email if you need to meet with a staff person.
Putin backs China's Ukraine peace plan, says Beijing understands the conflict
- Medium Text

Sign up here.
Reporting by Ron Popeski in Winnipeg; Editing by Lincoln Feast.
Our Standards: The Thomson Reuters Trust Principles. New Tab , opens new tab

World Chevron

US-Saudi nuclear deal: how might it work?
White House National Security Adviser Jake Sullivan will visit Saudi Arabia this weekend for talks expected to touch on a civil nuclear cooperation agreement, one piece of a wider arrangement Washington hopes will lead to normalization of Israeli-Saudi relations.


IMAGES
VIDEO
COMMENTS
Having a sail loft add sacrificial strips can be expensive, particularly if you have it done it to multiple sails, say, your jib and a genoa. An alternative solution is to make this DIY jib sock. You can use it to protect whatever sail you have on your furler and at a fraction of the cost of sacrificial strips.
This Old Boat: DIY Sailboat Restoration. Date Published: March 3, 2020 Categories: Custom Marine Carpentry Tags: boat restoration and custom shop, diy, do it yourself, refitting sailboat interior, sailboat aesthetics, sailboat restoration, sailboat restoration company, yacht furniture repair.
The electrical and plumbing systems on a classic sailboat may require updating or replacement to meet modern standards and ensure safety and reliability. Inspect the wiring, switches, and electrical components for signs of wear or damage, and replace any outdated or faulty parts. Plumbing systems should be checked for leaks, corrosion, or other ...
Sailboat DIY And Repair Tips. Sailing in the Time of Covid. In mid-August 2019, my wife, Terrie, and I laid up our Malö 46, Nada, in Falmouth, England, and flew home to Maine. We booked flights back to the UK for May 2020, anticipating a summer of cruising the Atlantic coasts of France and Spain. Then Covid struck.
The deck rebuild has reached yet another important milestone. I'm done replacing the old core, laying up the new top skin and now I'm also done painting. Yay...
Look for DIY boat restoration resources, such as books, online forums, and video tutorials. Learning from others' experiences can save you from common pitfalls and provide valuable insights. 5. Salvage and Recycle. When possible, salvage and recycle materials from your boat. Old hardware, wood, and even upholstery can often be refurbished or ...
My DIY (Do It Yourself) sailboat restoration is in full swing. In this video, I though briefly on cost. Both the purchase price and what it costs to keep Ath...
Over the weeks and months of our old sailboat restoration, I experienced periods of high motivation where working on the boat was the only thing I wanted to do. Things like eating, sleeping, and my day job just got in the way. Other times, making myself get out there was like getting a 6-year-old to eat peas: damn near impossible.
DIY sailboat restoration: Painting the cockpit of my sailboat at anchor in Costa Rica | Untie The Lines S6E11 ⇩ Support my videos and get real time video upd...
Exterior sailboat restoration projects. INSTALL SOLAR PANELS AND WIND GENERATOR Having power while at anchor is much more sustainable when you can harness the power of the sun and wind. We installed two rigid 100 Watt Renogy solar panels on our stern pulpit and two 110 Watt flexible panels on our dodger. We also refurbished and installed a free ...
Here are the basic steps that I follow to refinish interior teak: 1. If the wood has never been refinished or if the existing finish is in poor condition, remove it all from the sailboat so that you can work on it easier and apply the finish to all the surfaces. BEFORE - dull and dirty. 2.
Study a good book on sail and canvas repair, concoct a few small projects for practice. Work Surface - A wooden cutting board is perfect for small projects, much better than plastic. Sailmakers palm - Get one that fits. Left-handed palms are available. A Dremel can smooth out the sharp edges, so your palm is as soft as a true sailmakers palm.
Here are 11 tips to keep in mind when restoring an older boat. 1. Take an inventory of your tools, and then roll up your sleeves and start. It's that simple. 2. Clean the boat from stem to stern so you can see exactly what you have to work with. Advertisement. 3. Remove all the water, leaves and debris from the boat.
A number of products proved strong enough and flexible enough to make serviceable repairs. In Stitch-free Sail Repair, (see November 2017) we reviewed repair tapes, epoxy, polyurethane, and a few other common adhesives for usefulness as no-sewing options for sail repair, and in September 2017 we reviewed options for Sunbrella repair. After two ...
Always clean your fabric of salt with a freshwater rinse. Then allow a few moments for the fabric to dry. Continue by removing any residues with rubbing alcohol. This tip facilitates the drying process, as the alcohol evaporates. Most of the time, some sails (mostly white), tear in lines.
After 1 year of building our old boat it has finally become the off grid yacht we dreamed of. Without having any experience this was a challenging project. E...
Fix-it Kit: Essentials for DIY Sail Repair. Nothing will ruin your cruise faster than a damaged or torn sail. With the BoatWorks sail-repair kit on board, you'll be able to make emergency repairs and keep on sailing. Ours cost less than $100 to assemble but could save us hundreds in repair bills. Mark Corke.
05-13-2024, 08:34 AM. One insane englishman trying to rebuild the 1910 gaff cutter Tally Ho, in WA. (VIDEO) by SampsonBoatCo. Started by SampsonBoatCo, 10-01-2017, 12:12 PM. 1,576 responses.
If you would like NRS to repair your gaskets or test* for pinholes or potential leaks in your dry suit, please add the desired items below to you cart and checkout. Agency Customers: If you are sending in multiple dry suits for an agency department, please use our Agency Dry Suit Intake Form. Latex Neck Gasket Repair Service for Dry Wear. $69.95.
SEE our Project Sailboats Interior Makeover! Our Project Boat Refit and Restoration.We did many projects over the years and in this video we are going to sha...
CLASSIC RESTORATION cUSTOM SHOP. Restoring memories from the heartland of America. CONTACT ALCHEMY RESTO. Name . Email . Phone . Message . Send. CONTACT ALCHEMY RESTO. 1835 W. Outer Hwy 61, Moscow Mills, MO 63362 (636) 775-5353 Opens in your application. email Alchemy Opens in your application. HOURS OF OPERATION. Mon - Fri: 8am - 5pm.
The Restoration Team works with volunteers to restore, maintain, and conserve ecosystems in the Palouse-Clearwater region. These efforts include a variety of projects, such as riparian/wetland restoration, Palouse Prairie rehabilitation, watershed planning, biological monitoring, and water quality protection. The Restoration Team welcomes ...
Ukrainian President Volodymyr Zelenskiy's peace plan calls for a withdrawal of Russian troops, the restoration of its 1991 post-Soviet borders and bringing Russia to account for its actions.
Please join us for today's Fourth of July special video as we completely restore this damage boat to back to new condition. Throughout this journey of rebuil...