Great choice! Your favorites are temporarily saved for this session. Sign in to save them permanently, access them on any device, and receive relevant alerts.
- Sailboat Guide
Prindle 19 is a 19 ′ 2 ″ / 5.9 m catamaran sailboat designed by Richard Loutek and built by Prindle Catamarans and Performance Catamarans Inc. starting in 1985.


Rig and Sails
Auxilary power, accomodations, calculations.
The theoretical maximum speed that a displacement hull can move efficiently through the water is determined by it's waterline length and displacement. It may be unable to reach this speed if the boat is underpowered or heavily loaded, though it may exceed this speed given enough power. Read more.
Classic hull speed formula:
Hull Speed = 1.34 x √LWL
Max Speed/Length ratio = 8.26 ÷ Displacement/Length ratio .311 Hull Speed = Max Speed/Length ratio x √LWL
Sail Area / Displacement Ratio
A measure of the power of the sails relative to the weight of the boat. The higher the number, the higher the performance, but the harder the boat will be to handle. This ratio is a "non-dimensional" value that facilitates comparisons between boats of different types and sizes. Read more.
SA/D = SA ÷ (D ÷ 64) 2/3
- SA : Sail area in square feet, derived by adding the mainsail area to 100% of the foretriangle area (the lateral area above the deck between the mast and the forestay).
- D : Displacement in pounds.
Ballast / Displacement Ratio
A measure of the stability of a boat's hull that suggests how well a monohull will stand up to its sails. The ballast displacement ratio indicates how much of the weight of a boat is placed for maximum stability against capsizing and is an indicator of stiffness and resistance to capsize.
Ballast / Displacement * 100
Displacement / Length Ratio
A measure of the weight of the boat relative to it's length at the waterline. The higher a boat’s D/L ratio, the more easily it will carry a load and the more comfortable its motion will be. The lower a boat's ratio is, the less power it takes to drive the boat to its nominal hull speed or beyond. Read more.
D/L = (D ÷ 2240) ÷ (0.01 x LWL)³
- D: Displacement of the boat in pounds.
- LWL: Waterline length in feet
Comfort Ratio
This ratio assess how quickly and abruptly a boat’s hull reacts to waves in a significant seaway, these being the elements of a boat’s motion most likely to cause seasickness. Read more.
Comfort ratio = D ÷ (.65 x (.7 LWL + .3 LOA) x Beam 1.33 )
- D: Displacement of the boat in pounds
- LOA: Length overall in feet
- Beam: Width of boat at the widest point in feet
Capsize Screening Formula
This formula attempts to indicate whether a given boat might be too wide and light to readily right itself after being overturned in extreme conditions. Read more.
CSV = Beam ÷ ³√(D / 64)
Embed this page on your own website by copying and pasting this code.
- About Sailboat Guide
©2024 Sea Time Tech, LLC
This site is protected by reCAPTCHA and the Google Privacy Policy and Terms of Service apply.

The Prindle 19 is a 19.21ft frac. sloop (rotating spar) designed by Richard Loutek and built in fiberglass by Performance Catamarans Inc. since 1985.
The Prindle 19 is an ultralight sailboat which is a very high performer.

Prindle 19 for sale elsewhere on the web:
Main features
Login or register to personnalize this screen.
You will be able to pin external links of your choice.

See how Sailboatlab works in video

We help you build your own hydraulic steering system - Lecomble & Schmitt
Accommodations
Builder data, other photos.

Modal Title
The content of your modal.
Personalize your sailboat data sheet
PRINDLE 19 Detailed Review

If you are a boat enthusiast looking to get more information on specs, built, make, etc. of different boats, then here is a complete review of PRINDLE 19. Built by Performance Catamarans Inc. and designed by undefined, the boat was first built in 1985. It has a hull type of Catamaran Twin Cbrd. and LOA is 5.86. Its sail area/displacement ratio 74.76. Its auxiliary power tank, manufactured by undefined, runs on undefined.
PRINDLE 19 has retained its value as a result of superior building, a solid reputation, and a devoted owner base. Read on to find out more about PRINDLE 19 and decide if it is a fit for your boating needs.
Boat Information
Boat specifications, contributions, who builds prindle 19.
PRINDLE 19 is built by Performance Catamarans Inc..
When was PRINDLE 19 first built?
PRINDLE 19 was first built in 1985.
How long is PRINDLE 19?
PRINDLE 19 is 5.64 m in length.
Member Boats at HarborMoor

INTRODUCTION CONTENTS
SECTION I: ASSEMBLY This owner’s manual is provided to ease assembly, Preparation 3 maintenance and use of your Prindle Catamaran. We Crossbars 3 believe these instructions portray the simplest methods. Trampoline 5 Do it our way the first time and learn from us. Then, if Standard Jib System 8 you discover a better method, feel free to tell us about Deluxe 4-Way Jib System 8 Jib Sheet 10 it by faxing (714) 541-6643 or e-mailing pcat@perfor- Rudder System 11 mancecat.com. You may see your idea appear in the Castings 11 next edition of the owner’s manual. Tiller Crossbar 11 Tiller Extension 11 We are sure you will enjoy your Prindle Catamaran and Rudder Blades 12 hope that this manual will make your enjoyment easier Rudder Lock Bolt 12 Adjusting the Helm 12 to come by. Rudder Alignment 13 Operation of Rudder System 13 Make sure you join the Prindle Class Association - it’s fun Mast and Rigging 14 and it’s free to any new owner of a Prindle Catamaran Spreaders 14 ($20 annually after the first year). You will receive the Diamond Wires 15 Mast Rotator 16 Performance Sailor, our official class newsletter. This Masthorn 16 newsletter contains feature articles, news and results of Shrouds and Trapeze Wires 17 regattas, photographs, timely tuning tips, special Forestay and Jib Halyard 17 announcements and contests. As a member of the Main Halyard 17 Prindle Class Association, you will also be entitled to Raising the Mast 18 enter and participate in all of our Class sanctioned regat- Diamond Wires 20 Sails and Battens 21 tas. Mainsail Battens 21 Hoisting the Mainsail 22 One design racing begins at the local fleet level leading Boom 23 to regional qualifying regattas and culminates with the Mast Rotator 23 Annual National Championship Regattas held in a differ- Downhaul 23 ent region every year. Even if you are not a racer, join Mainsheet and Traveler 24 Jib 24 the Prindle Fleet in your area. Our fleets have held such Jib Sheet Jam Preventer 26 fun events as watermelon hunts, hull flying contests, Righting Line 26 group cruises, Prindle barge picnics and clinics. It’s Tightening rig tension 26 much more fun to share the joy of sailing a Prindle Centerboard 27 Catamaran. If a fleet does not exist in your area - start SECTION II: SAILING Sail Trim one! All you need is a few enthusiastic owners! To Weather 27 Reaching 28 Make sure your dealer fills out and submits your war- Downwind 28 ranty card for your new boat. Not only does it validate Downhaul Systems 28 your warranty, but it will also automatically register you Trapezing as a member of the Prindle Class Association. If you Lacing the Harness 28 Trapeze Positioning 29 have purchased a used Prindle, please send us your sail Launching and hull numbers as well as your complete address. Onshore 30 Make sure to notify us when you move too, the Offshore 30 Performance Sailor does not get forwarded. Tacking 31 Jibing 32 Keep in touch. We love to hear from our owners! Balance 33 Righting 33 1800 East Borchard Avenue SECTION III: AFTER SAILING Santa Ana, CA 92705 Loosening the rig 36 (714) 835-6416 Lowering the sails 36 (714) 541-6643 fax Trailering 38 www.performancecat.com SECTION IV: MAINTENANCE Dolphin Striker 40 Battens 41 Foam/Fiberglass Battens 41 General Maintenance Tips 41 Hulls 41 Rudders 41 Sails 42 Outhaul Systems 42 SECTION V: TUNING PERFORMANCE Mast Rake 43 Mast Rotation 43 Barberhauler 43 SECTION VI: SUPPLEMENTAL INFORMATION Major Parts of a Boat 44 Glossary of Terms 45 Knot Illustrations 46 Prindle 18-2 & 19 Owner’s Manual
Section I: ASSEMBLY
Preparation Tools needed: ✔ large screwdriver ✔ pliers ✔ needle-nose pliers ✔ 1/2” offset wrench ✔ combination 1/2” & 9/16 box-end wrench ✔ adjustable wrench ✔ silicone sealant
Your Prindle Catamaran comes packaged in two hull containers, one large hardware box and one mast box.
Place the two hull containers approximately 6 feet apart with stapled seams at the top of the Open the hardware box and familiarize your- cartons facing each other. This will insure that self with the major parts of your boat. The both hulls will be facing the same direction. contents of the hardware box should include: boom trampoline battens rudder box rear crossbar tiller crossbar sails (may be packed tiller extension with hulls) Open the rigging box. The contents will be listed on the sheet enclosed.
CROSSBARS Put a dab of grease (included in bolt kit) into each hole in the hull for the front beam bolts. This is very important! Put a small amount on each of the 3/8” hex head front beam bolts Open the hull containers. Leave the hulls before assembling crossbars. The front beam standing on the cardboard supports. bolts are tapped into an aluminum plate.
3 If the 3/88” bolts bind at all, remove the bolts and check fit of bolt without the beam on. DO NOT force bolts as you could strip out the alu- minum plate inside the hull. If the bolt con- tinues to bind, use a 3/8-16 tap and rethread the hole to rectify the problem.
Tighten all rear beam bolts until about 1/8” from being fully snug. This allows beams to properly align themselves. Snug down all 8 bolts and then tighten all 8 bolts. Lay both the front and rear cross bars on the hulls with the outside edges even with the out- side edges of the hulls. The curf (groove) on the front crossbar should face aft and the curf on the back crossbar should face forward.
To attach inside bolts on the rear crossbar, insert one of the 5/16” flathead screws through the inboard hold of the rear crossbar. Apply silicone sealant to washer and nut and tighten with fingers only.
Align holes in front beam with the holes in the hull. Carefully thread all 4 of the 3/8” hex head bolts, with grease on threads, through the beam and into the hull until they are about 1/8” from being completely tight. CAUTION!!! 4 The trapezes are continuous from one hull to the other.
Lead trapeze shockcords before putting tram- poline on hulls. Tie one piece of 1/8" x 2’ paracord to one end of shock cord using a small bowline knot.
If one of the fairleads should come loose dur- ing assembly, simply apply some silicone sealant and push into place.
To install the trampoline, first unzip and remove the rear section. Slip the front of the trampoline onto the front crossbar.
Feed the line through the white fairlead on side of hull and out the other side. Continue across to the other hull and repeat procedure.
5 Center the trampoline in the front. Lace up the back of the trampoline with 1/4" x 19’ lac- ing line. Begin by tying a double overhand knot in one end of the line and thread through the right/aft grommet.
Slide the sides down each side of the trampo- line track. Two people are needed here.
Slide the rear piece and zip the two pieces together.
6 Always tighten rear lace line first. Stand at the Tighten starting at the front. back of the boat and tighten lines by bracing your foot or knee on the rear crossbar for leverage. Pull tight. Tie line off under trampo- line. Do not trim excess line as it leaves something to hold onto when re-tightening trampoline.
Complete lacing.
Lace up the side of the trampoline with 1/4" x 19’ lacing line. Begin by tying a double over- hand knot in one end of the line and thread through the forward/inboard grommet.
7 STANDARD JIB SYSTEM Attach jib adjuster plate to both sides.
Attach jib block to padeye on side jib tracks.
Attach jib crosswire to adjuster plate, leading wire through the tramp sock, choosing one of Note: there will be an aluminum cleat on the four middle holes on each side so the wire is deck just forward on the jib track, this is for snug. NOTE: You may find it necessary to future addition of the 4-way jib system as is remove the plate to put the "O" ring on the the "sock" on the trampoline. clevis pin.
DELUXE 4-WAY JIB SYSTEM The parts are included in a separate bag.
Attach the small bullet blocks to the forward most hole on each adjuster plate using a 3/16" shackle .
If the jib cars have installed padeyes remove them since they will not be used.
8 Shackle the jib blocks to each of the two bul- The jib blocks have a ratchet which can be let blocks on the crosswire. turned off and on by using the button on the side of the block.
Adjust the cleat angle as high as possible using the side set screws. Most people prefer this position. Tie each 1/4" x 8 1/2’ line completely around the jib block shackle – not through.
Lead the line around the bullet block on the adjuster plate and through the aluminum cleat on the opposite side of the boat leading line through the trampoline sock.
9 Lead the shockcord through both loops in the Entire 4-way system completed. lines around jib shackles and tie shockcord together. Slide the knot into the sock to hide from view.
Tie a 1/4" shackle to the middle of the 3/16" x 6’ line provided.
Tie the small jib clew blocks to each end of the line using a small bowline. Thread the 5/16" x 33’ jib sheet line by tying off one end to jib ratchet block with a bowline. Thread through small jib clew blocks, through cleat of jib block, across trampoline and through opposite jib block in opposite direction. Jib sheet should be one continuous line.
One side of 4-way system completed.
10 RUDDER SYSTEM TILLER CROSSBAR
Remove cradles out from under hulls and peel off protecting paper from Prindle logo on hull.
Open rudder box, it should contain: left & right rudder castings with tiller arms and com- To attach tiller crossbar to tiller arms, remove plete workings installed, and two rudder 1/4" bolt, washer, and lock nut from end of blades with lock pins attached. tiller arm. Place tiller crossbar over tillers with large hole at end facing up and end cap pop rivet facing aft. Drop 1/4" bolt down through CASTINGS crossbar, putting washer between tiller cross- bar and tiller arm. Insert 1/4" bolt through hole in tiller arm and put lock nut on end. Make sure lines inside tiller go on either side of bolt, do not cross them. Do not put the nut on the bolt at adjuster end of crossbar until rudders have been aligned (instructions later).
TILLER EXTENSION
To install rudder castings onto transom, make sure Prindle insignia is on outboard side. Remove cotter key and pintle from casting. Line up casting with gudgeons on transom and reinsert pintle through gudgeons and casting. Remove lock nut from end of tiller extension. Attach extension to tiller crossbar and re- attach lock nut. 11 Tiller extension should be able to touch tram- The rudder lock bolt is on the forward edge of poline easily. If it does not, the tiller crossbar each rudder blade. It is necessary to adjust has been installed backwards. this bolt to obtain proper helm. Making the bolt longer produces more weather helm RUDDER BLADES ( h e avy steering) and shortening the bolt decreases weather helm (easier steering).
ADJUSTING HELM
To install rudder blades into rudder castings, untie ends of downhaul and uphaul lines in castings, but do not unlace. Remove 1/4" bolt with lock nut. Place rudder blade between casting with lock pin forward. Reinstate 1/4" bolt through casting and 1/4" hole in rudder We recommend the following method for blade. Replace lock nut and tighten until rud- adjusting the rudders before the boat is der will just fall by itself. Do not over-tighten sailed. as this will restrict rudder movement, too loose and rudder will be sloppy in casting. Place boat so there is clearance to lower rud- Thread downhaul and uphaul lines into rudder ders and lock down. Take a short batten or blade and tie off ends with a figure eight knot. yardstick and lay the straight edge flush Make sure the ends do not extend beyond the against the transom. Adjust the lock bolt so edge of blade. Follow same procedure on both that the forward button edge of the rudder is blades. about 1/4" to 3/8" forward of the forward edge of the batten. (Pull rudder back lightly to pull out any slop). 1/4" to 3/8" forward is a RUDDER LOCK BOLT good starting point, further adjustment may be necessary for personal preference.
Note: As the mast is raked aft, the rudders must be raked forward to balance helm.
12 RUDDER ALIGNMENT Attach adjuster end of tiller crossbar to tiller.
Lock both rudders Example: if the distance between the front edges is down. Measure 20” 86” and the distance between the trailing edges is up the leading edge 86-1/2” of rudcder and mark this measurement. Do the same on the trailing edge. Turn the rudders so they are pointing down the hull as if sailing stra i g h t ahead. Measure from the front edge of one rudder blade (20” up) to the centerline of the front edge of the other blade. Do the same with the trailing edge.
If the distance between the trailing edges is greater than that of the front edges; lengthen the tiller adjuster by unscrewing it.
If the distance between the front edges is greater than that of the trailing edges; shorten the tiller adjuster by screwing it in.
One complete turn is 1/16 of an inch. 13 CAUTION!!!! Check for overhead wires before raising mast. A mast which comes in contact with electrical powerlines can cause serious injury or death.
Prindle 15 mast step hinge in use 14 Prindle 16 mast step hinge in use Stand on trampoline with one foot on rear crossbar to steady yourself.
Prindle 18 mast step hinge in use
15 NOTE: Make sure to tape the turn- buckle barrel and nuts to prevent them from loosen- ing. Raise the mast to your shoulder and walk forward with it while extending arms over your head until the mast is held by the side shrouds.
Attach the forestay to the Diamond Wires 1/4” shackle hold- Prindle 18: ing the bow bridle Adjusting the ten- wires together. sion of the dia- After this initial mond wires rigging you can should be done leave the forestay with care. Before turnbuckle pre- the sails are set. hoisted, but after the mast has Tighten turnbuckle been stepped; until mast is raked adjust both dia- slightly aft of mond wires to straight up. See the same tight- Performance ness. If one is Tuning section for looser than the optimum mast other your mast rake suggestion. will bend more on If the shrouds are one tack than the in one of the top other. holes the rig will be a little loose. Push both wires towards the mast with equal tension at the same time. The wires should After hoisting the touch the mast at least 12” above the lower mainsail we will attachment point but not more than 20” explain how to above. tighten the rig., Use a wrench or If the diamond wires are too tight, your mast pliers to tighten will not bend and undo strain will be put on the nuts against these wires. the turnbuckle barrel. This will WARNING: If the diamond wires are too help keep it from loose the mast could break under high pres - unturning. sure loads. 16 Be sure to tape the locking nuts on turn- buckles after you have adjusted the wires so that they will not unturn. SAILING NOTE: The looser the diamond wires are the more the mast will bend and the flatter the sail will become (and vice versa).
A way to insure that the turn- buckles on mast do not loosen is to thread a small Insert tapered end of each batten (foam line (batten tie) core) or the end with rounded edges (fiber- through the cen- glass) into batten pockets making sure each ter hole in each batten fits into the pocket end protector at barrel, tying a forward edge of sail. Put plastic caps on aft knot on the back end of fiberglass battens. side of the barrel.
SAILS AND BATTENS Mainsail battens The Prindle mainsail has a batten between each panel of cloth. The longest one is the second one up from the boom. The rest go from long to short as you progress up the sail. The 15 and 16 each have nine battens, the 18 has 10. Lead string up through either hole in foam Remove batten string ties from clew of main- batten or through end cap and down through sail. top grommet and tie an overhand knot (tightly) while pushing batten into sail with thumb.
Push batten tight enough to eliminate all wrinkles in batten pocket if using fiberglass battens. Foam battens should be tight enough to just “flop” from side to side.
Fold batten string in half and loop through batten grommet on leech of sail.
17 Make sure the mast base sheave, or roller, spins freely while raising the sail. If it does not, you may need Finish tying string with a square knot and to file the inside of tuck loose ends into batten pocket. the mast base casting.
When the sail reaches the top of the mast, you must lock the ring on the hal- yard line to the Finished tie on fiberglass batten. hook at the head of the mast. To do this, pull hal- Hoisting the mainsail yard until the ring Face your boat into the wind when raising or is above the lowering your sails. Lay the mainsail to the hook. batten ends will not get caught on the tiller crossbar.
Prindle 15 & 18: Attach the twisted shackle to the Rotate mast (push main halyard rotator) towards ring. NOTE: The the starboard hull) halyard should so hook is inside follow the curf of ring and pull down the mast and not on the tack of the wrap around the sail gently until hook at the mast- the ring locks onto head. the hook.
Coil the extra main halyard line Attach the twisted shackle to the head of the and store in one of mainsail and place forward edge of sail into the pockets on the curf of mast. trampoline. With one hand, feed the sail into the curf and pull on rope tail of halyard (exiting at base of mast) with the other. 18 Boom
Prindle 16: Attach main hal- yard shackle into hole at head of mainsail.
Remove clevis pin from gooseneck assembly attached to forward end of boom. Connect boom to the bracket on the mast using this clevis pin and cotter ring. Place forward edge of sail into curf of mast. With one hand, feed the curf and pull on rope tail of halyard with the other. Pull from directly for- ward of mast and not off to either side. This helps Remove clevis in from outhaul car on aft end to prevent hal- of boom and lift boom to aft end of mainsail. yard from jump- Clew ring of sail goes in between sides of ing out of mast outhaul car. Reinsert clevis pin through sail head sheaves. and outhaul car. Install cotter ring in end of clevis pin.
When the sail reaches the top of Mast Rotator mast, you must (previously installed onto mast) secure the second metal stop on the halyard wire into the halyard lock on the mast. DO this by leading wire between teeth on lock and pulling down on sail to put tension on the metal stop. Tie rotator line 3/16” x 5’) to fairlead built The other stop, into the aluminum clam cleat, down through further down on the eye in the rotator wishbone and back the halyard wire, through the cleat. This provides a 2:1 pur- is for a reefed main only. chase for adjusting mast rotation. 45 to 75 degrees rotation is considered normal for Cleat main halyard off and stow extra line. 19 most sailing. Downhaul 4) Up through inside Tie downhaul line (3/16” x 7’) to tack ring of roller of lower back mainsail and lead: 5) Through last roller 1) Through pulley on gooseneck on port of upper block side of mast 6) Down through fair- 2) Through tack ring on sail lead on cleat base of lower block and tie off 3) Around pulley on starboard side of mast with a single overhand knot. 4) Back through tack ring and down to cleat
Prindle 15 and 18 Note: Lines are lead through inside of rotator wishbone. A Prindle 18: method used by many racers to increase To thread mainsheet purchase is to tie the line through “U” brack- blocks (7:1 purchase) et on gooseneck base first, lead it up lay blocks on their through the tack ring, and then follow steps sides on a flat surface. 1 to 4. Feed line away from you through cleat and ratchet roller of lower Mainsheet and Traveler block and lead: Prindle 15 & 16: To thread main- 1) Towards you sheet blocks (6:1 through bottom of purchase) lay roller of upper boom blocks on a flat block surface with the lower ratchet block facing right and the upper 2) Away through bot- block on rollers as tom roller of lower shown. Feed line block through cleat and middle roller 3) Towards you (ratchet) of lower through top roller of block and lead: upper block
1) Through first 4) Away through mid- roller of upper dle roller of lower block block
2) Up through out- 5) Towards you side roller of lower through top roller of upper block block 6) Away through top roller of lower block 3) Down through middle roller of 7) Tie to becket of upper block with bowline upper block All boats: Install upper block to block hang- er on boom with 1/4” shackle. Install lower block to traveler with 1/4” shackle. 20 into the mainsheet cover for the last 8 to 12 inches. This can be done neatly by stitching with the weave of the braid so that your stitches do not show. Make sure the stitches go through the middle of the new core (trav- eler). Complete it by turning end of the mainsheet cover over the traveler sheet.
Jib Prindle 16 and 18 only: Tie “S” hook to the aft Prindle 15 and 16: half of the jib halyard. Thread loose end of mainsheet through trav- This can be left on eler cleat and fairlead (mounted on swivel permanently. Attach pedestal, rear crossbar), traveler car, and “S” hook to the head pad eye. Tie off with figure eight knot. of the jib with a 3/16” shackle. Hook open- ing must face toward mast.
Start the zipper around forestay wire and jib halyard line. The jib halyard is internal in the luff of jib.
Hoist jib up, closing sipper as you do until “S” hook just passes ring.
Slowly pull the jib back down at the Prindle 18: tack (forward lower Tie or splice 5/16” traveler line to loose end corner) until the hook of mainsheet and thread same as 15 and 16. is locked in place. Note: the opening on Complete mainsheet and traveler on Prindle hook should be 18 between1/4” to 3/8” for easiest operation. Complete mainsheet and traveler on 16 (same as 15) Unlock the brummel hooks from each other Tips on splicing from Leigh Martin: Cut the and store extra hal- bitter end of the mainsheet off with a new yard length in one of single edge razor. Pull out 8 to 12 inches of the pockets on the the center core and cut with a hot knife (or trampoline. tape, cut with a razor, and burn end). Put the end of this core up to end of traveler sheet and carefully sew them together, end to end with no overlap using a good, heavy dacron-polyester thread. Feed the core and traveler sheet back into the mainsheet cover until it is all smooth. Sew the traveler sheet 21 Lead jib downhaul line around shackle pin and cleat downhaul line snugly into cleat on jib tack.
Prindle 16 only: Attach two small pul- lies (attached to jib sheet line earlier) to foot of jib by leading each one around the front of the mast, one from each side. Put a 1/4” shackle through grommet in lower aft corner of jib (clew) and reattach pullies with Rigged boat ready to sail.
shackle pin. Make sure that Righting Line these lines are It is recommended not twisted. that you always Pull up slack carry a righting from line lead- line on your boat. ing between the A grommet and jib sheet blocks pouch are on the and trampoline. trampoline to facil- itate this. You will Prindle 18 only: need a line at least Tie jib clew blocks to sail clew rather than 14’ long and 3/8” with shackle. Use one of the 3/16” x 3’ 7” or 7/16” in diame- lines. Tie one block to each end. ter. Tie a figure eight knot about 9” from one end. Jib Sheet and Insert the tail Jam down through the Preventer grommet in tramp by the mast and tie Using the extra another figure eight knot on this end. You 7’ piece of might also find it useful to tie knots on the shock cord sup- line every few plied attach the feet so your wet center to the hands do not mast and tie slip when right- each end to dolphin striker bar on opposite ing the boat. sides of mast. Be sure the jib sheet is lead Coil the line and outside shock cord. This will keep the jib store it in a sheet from catching under mast base. pouch until 22 needed. Tightening the rig tension SECTION II: Sailing After the boat is completely rigged with sails up and mainsheet connected, it is time to Sail Trim tighten the rig. You should not attempt to To Weather do this by yourself or if it is windy until you have done it several times.
Turn the boat until the wind is blow- ing from a 45o angle to the bow. Ease the traveler out to the lee side and sheet the main in tight. Have your crew sit on the trampoline to keep the main- sheet from The main traveler should be centered with uncleating and the the main and jib sheets in snug. Be careful boat from tipping. not to pull the sails in too tight. If the main With the main is oversheeted (too tight), the mainsail will sheeted to lee- be too flat and the boat will not move very ward, the leeward shroud will be loose. fast. Move the shroud down a couple of holes on the adjuster, but not all the way down. If the jib is over- Replace clevis pin and ring. Loosen main- sheeted it will stop sheet. the air flowing between the leech Turn the boat so the wind is coming from the of the jib and the opposite side. Ease the traveler out to what mainsail. This gap is now the lee side and sheet in. The new (slot) between the leeward shroud will be loose. Move the jib leech and the shroud down to the corresponding hole in mainsail should be the adjuster as the first shroud. If the rig is about 12 inches still loose, move the shroud down one or two near the top of the more holes and repeat with the other side jib. until the rig is fairly tight and both shrouds are in the same hole on the adjuster. The jib tell-tale on the leeward and It is possible to over-tighten the rig which windward sides will make the mast hard to rotate. should be streaming back. If the windward tell-tale on the jib is flopping forward you When you take the boat apart, be sure to should head the boat downwind a little. If loosen one side only before taking the main the leeward tell-tale is flopping forward, you down. By leaving one shroud in the correct should head the boat into the wind a little, or hole, you will only have to tighten one side if you do not want to head up any further, let next time you go sailing. the sail out a little.
If you are not happy with the mast rake you have, simply lengthen or shorten the forestay turnbuckle. Be sure to leave at least 10 complete threads into each side of the barrel. 23 Reaching Downhaul Systems The luff of both the main and jib should be pulled down tightly to pull all the wrinkles out when sailing. You have to be quite strong to over- downhaul the mainsail, so give it a hard pull. You can easily over- tighten the jib downhaul, so just pull hard enough to get wrinkles.
Notice the diagonal The main traveler should be set a few inches wrinkles in the luff from center with the main sheet snug and of both the main the jib sheet slightly looser than used when and jib. Both sails going to weather. This will allow the dis- should be down- tance between the main and the jib to hauled until they increase. Both sails should be sheeted in so disappear. that both the leeward and windward tell- tales are streaming back. TRAPEZING Lacing the Harness Downwind Using bowlines, tie each of the lines supplied onto the bottom inside grom- mets. Lace back and forth loosely and tie a half hitch at the top out- side grommets.
Put the harness on. It should be slightly loose. Most people find a tightly laced harness uncom- fortable. Slip the web- bing over your head. Feed the lines through the webbing grommet Let the main traveler all the way out to the from the backside, then end of the crossbar and sheet the main feed one through each loosely. Do not let the main out far enough backside of top grom- to rub against the shrouds if at all possible. met near hook. Tie Trim the jib sheet loosely trying to keep the ends together using an windward and leeward tell-tales streaming overhand knot. Do not back. use a square knot. The webbing over your If your boat is equipped with a barber hauler, shoulders should fit see Section V - Tuning for Performance for tightly. The tighter it is instructions regarding its use. the more it will support your back and shoul- ders. 24 Trapeze Positioning We recommend that you practice going out on the trapeze on shore before you try it while sailing.
Before hooking up, pull the dog bone down and see if it will reach the trampoline. The lowest ring should almost reach the outside edge of the trampoline. If it does not, adjust the length using the height adjuster.
Sit on the side of the hull just forward of the Now bring your aft leg out and put that foot shroud. Pull the dog bone down and hook on the rail. Slowly straighten your legs out, the uppermost ring onto the harness hook. keeping your feet two feet apart. Lean back! Do not hold onto the handle as you could unhook yourself.
Lean back until you are being supported by the trapeze wire. Hold the jib sheet in your back hand. When trapezing on a reach, move your weight back on the hull to keep the bows up.
LAUNCHING Always launch with your bows into the wind. There are two basic wind conditions that will affect the way you launch:
Onshore - (wind blowing from the water towards the land)
Bring your forward leg out, put foot on rail. 25 Offshore - (wind blowing from the land As soon as water is deep enough, drop and towards the water) lock both rudders, bring traveler to center and sheet in main. You’re off! Before leaving the beach, make sure that the rudders are up all the way, the main traveler This method can be used when very light off- is out all the way, both sheets are loose and shore winds are blowing. Otherwise use the the hiking stick is on the windward side of following method. the boat.
Offshore Onshore
Look to make sure it is totally clear where Push the boat off at a 45 to 60 degree angle you will be backing. to the wind until it floats, jump on and sheet in the jib (only) tight. (Do not sheet in the Walk boat out backwards until it is floating. main yet.) This will pull you out at a good Give boat a big shove and jump onto the angle until you can safely drop your rudders. bows. Keeping the transoms out of the 26 water, have the crew hold jib clew out as far forward as necessary to fill jib with air and keep boat moving backwards. Keeping the transoms out of the water will keep the boat moving straight out. When you are far out enough (usually about 100 feet) let the jib go, move to the proper sailing positions, drop rudders down, sheet in both sails and go.
TACKING The skipper should now move aft, into the Before starting your tack, be sure you are center, and swing the hiking stick to the new sailing to weather with good speed (sheeted side. Do not straighten the rudders out. If in and traveler centered). Do not attempt to you do, you will find yourself into “irons” tack while sailing on a reach. (boat pointing directly into wind making no headway).
Make a smooth turn to windward using about one half the amount of rudder throw. Leave the jib cleated until the boat is on its Turning the rudders too sharply will stall the new heading. When the main “pops” to the boat and bring it to an abrupt stop. new side, release the jib, bring it across quickly and sheet in. Keeping the jib on the windward side is called “backwinding”. It helps pull the bows around until your tack is completed.
When the bows are pointing into the wind, release the main sheet 1 or 2 feet. Leave the jib cleated.
While the crew is sheeting in the jib, the skipper should be sheeting in the main and moving to the proper position on the wind- 27 ward side of the boat. Tack is now complet- ed.
NOTE: If you end up “in irons” you will start to drift backwards. While sitting on the weather hull, uncleat the main and push the boom to leeward. Backwind the jib and push the tiller away from you. This reverses the rudders and allows the boat to sail back - wards. Leave them reversed until the bows are pointed in the direction of a close reach. Release the jib, straighten the rudders and When boat is heading straight downwind, sheet both sails in quickly. grab the sheets between the main blocks and pull the sail across. BE SURE TO KEEP LOW AS THE BOOM CROSSES THE BOAT. JIBING When sailing downwind or on a broad reach you must jibe. To do so, first check new direction to be sure it is clear of other boats.
The skipper should move aft and to the cen- ter of the boat while turning the rudder about 1/3 of the full throw.
Swing the hiking stick to the opposite side, placing the end aft of the rear beam and for- ward of the tiller arm. Keep the rudders turned by holding onto the tiller crossbar. When the main fills on the opposite side it may “snap” across so be ready for it. Have your crew bring the jib to the new side. Move to the side of the boat and pick up the hiking stick.
BALANCE Your Prindle Catamaran will sail faster and easier if it is sailed on its “lines” so that the water flows across the hull as it was designed to do.
28 be between 6 and 12 inches out of the water and the weather hull will just touch the water. The idea is to sink the leeward hull deep into the water, thereby using the hull to reduce side slippage.
RIGHTING Even the best sailors flip occasionally, so pre- pare your boat for the inevitable. Install a Note how the transom is almost under water righting line according to instructions in and the bows are very high. The sailors are Section I - Assembly. too far aft - MOVE FORWARD! The boat will lose speed as it raises up on one hull and usually flips over slowly. Sit down on the flat surface of the hull.
Bows are too low and transoms are too high out of the water. Sailors are too far forward - MOVE AFT!
Ease yourself down to the bot- tom hull using the mast as a step.
Trim fore and aft here is good, but there is too much weight on one side for the light air. Move the crew to the middle or leeward side.
It is important to get off the top hull quickly to prevent the boat from turning upside down (turtle). Do not jump off the boat as current and wind may not allow you to When balance is proper, the leeward bow will return to it. 29 ing your boat, The skipper carry your jib bag should uncleat on board. Grab the main while onto the righting the crew uncleats line, scoop up a the jib. bag of water and hold it over your The crew should shoulder while reach around the leaning back. This front crossbar for extra weight the righting line should allow you and throw it over to right the boat. the top hull. Make sure the An alternative bows are pointing method is to tie a into the wind. loop in the end of the righting line
and attach the If the mast is loop to your tra- pointed into the peze harness wind, the boat hook for more may flip over in leverage. the other direction as you try to right Once the tip of it. To swing bows the mast comes around into the out of the water, wind, walk back the boat will right towards the tran- quickly. Be sure som slowly until to hold onto the bows are posi- righting line until tioned properly. you can grab the boat and pull yourself up. The boat will now be Be careful not to pointing directly into the wind and moving shift your com- slowly if at all. Stow the righting line back in bined weight too the pouch and you are sailing again! far forward or aft as this may cause the boat to roll REEFING and turn “turtle”. Unlock the main halyard and lower the main- sail down about 4 feet. Lock the lower metal Standing even stop on the halyard wire into the halyard with the front lock on the mast. The sail should now be crossbar, the about 4 feet short of being fully hoisted. skipper and crew Downhaul the luff using the ring in the reef should grab the patches. righting line and lean backwards. Knots in the line help keep your hands from slipping. If you are single-hand- 30 hole in adjuster, insert pin and ring and uncleat the main. You do not need to loosen the other shroud. Leave it in the proper sail- ing position and you will know where to place the loosened shroud the next time you go sailing.
Lowering the sails Point your bows into the wind. Uncleat the main downhaul and disconnect the boom Attach the outhaul car to the aft ring. from the mainsail. Starting with the bottom batten, roll the extra sail up and tie with two 2 foot pieces of To lower the jib, uncleat the jib downhaul. line using the reef points (grommets) in the Rehook the jib halyards together with brum- sail. Do now tie around boom. mel hooks. Hoist the jib slightly until “S” hook is just above the ring and quickly pull the jib down by the tack.
NOTE: If the jib does not lock or unlock the first time, try again. Remember the hook must face aft and to hoist the “S” hook just above the ring. Pull down slowly to lock and quickly to unlock.
Lower the jib and tie the jib halyard at the base of the mast. Use the downhaul cleat for this purpose. Pull the lines tight to keep them from flapping while trailering. Leave zipper open with the zipper car at the head of the sail. If it is allowed to go to the bot- tom, it may fall off.
Reefed sail on a Prindle 16.
SECTION III: AFTER SAILING
Loosening the rig Before you lower your sails, you must loosen the rig tension using the mainsheet and trav- eler method (explained in Section I - Assembly). With the wind coming from the bow at a 45 degree angle, travel the main all the way out to the leeward corner. With the crew sitting on the trampoline, sheet the main in tight. The lee shroud should become loose. Fold the jib in half and start rolling from the Move the shroud up to the second to the top middle. 31 Roll tightly without (below the shrouds) 3 or 4 times. Cleat off any folds. If it is using the main halyard cleat. windy, put the jib under the hiking strap to keep it from blowing away while you lower the main.
To lower the main on the Prindle 15 and 18, hoist the mainsail up as far as possible and rotate mast away from sail to unhook main hal- yard. This rotation should be towards the side of the mast that the hook is riveted onto. The object to turn the headboard and ring away from the hook enabling the sail to be lowered past the hook.
NOTE: The best way to do this is to have one person pull the sail up and rotate the Roll the main starting with the second or mast using the rotator wishbone while some - third batten from the top. Roll smoothly and one else pulls the clew of the mainsail in the tightly. Stop when you get to the next to opposite direction than the mast is rotated. the last bottom batten. The person hoisting the sail lets the halyard go and pulls down on the tack while keeping the mast rotated.
Once the sail has dropped a couple of inches below the hook, let the clew and rotator go and drop the sail.
NOTE: Be sure to have a knot tied in the end of the halyard to keep it from going inside the mast.
After the main is down, attach the twist shackle to the rotator bar and pull the main halyard firmly and tie off.
To lower the main on the Prindle 16, hoist the mainsail up as far as possible and it should release from the halyard lock. Let the sail drop.
After the main is down, store the shackle in the curf on the mast, pull firmly on the main Insert the rolled jib and continue rolling. halyard and wrap the line around the mast 32 Trailering
Wrap and tie downhaul line around rolled sails.
Place the boat on the trailer. Tie the boat down using at least 1/4” nylon or dacron line. DO NOT TIE ANYTHING TO THE DOL- PHIN STRIKER OR ROD. Remove the rudder blades from castings. Be sure they are marked port or starboard so you don not Place sails in long mainsail bag. Your jib bag have to retune them the next time you go can now be used to carry other miscella- sailing. neous items.
We strongly recommend that you store your sails in this manner rather than folding them as they will last much longer.
Attach mast hinge to the mast. With one person on the trampoline, push the mast for- ward and disconnect the forestay shackle. DO NOT undo the turnbuckle. Rig shackle so it holds the two bow bridle wires together. Unfasten the lower main block from the trav- Check in back of boat to make sure you will eler car and the traveler line. Tie the out- not be lowering the mast onto a person, car, haul line tail to the lower main block shackle or power line. and coil the excess mainsheet. This keep everything from becoming tangled in stor- CAUTION - Extreme caution must be age. observed when launching and sailing near overhead wires. A mast near a 33 wire could be fatal! support on the trailer. Store hinge in down position.
Place the top of the mast in the rear mast support making sure the mast does not extend beyond the rudder castings. Trailer the Prindle 15 and 18 with curf up to prevent damage to rear support padding and mast. DO NOT trailer with the Prindle 18 mast on its side. The bouncing will put excess shock loads on the spreader assembly. The second person should move to the back to catch the mast as it is lowered.
Secure the mast and support to the boat by wrapping the tie down line around the mast twice and down through the trampoline grommets. Store the tiller under a hiking strap or jib lead line to keep it from flapping around. Tie a 3 or 4 foot piece of line to the traveler pad eye, around the tiller crossbar twice, and through the fairlead and cleat. This will keep the rudder castings from swinging. Tie the front end of the mast down making sure to wrap line twice here also.
There are several ways to store your rigging while trailering. Here are two popular meth- ods.
While the second person holds the mast, remove the hinge pin and walk the mast for- ward until you can place it in the front mast 34 #1 Tie a 6 foot line to the front mast sup- Pull the jib sheet snug and cleat each side. port. Bring all shroud and trapeze wires for- Store the extra line in the halyard pouch or ward to the front support and tie the line loop around hiking straps. around them.
SECTION IV: Maintenance
Dolphin Striker The single most important maintenance pro- cedure is done on the dolphin striker. This MUST be kept snug at all times with no play between the vertical rod and the bar. Think of the dolphin striker as the backbone of your boat.
Lace the forestay through the back lace lines 2 or 3 times. Store trapeze dogbones under trampoline to keep them from banging around. You may wish to tie the wires up off the front crossbar to keep them from rubbing on a long trip with a line over the mast.
To test the snugness of your dolphin striker, grab the aluminum bar between the side and the rod, push up and then pull down. If you can #2 This method is not recommended if the move it more than boat is stored outside during the rainy sea- 1/4” you must son. Remove both hatch covers and feed tighten the rod. shrouds and trapeze wires into each hull. Store forestay as in method #1. To tighten the rod, first loosen With any method you use, the important the nylon mast thing is to keep all rigging separate and tan- bearing (half- gle-free. round ball on top of mast step). Store the jib sheet by tying or shackling the jib clew blocks to the bow bridle shackle. 35 Loosen screw at Loosen battens when storing the sail for bottom of striker more than a few weeks or during extreme rod. temperature changes. This relieves pressure on the sail and battens and will preserve the Turn dolphin life of both. striker rod clock- wise using a Foam/Fiberglass Battens wrench and the Race equipped Prindle 16 and 18s and all flat spot on the Prindle 15s are equipped with foam/fiber- rod designed for glass battens. These battens are much soft- this purpose until er and more fragile requiring more care. the bar is snug again. Occasionally, a delamination may occur at the tapered end where the foam narrows Retighten the towards the tip. To repair, spread the glass nylon ball and and foam apart slightly and coat with 5- screw. minute epoxy, clamp tip together, and let harden. This repair should be stronger than The bolts that new. connect the striker bar to the Take care when rolling a sail with foam bat- front crossbar tens. If the sail is rolled unevenly and bat- should be loos- tens are allowed to twist they will hold the ened occasionally twist. This may hamper your sail shape. to check for You can however, remove this twist by cracks in the removing the batten from the sail and twist- crossbar. If ing it in the opposite direction and holding it cracks are appar- for a moment or two. The batten should ent, the crossbar spring back fairly straight. should be replaced. There is a back-up GENERAL MAINTENANCE TIPS plate inside the After your second sail on your Prindle crossbar so these Catamaran and periodically thereafter: bolts can be tightened easily 1) Tighten the 8 crossbar bolts. This is from the outside. Again, do not overtighten, very important as most of the strain on since the bolts could snap. the boat is concentrated on these bolts.
2) Check all shackles (shrouds, forestay, BATTENS etc.) and other fasteners (including nuts Prindle 16 and 18 Catamarans are equipped and bolts on blocks and cleats). Tighten standard with solid fiberglass battens. These where necessary. are virtually unbreakable but do require some attention. 3) Check all hardware attached to hulls (bow tangs, shroud pins, gudgeons) for tight- Make sure that battens are inserted all the ness. Do not over tighten. way into the batten pocket with tapered end inside the stop at the luff of the sail. If it is 4) Cut off excess length on solid fiberglass not, the batten may tear the sail. The bat- mainsail battens leaving 1-1/2” past aft tens should extend about 1-1/2” past the edge of sail. end of the batten pocket. You may wish to trim them to this length. 36 Hulls Outhaul System Check for leaks at all hull fittings by covering The Prindle 18-2 and 19 boom is equipped these areas with detergent and blowing air with an internal 4:1 outhaul system with (from your lungs) into drain plug hole. DO shock cord load return. Shock cord tension NOT USE A VACUUM CLEANER AS THE can be tightened simply by pulling some EXCESS PRESSURE CAN DAMAGE THE corder out of the boom at the front end of HULLS. If detergent bubbles, there is a leak. Remove fitting and cover area with clear sili- cone sealant and replace.
Rudders Rub paraffin on the inside of casting where blade slides to ease operation. To fine tune: remove uppermost bolt on casting and paraf- fin. If there is slack between sheaves add a washer on nut end of bolt. Insert and tighten. This will help keep lines of sheaves. Remove bolt which holds top of spring and rub with paraffin. If rudders do not kick up tieing a new know. DO NOT LET THE SHOCK easily: pull spring to loosen tension and CORD GO! To relead the shock cord you replace bolt. Paraffin lock pin. Sand all must disassemble the entire aft end of the rough edges on blades lightly. Always boom. DO NOT REMOVE the small clevis pin remove blades for trailering. in the outhaul car unless you need to remove the internal workings of the outhaul system.
Sails Rub paraffin on the luff of mainsail to ease hoisting. Sail tape should be applied to bat- ten pockets where it hits shrouds to avoid chafe. Always fold your jib and store it in the envelope bar or roll it - DO NOT JUST STUFF IT IN BAG. Roll your main front the third batten (from top) to your boom and store in long boom bag. Storing your sails will greatly lengthen their life. Rinse the fresh water whenever possible.
NOTE: Howe and Bainbridge, Inc., the man- ufacturers of our sail cloth have sent us the following memo which we felt was important enough to pass on to you. -- To prevent color transfer on your sails, dry them as thoroughly as possible after using. Try not to store wet in sailbag for any longer periods of time than necessary. When either dyed nylon or dacron sail fabrics are stored wet, the color will bleed or transfer form the colored to the white or even from a darker shade to a lighter shade. The wetter and more compressed the fabric, the greater the bleeding - such as stuffed in a sailbag. -- 37 SECTION V: BARBERHAULER TUNING FOR PERFORMANCE A barberhauler sys- tem works like a Mast Rake: traveler for the jib To measure the amount of mast rake, your and is used for mast must be up with your rig tension snug. broad reaching and Lay a carpenter’s level on the trampoline just downwind sailing. aft of the hatch. Adjust the boat until it is It is optional equip- level fore and aft and relatively level from ment. This system side to side. Attach a one or two pound is generally used to weight (a heavy wrench will work) onto the get that “extra main halyard. Using the main halyard as a edge” while racing plumb, measure the distance from the aft and is not neces- edge of the mast at the black band to the sary for pleasure center of the plumb. This distance is how sailing. The bar- much mast rake you have. We recommend berhauler will pull between six and ten inches of aft rake. You the clew of the jib may find that you prefer slightly less or out to the end of more. the front crossbar which will give it a slightly better shape and make it easier to trim properly.
FOUR-WAY JIB SYSTEM The optional four-way jib system has a few basic positions and infinite options in between. Use these basic guidelines to dis- cover your preferences.
The four and aft track: Set at center position for light to medium air. MAST ROTATION Set at aft position for heavy air. The Prindle 15 and 18 come equipped stan- dard with an adjustable mast rotation control To side to side lead: (wishbone device on the mast). For most Set at 8” inboard in light air. sailing this rotation should be set between Move position outboard as wind picks up 60 and 75 degrees from straight back. A until lead is about 2 to 5 inches inboard good rule of thumb is to have the wishbone when you are a little overpowered. pointing at the shroud when you are sailing You may find in certain downwind conditions to weather. As you ease the traveler out, that having the barberhauler (option and the rotation will automatically increase so seperate from the four-way jib system) all that it should be between 80 and 100 the way out is too far for proper wind flow. degrees for downwind sailing. When sailing In medium to heavy conditions setting the to weather, an increase in rotation will flatten barber 8 to 15 inches from fully outboard is the mainsail and less rotation will make the optimum. mainsail fuller. SECTION VI: SUPPLEMENTAL INFORMATION
GLOSSARY OF TERMS
Aft ...... toward or near the rear part of the boat Asymmetrical . . . . not symmetrical. On Prindle hulls - flat on one side, curved on the other Batten...... thin, narrow strip of material used to stiffen the shape of a sail Beat ...... to sail to windward Block ...... roller or pulley Boom...... aluminum tube that holds the foot of the mainsail and attaches to the mast Bow ...... the forward part of the hull Capsize ...... to turn the boat over Cleat ...... device which secures a line or rope by jamming or tying off Clew ...... lower, rear corner of sail Closed Hauled...... sailing close to the eye of the wind Crossbar ...... aluminum tube connecting two sides together Curf ...... grove in boom, mast or crossbar Diamond Wire ...... wire that attaches to mast and spreader to control mast bend Downhaul ...... line used to pull down the tack of a sail Downwind...... sailing away from the wind Eye of the Wind ...... exact direction the wind is blowing from Foot ...... bottom edge of sail Fore & Aft ...... from the bow to the stern Forestay ...... forward wire supporting mast Gooseneck ...... fitting connecting the boom to the mast Grommet ...... metal ring set into a sail Gudgeon...... fitting bolted through transom of hull for attaching the rudder system Halyard ...... line or wire used to hoist and lower sail Harness ...... a support worn while hooked to trapeze wire Head...... top of sail Head Off ...... to steer the boat away from the wind Head to Wind ...... also referred to as “in irons” - pointing the bows directly into the wind Head Up ...... to steer the boat into the wind Helm ...... tiller which controls the rudders Hike ...... to position weight as far as possible to windward Hoist ...... to pull up In Irons...... heading directly into the eye of the wind, unable to tack or go forward Jibe ...... also gybe, to change course of boat without tacking Lee ...... side falling away from the wind Leech ...... back edge of sail Lee Helm ...... tendency of boat to turn away from the wind Leeward ...... side away from the wind Line ...... rope Loose Footed ...... mainsail not held to a boom for its entire length Luff ...... leading edge of sail, or flagging of sails due to improper trim or heading Mast ...... aluminum tube used to support sails Mast Rake . . positioning the top of the mast fore and aft in relation to straight up and down Outhaul ...... system used to pull clew of mainsail away from the mast Pintel ...... pin which holds rudder casting onto gudgeons Port ...... the left side Reaching...... to sail across the direction of the wind Reefing ...... to reduce sail area 39 Rigging...... lines, wires and spars used for support and operation of mast and sails Rudder ...... wing shaped devies used to steer the boat Shackle ...... “U” shaped fitting with removable pin used to fasten lines or parts together Sheaves ...... roller or pulley Sheet...... lines used to control sails Shroud ...... wires on each side of boat supporting the mast Spreader ...... strut projecting from side of mast to brace diamond wire Starboard ...... the right side Stern ...... back of hull Tack...... to turn the bow by having the bows cross through the eye of the wind, ...... or lower forward control of the sail Tell Tale. . short pieces of ribbon or yarn attached to sail or rigging for reading wind direction Tiller Extension ...... device which controls rudder steering Trampoline ...... material stretched between hulls and crossbars to sit on Transom ...... aft most end of the boat Traveler ...... “car” which rolls width of rear crossbar Trim...... to adjust sheet tension, or to balance hulls in water ...... so they function to maximum efficiency Turnbuckle ...... threaded fitting for adjusting wire length Upwind ...... to sail into the wind Weather ...... to sail to windward Windward ...... side toward the wind
GLOSSARY OF KNOTS
Figure eight
Truckers hitch
Cleat half hitch Bowline
Reef knot or square knot
Two half hitches Double overhand knot
40 Masthead Head
Batten Diamond Wire Luff
Spreader (18) Mainsail Forestay
Jib (16 & 18) Clew Tack Boom Foot Bow Front Crossbar Tiller Mainsheet
Rudders Shroud Trapeze Wire Waterline Transom Keel Rear Crossbar
- {{>productsMenu}} Products
- {{>trendsMenu}} News & Trends
- Catalogs >
- Nacra Sailing >
- Nacra prindle 18 19
- News & Trends
- Exhibitions
Nacra prindle 18 19 41 Pages

Catalog excerpts

INTRODUCTION This owner’s manual is provided to ease assembly, maintenance and use of your Prindle Catamaran. We believe these instructions portray the simplest methods. Do it our way the first time and learn from us. Then, if you discover a better method, feel free to tell us about it by faxing (714) 541-6643 or e-mailing [email protected]. You may see your idea appear in the next edition of the owner’s manual. We are sure you will enjoy your Prindle Catamaran and hope that this manual will make your enjoyment easier to come by. Make sure you join the Prindle Class Association - it’s...

Prindle 18-2 & 19 Owner’s Manual Section I: ASSEMBLY Preparation Tools needed: large screwdriver pliers needle-nose pliers 1/2” offset wrench combination 1/2” & 9/16 box-end wrench adjustable wrench silicone sealant Your Prindle Catamaran comes packaged in two hull containers, one large hardware box and one mast box. Place the two hull containers approximately 6 feet apart with stapled seams at the top of the Open the hardware box and familiarize yourcartons facing each other. This will insure that self with the major parts of your boat. The contents of the hardware box should include: both...

If the 3/88” bolts bind at all, remove the bolts and check fit of bolt without the beam on. DO NOT force bolts as you could strip out the aluminum plate inside the hull. If the bolt continues to bind, use a 3/8-16 tap and rethread the hole to rectify the problem. Tighten all rear beam bolts until about 1/8” from being fully snug. This allows beams to properly align themselves. Snug down all 8 bolts and then tighten all 8 bolts. Lay both the front and rear cross bars on the hulls with the outside edges even with the outside edges of the hulls. The curf (groove) on the front crossbar should...

The trapezes are continuous from one hull to the other. TRAMPOLINE Lead trapeze shockcords before putting trampoline on hulls. Tie one piece of 1/8" x 2’ paracord to one end of shock cord using a small bowline knot. If one of the fairleads should come loose during assembly, simply apply some silicone sealant and push into place. To install the trampoline, first unzip and remove the rear section. Slip the front of the trampoline onto the front crossbar. Feed the line through the white fairlead on side of hull and out the other side. Continue across to the other hull and repeat procedure. 5

Center the trampoline in the front. Lace up the back of the trampoline with 1/4" x 19’ lacing line. Begin by tying a double overhand knot in one end of the line and thread through the right/aft grommet. Slide the sides down each side of the trampoline track. Two people are needed here. Slide the rear piece and zip the two pieces together. 6

Always tighten rear lace line first. Stand at the back of the boat and tighten lines by bracing your foot or knee on the rear crossbar for leverage. Pull tight. Tie line off under trampoline. Do not trim excess line as it leaves something to hold onto when re-tightening trampoline. Tighten starting at the front. Complete lacing. Lace up the side of the trampoline with 1/4" x 19’ lacing line. Begin by tying a double overhand knot in one end of the line and thread through the forward/inboard grommet. 7

STANDARD JIB SYSTEM Attach jib adjuster plate to both sides. Attach jib block to padeye on side jib tracks. Note: there will be an aluminum cleat on the deck just forward on the jib track, this is for future addition of the 4-way jib system as is the "sock" on the trampoline. Attach jib crosswire to adjuster plate, leading wire through the tramp sock, choosing one of four middle holes on each side so the wire is snug. NOTE: You may find it necessary to remove the plate to put the "O" ring on the clevis pin. DELUXE 4-WAY JIB SYSTEM The parts are included in a separate bag. Attach the small...

Shackle the jib blocks to each of the two bullet blocks on the crosswire. Adjust the cleat angle as high as possible using the side set screws. Most people prefer this position. The jib blocks have a ratchet which can be turned off and on by using the button on the side of the block. Tie each 1/4" x 8 1/2’ line completely around the jib block shackle – not through. Lead the line around the bullet block on the adjuster plate and through the aluminum cleat on the opposite side of the boat leading line through the trampoline sock. 9

Lead the shockcord through both loops in the lines around jib shackles and tie shockcord together. Slide the knot into the sock to hide from view. Entire 4-way system completed. JIB SHEET Tie a 1/4" shackle to the middle of the 3/16" x 6’ line provided. Tie the small jib clew blocks to each end of the line using a small bowline. Thread the 5/16" x 33’ jib sheet line by tying off one end to jib ratchet block with a bowline. Thread through small jib clew blocks, through cleat of jib block, across trampoline and through opposite jib block in opposite direction. Jib sheet should be one...

RUDDER SYSTEM TILLER CROSSBAR Remove cradles out from under hulls and peel off protecting paper from Prindle logo on hull. Open rudder box, it should contain: left & right rudder castings with tiller arms and complete workings installed, and two rudder blades with lock pins attached. To attach tiller crossbar to tiller arms, remove 1/4" bolt, washer, and lock nut from end of tiller arm. Place tiller crossbar over tillers with large hole at end facing up and end cap pop rivet facing aft. Drop 1/4" bolt down through crossbar, putting washer between tiller crossbar and tiller arm. Insert 1/4"...

Tiller extension should be able to touch trampoline easily. If it does not, the tiller crossbar has been installed backwards. The rudder lock bolt is on the forward edge of each rudder blade. It is necessary to adjust this bolt to obtain proper helm. Making the bolt longer produces more weather helm (heavy steering) and shortening the bolt decreases weather helm (easier steering). RUDDER BLADES ADJUSTING HELM To install rudder blades into rudder castings, untie ends of downhaul and uphaul lines in castings, but do not unlace. Remove 1/4" bolt with lock nut. Place rudder blade between...
All Nacra Sailing catalogs and brochures

2 Pages

1 Pages
Archived catalogs

73 Pages

4 Pages

40 Pages

34 Pages
Related Searches
- Sport catamaran
- Multiple sport catamaran
- Recreational sport catamaran
- Double-handed sport catamaran
- Asymmetric spinnaker sport catamaran
- Regatta sport catamaran
- Single-handed sport catamaran
- Double-trapeze sport catamaran
- Instructional sport catamaran
- ISAF sport catamaran
- Coastal racing sport catamaran
- FRP sport catamaran
- Formula 18 sport catamaran
- Resin sport catamaran
- Foiling sport catamaran
- Carbon sport catamaran
- Manufacturer account
- Buyer account
- Our services
- Newsletter subscription
- AboutVirtualExpo Group
- Performance Catamarans Manuals
- Prindle 18-2
- Owner's manual
Performance Catamarans Prindle 18-2 Owner's Manual
- page of 41 Go / 41
Table of Contents
- Preparation
- Deluxe 4-Way Jib System
- Standard Jib System
- Tiller Crossbar
- Tiller Extension
- Rudder Blades
- Rudder Lock Bolt
- Adjusting the Helm
- Rudder Alignment
- Diamond Wires
- Main Halyard
- Hoisting the Mainsail
- Mainsheet and Traveler
- Righting Line
- Tightening Rig Tension
- Downhaul Systems
- Trapeze Positioning
- Loosening the Rig
- Lowering the Sails
- Dolphin Striker
- Foam/Fiberglass Battens
- Outhaul Systems
- Mast Rotation
- Barberhauler
- Glossary of Terms
Advertisement
Quick Links
- 1 Deluxe 4-Way Jib System
- 2 Rudder System
- Download this manual
Summary of Contents for Performance Catamarans Prindle 18-2
Page 2: table of contents, page 3: preparation.
- Page 4 If the 3/88” bolts bind at all, remove the bolts and check fit of bolt without the beam on. DO NOT force bolts as you could strip out the alu- minum plate inside the hull. If the bolt con- tinues to bind, use a 3/8-16 tap and rethread the hole to rectify the problem.
Page 5: Trampoline
- Page 6 Center the trampoline in the front. Lace up the back of the trampoline with 1/4" x 19’ lac- ing line. Begin by tying a double overhand knot in one end of the line and thread through the right/aft grommet. Slide the sides down each side of the trampo- line track.
- Page 7 Always tighten rear lace line first. Stand at the Tighten starting at the front. back of the boat and tighten lines by bracing your foot or knee on the rear crossbar for leverage. Pull tight. Tie line off under trampo- line.
Page 8: Standard Jib System
- Page 9 Shackle the jib blocks to each of the two bul- The jib blocks have a ratchet which can be let blocks on the crosswire. turned off and on by using the button on the side of the block. Adjust the cleat angle as high as possible using the side set screws.
Page 10: Jib Sheet
Page 11: rudder system, page 12: rudder blades, page 13: rudder alignment.
- Page 14 CAUTION!!!! Check for overhead wires before raising mast. A mast which comes in contact with electrical powerlines can cause serious injury or death. Prindle 16 mast step hinge in use Prindle 15 mast step hinge in use...
- Page 15 Stand on trampoline with one foot on rear crossbar to steady yourself. Prindle 18 mast step hinge in use...
Page 16: Diamond Wires
- Page 17 Be sure to tape the locking nuts on turn- buckles after you have adjusted the wires so that they will not unturn. SAILING NOTE: The looser the diamond wires are the more the mast will bend and the flatter the sail will become (and vice versa).
Page 18: Main Halyard
Page 19: boom, page 20: downhaul, page 21: jib, page 22: righting line, page 23: tightening rig tension, page 24: reaching, page 25: trapeze positioning, page 26: onshore, page 27: tacking, page 28: balance, page 29: righting.
- Page 30 ing your boat, The skipper carry your jib bag should uncleat on board. Grab the main while onto the righting the crew uncleats line, scoop up a the jib. bag of water and hold it over your The crew should shoulder while reach around the leaning back.
Page 31: Section Iii: After Sailing
- Page 32 Roll tightly without (below the shrouds) 3 or 4 times. Cleat off any folds. If it is using the main halyard cleat. windy, put the jib under the hiking strap to keep it from blowing away while you lower the main. To lower the main on the Prindle 15 and 18, hoist the...
Page 33: Trailering
- Page 34 support on the trailer. Store hinge in down position. Place the top of the mast in the rear mast support making sure the mast does not extend beyond the rudder castings. Trailer the Prindle 15 and 18 with curf up to prevent damage to rear support padding and mast.
Page 35: Section Iv: Maintenance
Page 36: battens, page 37: hulls, page 38: mast rake, page 39: glossary of terms.
- Page 40 Rigging..lines, wires and spars used for support and operation of mast and sails Rudder ......wing shaped devies used to steer the boat Shackle .
- Page 41 Masthead Head Mast Leach Batten Diamond Wire Luff Spreader (18) Mainsail Forestay Jib (16 & 18) Clew Tack Boom Foot Front Crossbar Mainsheet Tiller Rudders Trapeze Wire Shroud Waterline Transom Keel Rear Crossbar...
This manual is also suitable for:
Rename the bookmark, delete bookmark, delete from my manuals, upload manual.
- Sign In or Register
- Boats for Sale
- Research Boats
- Sell a Boat
- Search Alerts
- My Listings
- Account Settings
- Dealer Advertising
Prindle Boats for sale

1993 Prindle 19 MX
Cornelius, North Carolina
Make Prindle
Model 19 MX
Category Sailboats
Posted Over 1 Month
1993 Prindle 19 MX This Prindle 19 includes trailer, trailer box, mylar sails, racing battens and harken fittings. It is ready to sail. The sails are in great shape. Call for more information.

1987 Prindle 19-2
Casa Grande, Arizona
1987 Prindle 19-2,PRINDLE 19-2, WHITE HULLS, Trailer, CAT BOX, Cat Trax, Great to Good shape. Double Trap. All White sails, trap harness, spare parts includeing shrouds and fore stay. This Cat is like a Rocket Ship on Water! No Dealers please. email; [email protected] $3500, 5205606111

Prindle 16 Sailing Catamaran and Trailer, customized for fast rigging
Monroe, New Jersey
Category Catamarans
Length 16.0
Prindle 16 Sailing Catamaran and trailer, highly customized, many spare parts. At a glance:Clean Title for the boatClean Title for the trailerEverything is new - tons of money invested, see below.Boat and trailer are modified to save 40 minutes on rigging, see below.Trailer is modified to keep car away from salt water, see below. About Prindle 16 Prindle 16 has slightly larger hulls compared to the Hobie Cat 16, and tends to have more buoyancy and is often recommended for novices. Prindle is a tough boat and doesn't have the famous Hobie Cat weak spots where the hulls rot. Parts are readily available from online retailers This is a very fun boat with 1-4 people. I've clocked 20+ mph on it in the Keyport area and I have never sailed anything before and have had no instruction. I've even sailed with it overnight (island camping). About THIS Prindle 16 The boat and trailer have been modified to reduce the setup time. Prior to modifications it took me about an hour to rig the boat and get it ready to launch. After modifications, it takes me less than 20 (and I'm always doing it alone). Modifications include: Boat is on trailer backwards so that the rudders stay on.PVC rudder supports to prevent rudder damage.Quick-Release forestay (shackle rated for 2500lbs), quick-release boom, etc (no D-rings)Shrouds always stay on because the boat is backwards on the trailer.I use micro bungees for batten ties, they stay on.The only setup is therefore: raise mast, clip in boom, raise sails.Longer trailer tongue keeps your car away from salt water. Maintenance and Repairs - Boat (Starting with the Initial reconditioning after purchase)2012: New trampoline from Slo Sail and Canvas, Tanara UV-resistant thread and pocket upgrades. Should last for decades even in direct sunlight. ($480)2012: New PVC-coated rigging (all of it) from Salty Dog Marine ($150)2012: New Lines (all of them) from Salty Dog Marine ($125)2012: Minor sail repairs using dacron cloth and UV resistant polyester thread.2012: All new batten pockets (main sail)2012: All new fiberglass battens (main sail) ($50)2012: Bridle bow tang (stainless steel), new2012: Main cam cleat ($30)2012: New tell-tails, new sheaves for mast, many small hardware upgrades.2012: Minor punctures in hull repaired with marine epoxy (3mm or smaller)2012: Designed an integrated righting pole system (8 foot pivoting pole). Can't right the boat in the water without it, it's too heavy.2013: Added quick-release pins for everything - main to boom, boom to mast, etc.2013: PVC hiking stick, about 8' long.2013: New hull plugs and drain plugs.2014: New downhaul block Maintenance and Repairs - Trailer2012: new wheels and tires2012: Cold galvanized the whole thing.2012: all new LED lights: rear, sidemarkers, license plate, all new wiring with 12AWG ($150)2012: new trailer jack (with caster) ($30)2014: Custom built telescoping trailer tongue extender to keep the tow vehicle away from salt water. Extends trailer 4 feet, made out of 11 gauge steel. New coupler.2014: New galvanized axle, bearings, seals, etc. Old axle was rusted beyond repair. 2014: Brand new Bearing Buddies on hubs. Current ConditionSails are good and have no tears. Jib has a couple of teeth missing on the zipper but it works fine.Trailer is 100% with new axles, wheels, lights, coupler, etc.Boat is 100% with new everything, though looks a bit dirty due to the plankton in Keyport Bay and a few off-color epoxy spots.No repairs are needed at this time. You are welcome to arrange to inspect the boat. I'm available most days by appointment. I've invested $2840.54 in this boat over the last 3 years, and now you may not have to. (Yes, I have a complete maintenance record). This is obviously a unique item and I'm sure that it will find the right buyer who can appreciate the features.

16' 1981 Prindle Sailboat
Gig Harbor, Washington
For more details visit: http://www.BoatsFSBO.com/97229 Please contact boat owner Craig at 678-458-5055.Have this awesome Prindle 16 for sale. Fresh bottom job 3-layers of glass and new paint. Hulls are rock solid with no soft spots Boat is set up for fast rigging in less than 20 minutes from driving to sailing. Rudders are set up to trailer with them locked in the up position with custom made brackets and locking pins. Prindles cannot normally be trailered with rudders attached since the original up lock system depends on the rudder floating in the water and is not strong enough to support it on the road where it bounces around Trampoline is new and was only sailed on about half a dozen times or so. Trailer is in good shape and has new LED lights and fresh paint from last year. This boat can sail today. Summer is around the corner and its time to hit the water Come by my house in Gig Harbor to take a look. Good luck finding one in better condition call me for details. Thanks for looking.

16' Prindle Sailboat
Commerce Twp, Michigan
Up for sale is my 16' Prindle. The main sale is multi colored and in very good shape considering this is not a new boat, the jib is solid Yellow. The Boats pontoons are in very good shape with no soft spots. The Trailer is Aluminum and also in good shape and has bearing buddies installed. I have not sailed in years but have sailed extensively on both this prindle and other sailboats. The 16 Prindle handles the heavy wind far better than a hobie and very importantly can be self righted when/if you flip it by just one person. This point can not be overstated you dont want to be stranded in the middle of the lake because you are sailing an 18' It will take a weekend to clean up and to do the intisl setup. On a prindle each rudder is raised and lowered manually and independantly of the other by two different lines, for a total of four four foot lines. These lines are about three to four feet long each. These lines are available at lowes or home depot in the rope section and cost a total under $10.00. It is easy with just a coat hanger to re-line your rudders in about 20 minutes and is part of good maitenance to do on who evers prindle you adopt. Besides this just a good overall cleaning and waxing much like you would your car. The trailer has Michigan plates but the tabs are expired. I contacted secretary of state today and was told that boats under 20' in Michigan do not have title but just a bill of sale, please feel free to confirm this independantly with the Michigan Secretary of State office. All the other ropes and block along with the main and jib sails and the boom, Mast and cables, have been stored inside and are in excellent condition. I am no longer including the trampoline so you will have to buy a new one. This is good because new trampolines are so much better than the original trampolines that came with these boats. The reason is you tend to slide across these tramps very often as you move from port to starboard under the boom and vice versa and nothing is worse than the original trampoline for this or a modern trampoline with burs/small inperfections. You also want a trampoline that will be smooth to slide across without any obstacles in the mat ie Straps, Gromets, Rope and in my opinion rope pockets. See Aromic Tarp Website for 16' Prindle Mats. http://www.atomictarp.com/catamaran_trampolines?id=catamaran_trampolines&bas=&categories=4 The prindle is at my home on commerce lake in Commerce Township, MI. It is loaded on its aluminum trailer in my driveway. $650 firm 248-266-2045 or 248-894-6387 Emailing is the easiest way to reach me, I check my email often thru out the day and can respond to any questions quickly.

16 ft Prindle Catamaran Sailboat
Boyne City, Michigan
Sailboat may be seen in Lake Charlevoix near Sommerset Yacht Club. It is in very good shape as are the sails.

"Cool Cat" Cooler for Hobie & Prindle Catamarans
Arlington, Texas
Nice little cooler designed to strap to the trampoline of your Hobie or Prindle catamaran. Called "Cool Cat", made in Buffalo, NY. Yellow, made of breathable vinyl, zippered. Size is 13 x 10 x 6 inches. Good condition.

Great condition Prindle 18 catamaran beachcat FAST!
Berryville, Arkansas
This boat is FAST and great fun. It's a Prindle 18 catamaran, hardly used condition that I bought in Ohio a few years ago. It is ready to sail, needs nothing. Its hulls, sails, and standing rigging look and work perfectly. The mast has a small dent (unknown) that does not affect anything (shown up close in photo). Sails are still crisp and colorful. Running rigging is all Harken. It has an extendable tiller and kick-up rudders that work as they should. New stainless double trapeze wires and 2 seats. Trampoline is in good condition for its age (usually covered) but is likely original. Comes with trailer (newer tires, bearing buddies, and lights) that has a sturdy mast cradle. It tows invisibly behind my 4 cylinder truck, but also easily behind my Camry. Comes with newer sun cover. Delivery is available at $.50/mile anywhere. other tags: Hobie, NACRA, daysailer

Prindle 16 ft Catamaran with LOTS of extras
Long Beach, California
I have spent over $4000 for equipment and upgrades in the last 4 to 10 years, during which time the cat has been used only 4 or 5 times each summer and stored inside a large dry garage. The hulls are 1983 and are very sound with zero de-lamination. The sails, mast, boom, cross beams, dolphin-catcher and rudder system date from 1978. All parts have been properly maintained and are in great condition. After each outing, consisting of a brief jaunt into Long Beach harbor, she was hosed down thoroughly with fresh water and the stowage hatches and bags were removed to allow airflow through the hulls to prevent mold growth. She has sat idle indoors for the past 3 years. I’m moving to the mountains where there’s little opportunity to sail. Items that I purchased (new unless stated otherwise) over the 6-year period, most if not all of which are thus lightly used and in good condition:- trampoline with hiking straps and halyard pocket; stainless steel shrouds, bridle and forestay; mast head pulleys; trapeze wires, hardware and harness; telescoping tiller with cork ball and wraparound grip; port covers and cat bags; beach wheels (Cat Trax with cradles); righting bag; two spare rudders (bought used but in very good condition) including stainless steel hardware; two paddles ; trampoline tightening kit; spare shackles; spare batten pockets; 6 adult life vests (2L, 2M, 2S/XS/child) ; Men’s large and women’s medium spring wetsuits (we used once); Men’s L Core Hotskin long sleeve; men’s L C-Skin shorts; waterproof bag; “Catamaran Sailing from Start to Finish” by Phil Berman . Other items included:- trailer with tail/brake/turn signal lights and spare wheel and tire; men’s L C-Skin-style long pants; men’s M long sleeve flotation jacket; self supporting cat chair; women’s 8 1/2 booties; pivot grease and other odd items.If you want me to take a specific photo let me know and I'll email it to you. Buyer collects or I am willing to deliver within about 30 miles of Long Beach, California for an additional $75.

windrider Rave Foiling Trimaran in Reno Nevada
Reno, Nevada
Just bought..very nice Original main and jib,trailer,pump. has bow pole and not stock screecher.. mast not stock but it looks the same as stock,prindle 16 cut down. stock fittings conform. Great buy, just bought a bigger boat and the wife is not going to understand two boats in two days. i am selling for what i paid for the boat and my gas...can deliver east on 80 for $.50 a mile
Narrow Results
Current search reset all.
- Keyword: prindle
- Prindle (3)
- Sailboats (2)
- Catamarans (1)
- Michigan (2)
- Washington (2)
- Arizona (1)
- Arkansas (1)
- California (1)
- New Jersey (1)
- North Carolina (1)
- Search Title Only
- Has Picture
- Include Sold Listings
Showcase Ads

2006 Yamaha SX210
Lake Havasu City, AZ

1967 Custom South Bay Scooter Duck Boat
Duxbury, MA

2021 Crestliner 2250 Sportfish
Port Clinton, OH

1985 O'Day 28 foot cruiser
Charleston, SC

2008 Sea Ray 260 Sundancer

2020 Robalo R222 Explorer

2017 Yamaha 242X
Winston-Salem, NC
Create Alert
Please, name this search
Select Interval
Alert Successfully Created
- Lost password
Please Support TheBeachcats.com
- Forums index page
- :: Catamaran Sailing Discussion
- :: Good Deals
- View latest posts
- Search forums
What's your weigh-in on a Prindle 19?
- Print topic
Go to page 1 - 2 [ +1 ]:

- Registered: May 09, 2014
- Last visit: Oct 20, 2015

- Registered: Mar 12, 2003
- Last visit: Feb 19, 2021

- Rank: Chief
- Registered: Apr 19, 2011
- Last visit: Dec 13, 2023
- Posts: 1445
- Rank: Lubber
- Registered: Jun 30, 2012
- Last visit: Jan 12, 2023
- Registered: Dec 31, 1969
- Last visit: May 06, 2022
- Registered: Nov 18, 2012
- Last visit: Sep 07, 2014
- Registered: Mar 15, 2013
- Last visit: May 18, 2014

- Registered: Feb 10, 2006
- Last visit: Nov 07, 2017

- Registered: Jul 26, 2008
- Last visit: Jan 15, 2018
- Registered: Jul 03, 2013
- Last visit: Jul 13, 2022

- Registered: Dec 28, 2013
- Last visit: Mar 04, 2017
- Registered: Jul 11, 2013
- Last visit: Jun 29, 2014

- Registered: Jul 27, 2008
- Last visit: May 31, 2019
No HTML tags allowed (except inside [code][/code] tags)
- Submit Preview Cancel
Font size: Tiny Small Normal Large Huge
Your browser does not support javascript or you turned it off. The BBCode interface has been disabled.
Your browser does not support javascript or you turned it off. The bbsmile interface has been disabled.
Users on-line
- cyberspeed ,
This list is based on users active over the last 60 minutes.
Search The Beachcats
[ Add New Beachcat Event ]
Upcoming Beachcats Events
VIEW FULL CALENDAR
- June 6, 2024
- "Live on the Edge" Multihull Regatta and Race Clinic, Eugene, Oregon
Copyright TheBeachcats.com
The Prindle 19 was similar in style to the Miracle 20 or other more aggressive pointed bow boats of the day. Many had a standard spinnaker setup.
Showing 1–36 of 100 results

Boat Cover One-Piece Economy
Aluminum Telescoping Tiller 50″-95″

Hobie Rudder Tight Bushing: Most Hobies

Nacra Carbon Tiller Extension

Rudder Pins Nacra, Prindle, H21 Aluminum

5/16″ Bow Shackle

6″ Access Port with Lip
6mm harken bow shackle.

Bolt for Gudgeon 1/4 X 1.25″

Bolt Hex 3/8 X 4.25″ Prindle Crossbar
Bolt Hex Head 1/4-20 X 2 (Stainless Steel)

Can’t Miss Rings Pair Black
Centerboard lock screw p18.2, p19, centerboard p18-2, p19.

Centerboard Pivot Tube – PVC

Centerboard Spring Kit
Clevis Pin 1/4 X 1-3/8

Clevis Pin 1/4 X 3/4″

Cotter Pin 3/32 x 3/4
Crossbar extrusion prindle 18-2 / prindle 19.

Dolphin Mast Support Pad Nacra/Prindle

Dolphin Striker Rod Prindle 12.25″

Dolphin Striker Rod Washer Nacra
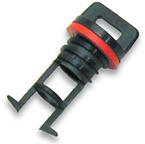
Drain Plug for Hobie, Nacra and Prindle Catamarans

Drain Plug with Chromed Brass Housing

Flat Head Machine Screw 5/16 X 5″

Gooseneck ‘U’ Bracket N5.2, Prindles

Gudgeon Extended P18-2, P19

Gudgeon Narrow N5.0, N5.7, N6.0, P18-2, P19

Harken 7:1 Mainsheet System

Hex Bolt Rear Crossbar 5/16 X 5.75″

Jib Halyard with Sister Clips Prindle

Jib Track End Stop N5.5SL, N5.7, N5.8, N6.0, P18-2, P19

Main Halyard Ring (Murrays)

Mast Base Casting P18-2, P19

Mast Bearing Half Round Prindle
Maintenance underway. Pardon our dust. Dismiss
IMAGES
VIDEO
COMMENTS
LENGTH: Traditionally, LOA (length over all) equaled hull length. Today, many builders use LOA to include rail overhangs, bowsprits, etc. and LOD (length on deck) for hull length. That said, LOA may still mean LOD if the builder is being honest and using accepted industry standards developed by groups like the ABYC (American Boat and Yacht Council).
Prindle 19 is a 19′ 2″ / 5.9 m catamaran sailboat designed by Richard Loutek and built by Prindle Catamarans and Performance Catamarans Inc. starting in 1985. Great choice! Your favorites are temporarily saved for this session.
Prindle preowned sailboats for sale by owner. Prindle used sailboats for sale by owner. Home. ... Prindle catamarans Prindle18-2: Length: 18' Type: racer/cruiser: Hull: fiberglass catamaran: Engine: 1 gas inboard; ... 19' Flying Scot Flying Scot Huntington NY, New York Asking $2,000. 42' Beneteau 42 CC Oceanis
The Prindle 19 is a 19.21ft frac. sloop (rotating spar) designed by Richard Loutek and built in fiberglass by Performance Catamarans Inc. since 1985. The Prindle 19 is an ultralight sailboat which is a very high performer. Prindle 19 for sale elsewhere on the web: Main features.
PRINDLE 19 Detailed Review. 1 of 2. If you are a boat enthusiast looking to get more information on specs, built, make, etc. of different boats, then here is a complete review of PRINDLE 19. Built by Performance Catamarans Inc. and designed by undefined, the boat was first built in 1985. It has a hull type of Catamaran Twin Cbrd. and LOA is 5.86.
Performance Catamarans Prindle 19 Manuals. Manuals and User Guides for Performance Catamarans Prindle 19. We have 1 Performance Catamarans Prindle 19 manual available for free PDF download: Owner's Manual.
Get Catamaran Racing for the 90's there is a whole section on the Prindle 19. Re: Tell me about the Prindle 19 #186995 08/04/09 06:43 ... There is a whole chapter in "Catamaran Racing for the 90"s" on the Prindle 19 by Randy Smyth. Won't help you on the spinnaker part, but should with setting up rest of boat. Doug. Re: ...
He started building the PRINDLE 16 in 1971. The company name was changed to Prindle Catamarans around 1978. Later, Prindles were built and sold under a number of corporate names. The Prindle brand was purchased by Performance Catamarans around 1988. ... PRINDLE 19: 19.21 ft / 5.86 m: 1985: PRINDLE ESCAPE: 18.00 ft / 5.49 m: 1995: ShipCanvas ...
Prindle 18-2 & 19 Owner's Manual Section I: ASSEMBLY Preparation Tools needed: large screwdriver pliers needle-nose pliers 1/2" offset wrench combination 1/2" & 9/16 box-end wrench adjustable wrench silicone sealant Your Prindle Catamaran comes packaged in two hull containers, one large hardware box and one mast box.
Experience the performance of a high pointing, fast tacking, powerful racing catamaran. <br> <br>The Prindle 19 is: <br> <br>sloop rigged, symmetrical hulled design <br>race equipped <br>If you are looking for the ultimate combination of sailing performance and strong class racing, the Prindle 19 is the catamaran for you! <br>
Preparation Tools needed: large screwdriver pliers needle-nose pliers 1/2" offset wrench combination 1/2" & 9/16 box-end wrench adjustable wrench silicone sealant. Your Prindle Catamaran comes packaged in two hull containers, one large hardware box and one mast box. Place the two hull containers approximately 6 feet apart with stapled seams ...
Prindle 18-2 & 19 Owner's Manual Section I: ASSEMBLY Preparation Tools needed: large screwdriver pliers needle-nose pliers 1/2" offset wrench combination 1/2" & 9/16 box-end wrench adjustable wrench silicone sealant Your Prindle Catamaran comes packaged in two hull containers, one large hardware box and one mast box.
P19's are great boats. i have sailed 19's and 19mx's. fun and fast boats, powerful (anther boat based off the olympic racing catamaran of the 70's through the early 2000's) so it is a race boat. can be depowered, and fine for island hopping / cruising: but at it's dna it is a racecat. but with a furling jib, correct sheeting settings all around ...
Page 3: Preparation. Prindle 18-2 & 19 Owner's Manual Section I: ASSEMBLY Preparation Tools needed: large screwdriver pliers needle-nose pliers 1/2" offset wrench combination 1/2" & 9/16 box-end wrench adjustable wrench silicone sealant Your Prindle Catamaran comes packaged in two hull containers, one large hardware box and one mast box.
The Prindle 18 is an American catamaran sailing dinghy that was designed by Geoffrey Prindle as a racer and first built in 1977. [1] [2] [3] Geoffrey Prindle had started out as a surfboard manufacturer but was also successful racing Hobie 14 catamarans and started his own line of boats, starting with the Prindle 16 .
1993 Prindle 19 MX This Prindle 19 includes trailer, trailer box, mylar sails, racing battens and harken fittings. It is ready to sail. The sails are in great shape. ... Prindle 16 Sailing Catamaran and trailer, highly customized, many spare parts. At a glance:Clean Title for the boatClean Title for the trailerEverything is new - tons of money ...
P-18s are solid as rocks. P19's were designed and built as a pure racing machine. While they can be a fun boat, thay are a handful. for I would go with a P18, H18 w/wings or a H20/21SE. I think the P-19 is a great boat, 6" wider than a NACRA 5.8 and a little lighter. This is Will Lockridge's P-19 with wings.
The Pacific cat was designed by Carter Pyle and was first built in 1960. It was slightly smaller than 19 ft × 8 ft (5.8 m × 2.4 m), and was a solid fiberglass catamaran with a solid core deck and traditional catamaran sail plan. The design's chief limitation was its weight of over 500 lb (230 kg) with approximately 300 square feet (28 m 2) of ...
19 Prindle 19MX. BASIC CATAMARAN ILLUSTRATION Centerboard Daggerboard Front Crossbar Starboard Hull Trapeze Wires Bridle Wires Forestay Jibsail Rear Crossbar Rudder Assemblies Port Hull Boom Trampoline Battens Mainsail Mast Illustrations are basic and may not be representative of your particular model.
Home / Shop By Sport / Catamaran Sailing / Prindle Factory Parts Prindle Factory Parts. Showing 1-36 of 111 results ... Crossbar Extrusion Prindle 18-2 / Prindle 19 $ 200.00 - $ 220.00; Dolphin Mast Support Pad Nacra/Prindle $ 40.10; Dolphin Striker Casting Prindle $ 9.50;
The Prindle 18-2 and 19 were designed after the Tornado. The Tornado had a 10' beam, the 18-2 and 19 have a 8.5' beam. The P-19 is actually 19'2" in length and "I think" weighs around 380#. I weigh 170 and solo all the time with no problems and actually enjoy sailing it solo.
The Prindle 19 was similar in style to the Miracle 20 or other more aggressive pointed bow boats of the day. Many had a standard spinnaker setup. Showing 1-36 of 100 results ... Drain Plug for Hobie, Nacra and Prindle Catamarans $ 4.05; Drain Plug with Chromed Brass Housing $ 14.10;