Sail Rigs And Types - The Only Guide You Need

Last Updated by
Daniel Wade
June 15, 2022
A well-designed sailboat is a thing of pure beauty. Whether you're a proud owner of one, a guest on one, or a shore-side admirer, you'll fall in love with the gliding sails, the excitement of a race, and the eco-friendly nature of these sophisticated yet magnificent vessels. With good sails, great design, and regular maintenance, sails and rigs are an important part of a sailboat.
If you’re thinking about going sailing, one of the first things you have to understand is the variety of modern sail plans. Unlike old sailboats, modern sailboats don't need huge, overlapping headsails and multiple masts just to get moving. In the past, when sailboats were heavy, keels were long, the only way to get the boat moving was with a massive relative sail area. You needed as much square footage as you could just to get your sailboat moving. But with the invention of fiberglass hulls, aluminum or composite masts, high-tensile but low diameter lines and stats, and more efficient sails, sailboats no longer need to plan for such large sail plans.. Still, there are various rig styles, from the common sloop, to the comfortable cat-rig, to the dual masted ketch and schooner, there are various sail types and rigs to choose from. The most important thing is to know the different types of sails and rigs and how they can make your sailing even more enjoyable.
There are different types of sails and rigs. Most sailboats have one mainsail and one headsail. The mainsail is generally fore-and-aft rigged and is triangular shaped. Various conditions and courses require adjustments to the sails on the boats, and, other than the mainsail, most boats can switch out their secondary sail depending on various conditions.. Do you want to sail upwind or go downwind? You cannot hoist just any sail and use it. It's, therefore, of great importance to understand how and when to use each sail type.
In this in-depth article, we'll look at various sail types and rigs, and how to use them to make your sailing more enjoyable.
Table of contents

Different Sail Types
It is perhaps worth noting that a sailboat is only as good as its sails. The very heart of sailing comes in capturing the wind using artfully trimmed sails and turning that into motion. . Ask any good sailor and he'll tell you that knowing how and when to trim the sails efficiently will not only improve the overall performance of your boat but will elevate your sailing experience. In short, sails are the driving force of sailboats.
As such, it's only natural that you should know the different types of sails and how they work. Let's first highlight different sail types before going into the details.
- Jib - triangular staysail
- Spinnaker - huge balloon-shaped downwind sail for light airs
- Genoa - huge jib that overlaps the mainsail
- Gennaker - a combination of a spinnaker and genoa
- Code zero - reaching genoa for light air
- Windseeker - tall, narrow, high-clewed, and lightweight jib
- Drifter - versatile light air genoa made from particularly lightweight cloth
- Storm jib - a smaller jib meant for stormy conditions
- Trysail - This is a smaller front-and-aft sail for heavy weather
The mainsail is the principal sail on a boat. It's generally set aft of the mainmast. Working together with the jib, the mainsail is designed to create the lift that drives the sailboat windward. That being said, the mainsail is a very powerful component that must always be kept under control.
As the largest sail, and the geometric center of effort on the boat, the mainsail is tasked with capturing the bulk of the wind that's required to propel the sailboat. The foot, the term for the bottom of any sail, secures to the boom, which allows you to trim the sail to your heading. The luff, the leading edge of the sail, is attached to the mast. An idealized mainsail would be able to swing through trim range of 180°, the full semi-circle aft of the mast, though in reality, most larger boats don’t support this full range of motion, as a fully eased sail can occasionally be unstable in heavy breeze.
. As fully controlling the shape of the mainsail is crucial to sailing performance, there are many different basic mainsail configurations. For instance, you can get a full-batten mainsail, a regular mainsail with short battens, or a two-plus-two mainsail with two full-length battens. Hyper-high performance boats have even begun experimenting with winged sails which are essentially trimmable airplane wings! Moreover, there are numerous sail controls that change the shape by pulling at different points on the sail, boom, or mast. Reefing, for instance, allows you to shorten the sail vertically, reducing the amount of sail area when the boat is overpowered.
Features of a Mainsail
Several features will affect how a particular sail works and performs. Some features will, of course, affect the cost of the sail while others may affect its longevity. All in all, it's essential to decide the type of mainsail that's right for you and your sailing application.
Sail Battens, the Roach, and the Leech
The most difficult part of the sail to control, but also the most important, are the areas we refer to as the leech and the roach. The roach is the part of the sail that extends backwards past the shortest line between the clew, at the end of the boom, and the top of the mast. It makes up roughly the back third of the sail. The leech is the trailing edge of the sail, the backmost curve of the roach. Together, these two components control the flow of the air off the back of the sail, which greatly affects the overall sail performance. If the air stalls off the backside of the sail, you will find a great loss in performance. Many sail controls, including the boom vang, backstay, main halyard, and even the cunningham, to name a few, focus on keeping this curve perfect.
As for parts of the sail itself, battens control the overall horizontal shape of the sail. Battens are typically made from fiberglass or wood and are built into batten pockets. They're meant to offer support and tension to maintain the sail shape Depending on the sail technology you want to use, you may find that full battens, which extend from luff to leech, or short battens, just on the trailing edge, are the way to go. Fully battened sails tend to be more expensive, but also higher performance.
Fully Battened Mainsails
They're generally popular on racing multihulls as they give you a nice solid sail shape which is crucial at high speeds. In cruising sailboats , fully battened mainsails have a few benefits such as:
- They prevent the mainsail from ragging. This extends the life of the sail, and makes maneuvers and trimming easier for the crew.
- It provides shape and lift in light-air conditions where short-battened mainsails would collapse.
On the other hand, fully-battened mainsails are often heavier, made out of thicker material, and can chafe against the standing rigging with more force when sailing off the wind.
Short Battens
On the other hand, you can choose a mainsail design that relies mostly on short battens, towards the leech of the sail. This tends to work for lighter cloth sails, as the breeze, the headsail, and the rigging help to shape the sail simply by the tension of the rig and the flow of the wind. The battens on the leech help to preserve the shape of the sail in the crucial area where the air is flowing off the back of the sail, keeping you from stalling out the entire rig.
The only potential downside is that these short battens deal with a little bit of chafe and tension in their pockets, and the sail cloth around these areas ought to be reinforced. If your sails do not have sufficient reinforcement here, or you run into any issues related to batten chafe, a good sail maker should be able to help you extend the life of your sails for much less than the price of a new set.
How to Hoist the Mainsail
Here's how to hoist the mainsail, assuming that it relies on a slab reefing system and lazy jacks and doesn't have an in-mast or in-boom furling system.
- Maintain enough speed for steeragewhile heading up into the wind
- Slacken the mainsheet, boom vang, and cunningham
- Make sure that the lazy jacks do not catch the ends on the battens by pulling the lazy jacks forward.
- Ensure that the reefing runs are free to run and the proper reefs are set if necessary.
- Raise the halyard as far as you can depending on pre-set reefs.
- Tension the halyard to a point where a crease begins to form along the front edge
- Re-set the lazy jacks
- Trim the mainsail properly while heading off to your desired course
So what's Right for You?
Your mainsail will depend on how you like sailing your boat and what you expect in terms of convenience and performance. That being said, first consult the options that the boatbuilder or sailmakers suggest for your rig. When choosing among the various options, consider what you want from the sail, how you like to sail, and how much you're willing to spend on the mainsail.
The headsail is principally the front sail in a fore-and-aft rig. They're commonly triangular and are attached to or serve as the boat’s forestay. They include a jib and a genoa.
A jib is a triangular sail that is set ahead of the foremost sail. For large boats, the roto-furling jib has become a common and convenient way to rig and store the jib. Often working in shifts with spinnakers, jibs are the main type of headsails on modern sailboats. Jibs take advantage of Bournoulli’s Principle to break the incoming breeze for the mainsail, greatly increasing the speed and point of any boat. By breaking the incoming wind and channeling it through what we call the ‘slot,’ the horizontal gap between the leech of the jib and the luff of the mainsail, the jib drastically increases the efficiency of your mainsail. It additionally balances the helm on your rudder by pulling the bow down, as the mainsail tends to pull the stern down. .
The main aim of the jib is to increase the sail area for a given mast size. It improves the aerodynamics of the mainsails so that your sailboat can catch more wind and thereby sail faster, especially in light air
Using Jibs on Modern Sailboats
In the modern contexts, jib’s mainly serve increase the performance and overall stability of the mainsail. The jib can also reduce the turbulence of the mainsail on the leeward side.
On Traditional Vessels
Traditional vessels such as schooners have about three jibs. The topmast carried a jib topsail, the main foresail is called the jib, while the innermost jib is known as the staysail. The first two were employed almost exclusively by clipper ships.
How to Rig the Jibs
There are three basic ways to rig the jib.
Track Sheets - A relatively modern approach to the self-tacking jib, this entails placing all the trimming hardware on a sliding track forward of the mast. This means that on each tack, the hardware slides from one side of the boat to the other. This alleviates the need to switch sheets and preserves the trim angle on both sides, though it can be finnicky and introduce friction.
Sheet up the Mast - This is a very popular approach and for a good reason. Hoist the jib sheet up the mast high enough to ensure that there's the right tension through the tack. Whether internally or externally, the sheet returnsto the deck and then back to the cockpit just like the rest of the mast baselines. The fact the hardware doesn't move through the tacks is essential in reducing friction.
Sheet Forward - This method revolves around ensuring that the jib sheet stays under constant pressure so that it does not move through the blocks in the tacks. This is possible if the through-deck block is extremely close to the jib tack. Your only challenge will only be to return the sheet to the cockpit. This is, however, quite challenging and can cause significant friction.
Dual Sheeting - The traditional method, especially on smaller dinghies, though it is not self-tacking. This requires a two ended or two separate sheet system, where one sheet runs to a block on starboard, and the other to port. Whenever you tack or gybe, this means you have to switch which sheet is active and which is slack, which is ok for well crewed boats, but a potential issue on under-crewed boats.
Another important headsail, a genoa is essentially a large jib that usually overlaps the mainsail or extends past the mast, especially when viewed from the other side. In the past, a genoa was known as the overlapping jib and is technically used on twin-mast boats and single-mast sloops such as ketches and yawls. A genoa has a large surface area, which is integral in increasing the speed of the vessel both in moderate and light winds.
Genoas are generally characterized by the percentage they cover. In most cases, sail racing classes stipulate the limit of a genoa size. In other words, genoas are usually classified by coverage.
Top-quality genoa trim is of great importance, especially if the wind is forward of the beam. This is because the wind will first pass over the genoa before the mainsail. As such, a wrongly sheeted genoa can erroneously direct the wind over the mainsail,spelling doom to your sailing escapades. While you can perfectly adjust the shape of a genoa using the mast rake, halyard tension, sheet tension, genoa car positioning, and backstay tension, furling and unfurling a genoa can be very challenging, especially in higher winds.
That being said, here are the crucial steps to always keep in mind.
- Unload and ease the loaded genoa sheet by going to a broad reach
- Do not use the winch; just pull on the furling line
- Keep a very small amount of pressure or tension on the loaded genoa sheet
- Secure the furling line and tighten the genoa sheets
- Get on the proper point of sail
- Have the crew help you and release the lazy genoa sheets
- Maintain a small tension while easing out the furling line
- Pull-on a loaded genoa sheet
- Close or cleat off the rope clutch when the genoa is unfurled
- Trim the genoa
To this end, it's important to note that genoas are popular in some racing classes. This is because they only categorize genoas based on the fore-triangle area covered, which essentially allows a genoa to significantly increase the actual sail area. On the contrary, keep in mind that tacking a genoa is quite a bit harder than a jib, as the overlapping area can get tangled with the mast and shrouds. It's, therefore, important to make sure that the genoa is carefully tended, particularly when tacking.
Downwind Sails
Modern sailboats are a lot easier to maneuver thanks to the fore-and-aft rig. Unfortunately, when sailing downwind they catch less wind, and downwind sails are a great way of reducing this problem. They include the spinnaker and the gennaker.
A spinnaker will, without a doubt, increase your sailing enjoyment. But why are they often buried in the cabin of cruising boats? Well, the first few attempts to rig and set a spinnaker can be difficult without enough help and guidance. Provided a solid background, however, spinnakers are quite straightforward and easy to use and handle with teamwork and enough practice. More importantly, spinnakers can bring a light wind passage to life and can save your engine.
Spinnakers are purposely designed for sailing off the wind; they fill with wind and balloon out in front of your sailboat. Structured with a lightweight fabric such as nylon, the spinnaker is also known as a kite or chute, as they look like parachutes both in structure and appearance.
A perfectly designed spinnaker should have taut leading edges when filled. This mitigates the risk of lifting and collapsing. A spinnaker should have a smooth curve when filled and devoid of depressions and bubbles that might be caused by the inconsistent stretching of the fabric. The idea here is that anything other than a smooth curve may reduce the lift and thereby reduce performance.
Types of Spinnakers
There are two main types of spinnakers: symmetric spinnakers and asymmetric spinnakers.
Asymmetric Spinnakers
Flown from a spinnaker pole or bowsprit fitted to the bow of the boat, asymmetric spinnakers resemble large jibs and have been around since the 19th century. The concept of asymmetric spinnaker revolves around attaching the tack of the spinnaker at the bow and pulling it around during a gybe.
Asymmetric spinnakers have two sheets just like a jib., These sheets are attached at the clew and never interact directly with the spinnaker pole. This is because the other corner of the spinnaker is fixed to the bowsprit. The asymmetric spinnaker works when you pull in one sheet while releasing the other. This makes it a lot easier to gybe but is less suited to sailing directly downwind. There is the loophole of having the asymmetric spinnaker gybed to the side opposite of the boom, so that the boat is sailing ‘wing-on-wing,’ though this is a more advanced maneuver, generally reserved for certain conditions and tactical racing situations.
On the contrary, the asymmetric spinnaker is perfect for fast planing dinghies. This is because such vessels have speeds that generate apparent wind forward. Because asymmetrics, by nature, prefer to sail shallower downwind angles, this apparent wind at high speeds makes the boat think that it is sailing higher than it really is, allowing you to drive a little lower off the breeze than normal. . In essence, the asymmetric spinnaker is vital if you're looking for easy handling.
Symmetric Spinnakers
Symmetric spinnakers are a classic sail type that has been used for centuries for controlling boats by lines known as a guy and a sheet. The guy, which is a windward line, is attached to the tack of the sail and stabilized by a spinnaker pole. The sheet, which is the leeward line, is attached to the clew of the spinnaker and is essential in controlling the shape of the spinnaker sail.
When set correctly, the leading edges of the symmetric spinnaker should be almost parallel to the wind. This is to ensure that the airflow over the leading edge remains attached. Generally, the spinnaker pole should be at the right angles to the apparent wind and requires a lot of care when packing.
The main disadvantage of this rig is the need to gybe the spinnaker pole whenever you gybe the boat. This is a complicated maneuver, and is one of the most common places for spinnakers to rip or get twisted. If, however, you can master this maneuver, you can sail at almost any angle downwind!
How to Use Spinnaker Effectively
If you decide to include the spinnakers to your sailboat, the sailmaker will want to know the type of boat you have, what kind of sailing you do, and where you sail. As such, the spinnaker that you end up with should be an excellent and all-round sail and should perform effectively off the breeze
The type of boat and where you'll be sailing will hugely influence the weight of your spinnaker cloth. In most cases, cruising spinnakers should be very light, so if you've decided to buy a spinnaker, make sure that it's designed per the type of your sailboat and where you will be sailing. Again, you can choose to go for something lighter and easier to set if you'll be sailing alone or with kids who are too young to help.
Setting up Spinnakers
One of the main reasons why sailors distrust spinnakers is because they don't know how to set them up. That being said, a perfectly working spinnaker starts with how you set it up and this revolves around how you carefully pack it and properly hook it up. You can do this by running the luff tapes and ensuring that the sails are not twisted when packed into the bag. If you are using large spinnakers, the best thing to do is make sure that they're set in stops to prevent the spinnakers from filling up with air before you even hoist them fully.
But even with that, you cannot fully set the spinnaker while sailing upwind. Make sure to bear away and have your pole ready to go as you turn downwind. You should then bear away to a reach before hoisting. Just don't hoist the spinnakers from the bow as this can move the weight of the crew and equipment forward.
Used when sailing downwind, a gennaker is asymmetric sail somewhere between a genoa and a spinnaker. It sets itself apart because it gennaker is a free-flying asymmetric spinnaker but it is tacked to the bowsprit like the jib.
Let's put it into perspective. Even though the genoa is a great sail for racing and cruising, sailors realized that it was too small to be used in a race or for downwind sail and this is the main reason why the spinnaker was invented. While the spinnakers are large sails that can be used for downwind sail, they are quite difficult to handle especially if you're sailing shorthanded. As such, this is how a gennaker came to be: it gives you the best of both worlds.
Gennakers are stable and easy to fly and will add to your enjoyment and downwind performance.
The Shape of a Gennaker
As we've just noted, the gennaker is asymmetrical. It doesn't attach to the forestay like the genoa but has a permanent fitting from the mast to bow. It is rigged exactly like a spinnaker but its tack is fastened to the bowsprit. This is fundamentally an essential sail if you're looking for something to bridge the gap between a genoa and a spinnaker.
Setting a Gennaker
When cruising, the gennaker is set with the tack line from the bow, a halyard, and a sheet that's led to the aft quarter. Attach the tack to a furling unit and attach it to a fitting on the hull near the very front of the sailboat. You can then attach the halyard that will help in pulling it up to the top of the mast before attaching it to the clew. The halyard can then run back to the winches to make the controlling of the sail shape easier, just like when using the genoa sail.
In essence, a gennaker is a superb sail that will give you the maximum versatility of achieving the best of both a genoa and a spinnaker, especially when sailing downwind. This is particularly of great importance if you're cruising by autopilot or at night.
Light Air Sails
Even though downwind sails can be used as light air sails, not all light air sails can be used for downwind sailing. In other words, there's a level of difference between downwind sails and light air sails. Light air sails include code zero, windseeker, and drifter reacher.
A cross between an asymmetrical spinnaker and a genoa, a code zero is a highly modern sail type that's generally used when sailing close to the wind in light air. Although the initial idea of code zero was to make a larger genoa, it settled on a narrow and flat spinnaker while upholding the shape of a genoa.
Modern boats come with code zero sails that can be used as soon as the sailboat bears off close-hauled even a little bit. It has a nearly straight luff and is designed to be very flat for close reaching. This sail is designed to give your boat extra performance in light winds, especially in boats that do not have overlapping genoas. It also mitigates the problem of loss of power when you are reaching with a non-overlapping headsail. Really, it is closer to a light air jib that sacrifices a little angle for speed.
In many conditions, a code zero sail can go as high as a sailboat with just a jib. By hoisting a code zero, you'll initially have to foot off about 15 degrees to fill it and get the power that you require to heel and move the boat. The boat will not only speed up but will also allow you to put the bow up while also doing the same course as before you set the zero. In essence, code zero can be an efficient way of giving your boat about 30% more speed and this is exactly why it's a vital inventory item in racing sailboats.
When it comes to furling code zero, the best way to do it is through a top-down furling system as this will ensure that you never get a twist in the system.
Generally used when a full size and heavier sail doesn't stay stable or pressurized, a windseeker is a very light sail that's designed for drifting conditions. This is exactly why they're designed with a forgiving cloth to allow them to handle these challenging conditions.
The windseeker should be tacked at the headstay with two sheets on the clew. To help this sail fill in the doldrums, you can heel the boat to whatever the apparent leeward side is and let gravity help you maintain a good sail shape while reaching.The ideal angle of a windseeker should be about 60 degrees.
Though only used in very specific conditions, the windseeker is so good at this one job that it is worth the investment if you plan on a long cruise. Still, you can substitute most off the breeze sails for this in a pinch, with slightly less performance gain, likely with more sacrifices in angle to the breeze.
Drifter Reacher
Many cruising sailors often get intimidated by the idea of setting and trimming a drifter if it's attached to the rig at only three corners or if it's free-flying. But whether or not a drifter is appropriate for your boat will hugely depend on your boat's rig, as well as other specific details such as your crew's ability to furl and unfurl the drifter and, of course, your intended cruising grounds.
But even with that, the drifter remains a time-honored sail that's handy and very versatile. Unlike other light air sails, the drifter perfectly carries on all points of sails as it allows the boat to sail close-hauled and to tack. It is also very easy to control when it's set and struck. In simpler terms, a drifter is principally a genoa that's built of lightweight fabric such as nylon. Regardless of the material, the drifter is a superb sail if you want to sail off a lee shore without using the genoa.
Generally stronger than other regular sails, stormsails are designed to handle winds of over 45 knots and are great when sailing in stormy conditions. They include a storm jib and a trysail.
If you sail long and far enough, chances are you have or will soon be caught in stormy conditions. Under such conditions, storm jibs can be your insurance and you'll be better off if you have a storm jib that has the following features:
- Robustly constructed using heavyweight sailcloth
- Sized suitably for the boat
- Highly visible even in grey and white seas
That's not all; you should never go out there without a storm jib as this, together with the trysail, is the only sails that will be capable of weathering some of nature's most testing situations.
Storm jibs typically have high clews to give you the flexibility of sheet location. You can raise the sail with a spare halyard until its lead position is closed-hauled in the right position. In essence, storm jib is your insurance policy when out there sailing: you should always have it but always hope that you never have to use it.
Also known as a spencer, a trysail is a small, bright orange, veritably bullet-proof, and triangular sail that's designed to save the boat's mainsail from winds over 45 knots and works in the same way as a storm jib. It is designed to enable you to make progress to windward even in strong and stormy winds.
Trysails generally use the same mast track as the mainsail but you have to introduce the slides into the gate from the head of the trysail.
There are two main types of rigs: the fore-and-aft rig and the square rigg.
Fore-and-aft Rig
This is a sailing rig that chiefly has the sails set along the lines of the keel and not perpendicular to it. It can be divided into three categories: Bermuda rig, Gaff rig, and Lateen rig.
Bermuda Rig - Also known as a Marconi rig, this is the typical configuration of most modern sailboats. It has been used since the 17th century and remains one of the most efficient types of rigs. The rig revolves around setting a triangular sail aft of the mast with the head raised to the top of the mast. The luff should run down the mast and be attached to the entire length.
Gaff Rig - This is the most popular fore-and-aft rig on vessels such as the schooner and barquentine. It revolves around having the sail four-cornered and controlled at its peak. In other words, the head of the mainsail is guided by a gaff.
Lateen Rig - This is a triangular fore-and-aft rig whereby a triangular sail is configured on a long yard that's mounted at a given angle of the mast while running in a fore-and-aft direction. Lateen rig is commonly used in the Indian Ocean and the Mediterranean.
Square Rigged
This is a rig whereby the mainsails are arranged in a horizontal spar so that they're square or vertical to the mast and the keel of the boat. The square rig is highly efficient when sailing downwind and was once very popular with ocean-going sailboats.
Unquestionably, sailing is always pleasurable. Imagine turning off the engine of your boat, hoisting the sails, and filling them with air! This is, without a doubt, a priceless moment that will make your boat keel and jump forward!
But being propelled by the noiseless motion of the wind and against the mighty currents and pounding waves of the seas require that you know various sail types and how to use them not just in propelling your boat but also in ensuring that you enjoy sailing and stay safe. Sails are a gorgeous way of getting forward. They remain the main fascination of sailboats and sea cruising. If anything, sails and boats are inseparable and are your true friends when out there on the water. As such, getting to know different types of sails and how to use them properly is of great importance.
All in all, let's wish you calm seas, fine winds, and a sturdy mast!
Related Articles
I've personally had thousands of questions about sailing and sailboats over the years. As I learn and experience sailing, and the community, I share the answers that work and make sense to me, here on Life of Sailing.
by this author
Learn About Sailboats
Sailboat Parts
Most Recent

What Does "Sailing By The Lee" Mean?
October 3, 2023

The Best Sailing Schools And Programs: Reviews & Ratings
September 26, 2023
Important Legal Info
Lifeofsailing.com is a participant in the Amazon Services LLC Associates Program, an affiliate advertising program designed to provide a means for sites to earn advertising fees by advertising and linking to Amazon. This site also participates in other affiliate programs and is compensated for referring traffic and business to these companies.
Similar Posts

Affordable Sailboats You Can Build at Home
September 13, 2023

Best Small Sailboat Ornaments
September 12, 2023

Discover the Magic of Hydrofoil Sailboats
December 11, 2023
Popular Posts

Best Liveaboard Catamaran Sailboats
December 28, 2023

Can a Novice Sail Around the World?
Elizabeth O'Malley

4 Best Electric Outboard Motors

How Long Did It Take The Vikings To Sail To England?

10 Best Sailboat Brands (And Why)
December 20, 2023

7 Best Places To Liveaboard A Sailboat
Get the best sailing content.
Top Rated Posts
Lifeofsailing.com is a participant in the Amazon Services LLC Associates Program, an affiliate advertising program designed to provide a means for sites to earn advertising fees by advertising and linking to Amazon. This site also participates in other affiliate programs and is compensated for referring traffic and business to these companies. (866) 342-SAIL
© 2024 Life of Sailing Email: [email protected] Address: 11816 Inwood Rd #3024 Dallas, TX 75244 Disclaimer Privacy Policy
Standing Rigging (or ‘Name That Stay’)
Published by rigworks on november 19, 2019.
Question: When your riggers talk about standing rigging, they often use terms I don’t recognize. Can you break it down for me?
From the Rigger: Let’s play ‘Name that Stay’…

Forestay (1 or HS) – The forestay, or headstay, connects the mast to the front (bow) of the boat and keeps your mast from falling aft.
- Your forestay can be full length (masthead to deck) or fractional (1/8 to 1/4 from the top of the mast to the deck).
- Inner forestays, including staysail stays, solent stays and baby stays, connect to the mast below the main forestay and to the deck aft of the main forestay. Inner forestays allow you to hoist small inner headsails and/or provide additional stability to your rig.
Backstay (2 or BS) – The backstay runs from the mast to the back of the boat (transom) and is often adjustable to control forestay tension and the shape of the sails.
- A backstay can be either continuous (direct from mast to transom) or it may split in the lower section (7) with “legs” that ‘V’ out to the edges of the transom.
- Backstays often have hydraulic or manual tensioners built into them to increase forestay tension and bend the mast, which flattens your mainsail.
- Running backstays can be removable, adjustable, and provide additional support and tuning usually on fractional rigs. They run to the outer edges of the transom and are adjusted with each tack. The windward running back is in tension and the leeward is eased so as not to interfere with the boom and sails.
- Checkstays, useful on fractional rigs with bendy masts, are attached well below the backstay and provide aft tension to the mid panels of the mast to reduce mast bend and provide stabilization to reduce the mast from pumping.
Shrouds – Shrouds support the mast from side to side. Shrouds are either continuous or discontinuous .
Continuous rigging, common in production sailboats, means that each shroud (except the lowers) is a continuous piece of material that connects to the mast at some point, passes through the spreaders without terminating, and continues to the deck. There may be a number of continuous shrouds on your boat ( see Figure 1 ).
- Cap shrouds (3) , sometimes called uppers, extend from masthead to the chainplates at the deck.
- Intermediate shrouds (4) extend from mid-mast panel to deck.
- Lower shrouds extend from below the spreader-base to the chainplates. Fore- (5) and Aft-Lowers (6) connect to the deck either forward or aft of the cap shroud.
Discontinuous rigging, common on high performance sailboats, is a series of shorter lengths that terminate in tip cups at each spreader. The diameter of the wire/rod can be reduced in the upper sections where loads are lighter, reducing overall weight. These independent sections are referred to as V# and D# ( see Figure 2 ). For example, V1 is the lowest vertical shroud that extends from the deck to the outer tip of the first spreader. D1 is the lowest diagonal shroud that extends from the deck to the mast at the base of the first spreader. The highest section that extends from the upper spreader to the mast head may be labeled either V# or D#.
A sailboat’s standing rigging is generally built from wire rope, rod, or occasionally a super-strong synthetic fibered rope such as Dyneema ® , carbon fiber, kevlar or PBO.
- 1×19 316 grade stainless steel Wire Rope (1 group of 19 wires, very stiff with low stretch) is standard on most sailboats. Wire rope is sized/priced by its diameter which varies from boat to boat, 3/16” through 1/2″ being the most common range.
- 1×19 Compact Strand or Dyform wire, a more expensive alternative, is used to increase strength, reduce stretch, and minimize diameter on high performance boats such as catamarans. It is also the best alternative when replacing rod with wire.
- Rod rigging offers lower stretch, longer life expectancy, and higher breaking strength than wire. Unlike wire rope, rod is defined by its breaking strength, usually ranging from -10 to -40 (approx. 10k to 40k breaking strength), rather than diameter. So, for example, we refer to 7/16” wire (diameter) vs. -10 Rod (breaking strength).
- Composite Rigging is a popular option for racing boats. It offers comparable breaking strengths to wire and rod with a significant reduction in weight and often lower stretch.
Are your eyes crossing yet? This is probably enough for now, but stay tuned for our next ‘Ask the Rigger’. We will continue this discussion with some of the fittings/connections/hardware associated with your standing rigging.
Related Posts
Ask the Rigger
Do your masthead sheaves need replacing.
Question: My halyard is binding. What’s up? From the Rigger: Most boat owners do not climb their masts regularly, but our riggers spend a lot of time up there. And they often find badly damaged Read more…
Selecting Rope – Length, Diameter, Type
Question: Do you have guidelines for selecting halyards, sheets, etc. for my sailboat? From the Rigger: First, if your old rope served its purpose but needs replacing, we recommend duplicating it as closely as possible Read more…
Spinlock Deckvest Maintenance
Question: What can I do to ensure that my Spinlock Deckvest is well-maintained and ready for the upcoming season? From the Rigger: We are so glad you asked! Deckvests need to be maintained so that Read more…
No products in the cart.
Sailing Ellidah is supported by our readers. Buying through our links may earn us an affiliate commission at no extra cost to you.
The Running Rigging On A Sailboat Explained
The running rigging on a sailboat consists of all the lines used to hoist, lower, and control the sails and sailing equipment. These lines usually have different colors and patterns to easily identify their function and location on the vessel.
Looking at the spaghetti of lines with different colors and patterns might get your head spinning. But don’t worry, it is actually pretty simple. Each line on a sailboat has a function, and you’ll often find labels describing them in the cockpit and on the mast.
In this guide, I’ll walk you through the functions of every component of the running rigging. We’ll also look at the hardware we use to operate it and get up to speed on some of the terminology.
The difference between standing rigging and running rigging
Sometimes things can get confusing as some of our nautical terms are used for multiple items depending on the context. Let me clarify just briefly:
The rig or rigging on a sailboat is a common term for two parts, the standing , and the running rigging.
- The standing rigging consists of wires supporting the mast on a sailboat and reinforcing the spars from the force of the sails when sailing. Check out my guide on standing rigging here!
- The running rigging consists of the halyards, sheets, and lines we use to hoist, lower, operate and control the sails on a sailboat which we will explore in this guide.
The components of the running rigging
Knowing the running rigging is an essential part of sailing, whether you are sailing a cruising boat or crewing on a large yacht. Different types of sailing vessels have different amounts of running rigging.
For example, a sloop rig has fewer lines than a ketch, which has multiple masts and requires a separate halyard, outhaul, and sheet for its mizzen sail. Similarly, a cutter rig needs another halyard and extra sheets for its additional headsail.
You can dive deeper and read more about Sloop rigs, Ketch Rigs, Cutter rigs, and many others here .
Take a look at this sailboat rigging diagram:
Lines are a type of rope with a smooth surface that works well on winches found on sailboats. They come in various styles and sizes and have different stretch capabilities.
Dyneema and other synthetic fibers have ultra-high tensile strength and low stretch. These high-performance lines last a long time, and I highly recommend them as a cruiser using them for my halyards.
A halyard is a line used to raise and lower the sail. It runs from the head of the sail to the masthead through a block and continues down to the deck. Running the halyard back to the cockpit is common, but many prefer to leave it on the mast.
Fun fact: Old traditional sailboats sometimes used a stainless steel wire attached to the head of the sail instead of a line!
Jib, Genoa, and Staysail Halyards
The halyard for the headsail is run through a block in front of the masthead. If your boat has a staysail, it needs a separate halyard. These lines are primarily untouched on vessels with a furling system except when you pack the sail away or back up. Commonly referred to as the jib halyard.
Spinnaker Halyard
A spinnaker halyard is basically the same as the main halyard but used to hoist and lower the spinnaker, gennaker, or parasailor.
The spinnaker halyard is also excellent for climbing up the front of the mast, hoisting the dinghy on deck, lifting the outboard, and many other things.
A sheet is a line you use to control and trim a sail to the angle of the wind . The mainsheet controls the angle of the mainsail and is attached between the boom and the mainsheet traveler . The two headsail sheets are connected to the sail’s clew (lower aft corner) and run back to each side of the cockpit.
These are control lines used to adjust the angle and tension of the sail. It is also the line used to unfurl a headsail on a furling system. Depending on what sail you are referring to, this can be the Genoa sheet , the Jib sheet , the Gennaker sheet , etc.
The outhaul is a line attached to the clew of the mainsail and used to adjust the foot tension. It works runs from the mainsail clew to the end of the boom and back to the mast. In many cases, back to the cockpit. On a boat with in-mast furling , this is the line you use to pull the sail out of the mast.
Topping lift
The topping lift is a line attached to the boom’s end and runs through the masthead and down to the deck or cockpit. It lifts and holds the boom and functions well as a spare main halyard. Some types of sailboat rigging don’t use a topping lift for their boom but a boom vang instead. Others have both!
Topping lifts can also be used to lift other spars.
A downhaul is a line used to lower with and typically used to haul the mainsail down when reefing and lowering the spinnaker and whisker poles. The downhaul can also control the tack of an asymmetrical spinnaker, gennaker, or parasailor.
Tweaker and Barber Haul
A tweaker is a line, often elastic, attached to the sheet of a headsail and used to fine-tune the tension on the sheet.
Barber haul
A barber haul is a line attached to a headsail’s sheet to adjust the sheeting angle to the wind. It is often used to pull the clew further toward the center or outboard than the cars allow.
Boom Preventer
A boom preventer is a line attached to the boom’s end when sailing off the wind. Its function is to hold the spar in place and prevent it from swinging wildly.
If the boat were to get an accidental gybe, it could cause serious damage to the rigging or even harm people on board. It is important for the rigger to be cautious when setting up the boom preventer.
Running Backstay
Running backstays is similar to a normal backstay but uses a line instead of a hydraulic tensioner. Some rigs have additional check stays or runners as well.
Bonus tip: Reefing
The term reefing is used when reducing the effective sailing area exposed to the wind of a given sail. Headsails are usually reefed by partially furling them in, and they often have marks for what we refer to as 1st, 2nd, and 3rd reefs.
The mainsail is reefed similarly with an in-mast furling or in-boom furling system.
On a traditional mast, we use a system called slab reefing. The system has reefing lines running through the boom to reinforced points on the luff and leech, allowing you to pull the sail down to the boom and effectively reduce the sail area.
Having at least two reefing points in the mainsail is normal, but most cruising sailboats have 3. The 3rd is used for the heaviest conditions, giving you only a tiny bit of sail area exposed to the wind.
You want to reef your sails before the wind increases to a point where your boat gets overpowered.
It is essential to practice your reefing technique . You will find yourself in situations with rapidly increasing winds where you need to reduce your sails quickly.
Rule of thumb: If you think setting a reef might be a good idea, do it.
Shaking a reef is the term used when we sail with a reefed sail and want to increase the sail area back to full.
Hardware used for sail handling and the running rigging
Furling system.
Most sailboats have their headsail on a furling system. A furling system is a tube that runs along the forestay from the bottom furler drum to the masthead swivel.
This system allows you to roll the headsail around the forestay, making furling the sail in and out accessible. It is also convenient when reefing the sail when the wind picks up, as you can easily do this from the safety of the cockpit. These furling systems come in manual versions and electric versions.
In-mast furling
In-mast furling is a system that rolls the mainsail in and out of the mast. To unfurl the mainsail, we use the outhaul .
In-boom furling
In-boom furling is a system that rolls the mainsail in and out of the boom. This system has been costly and has mostly been seen on big yachts earlier. They are becoming more affordable and common on smaller boats, though. To unfurl this setup, we use the main halyard.
A Stack pack is also called a Lazy Bag or Lazy Pack. It is a bag with a zip attached to the boom where the mainsail is stored when unused. It protects the mainsail from UV rays from the sun and weather elements. It is a very nice and tidy way to store the mainsail and reefing lines if you don’t have in-mast or in-boom furling.
Lazy Jacks is a system of lines running from the stack pack to the mast. The Lazy Jacks guide the mainsail up and down from the Stack Pack and prevent it from falling down on the deck. It is also possible to rig Lazy Jacks without a Stack Pack.
A block is a pulley with a sheave wheel. Blocks are used to change the direction of a pull on a line or rope and give a mechanical advantage. They have many uses, especially onboard sailboats.
A winch is a metal drum that gives you a mechanical advantage to control and tighten lines. These can be operated by turning a rope around it and pulling manually or by a winch handle to get more force. Most modern winches are self-tailing, which means they lock the line on so you can winch the line without holding on to it. Some boats even have electrical winches operated by a button.
Mainsheet Traveler
The mainsheet traveler is a horizontal track that the mainsheet is attached to through a series of blocks. The traveler enables you to adjust and lock the boom at an angle and also plays a critical part in trimming the mainsail.
Most cruising sailboats have their traveler attached to the top of the coachroof in front of the spray hood. A racing boat typically has the traveler in the cockpit near the helm to give the helmsman better control over the mainsheet.
The cars are basically a pulley or block attached to a track on the port and starboard deck that your headsail sheets run through. Cars are used to control the angle of the sheet between the clew and the deck. The cars are handy when you trim the sail to set the right balance of tension between the foot and leech, depending on your point of sail.
The jammer is used to lock a line in place. Most sailboats use these for locking the halyards, mainsheet, outhaul, reef lines, traveler lines, boom vang lines, etc. You can pull or winch a line through a closed jammer, but it won’t run away if you let go of it unless you open the lock.
As I explained earlier, it is normal to have most or all of the lines led back to the cockpit, and they are usually run through a series of jammers.
The jammers are often labeled with the name of the line it locks, which makes it easier to remember which line goes where.
Spinnaker Pole
A spinnaker pole is a spar used to wing out a headsail when sailing off the wind, particularly the spinnaker. The spinnaker pole should have the same length as the distance between the mast and the forestay measured along the deck. We use a fore and aft guy and the pole’s topping lift to rig a pole correctly.
The rigging varies depending on the layout of the boat, but it usually looks like this:
- One line runs from the bow to the end of the pole.
- An aft line runs from near the stern to the end of the pole.
- A topping lift is used to raise and lower the pole.
Whisker Pole
A whisker pole is similar to the spinnaker pole and is rigged similarly. It is typically built lighter and attached to a track on the mast. These can be found in fixed lengths or adjustable lengths. Ideally, the length should be the same as the foot of the headsail you intend to pole out.
Boom Vang/Rod Kicker
The Boom Vang has a few different names. Rod-kicker, kicking strap, or kicker. It is used to tension the boom downwards. When you are sailing downwind and have the boom far out, the mainsheet won’t pull the boom down as much as inboard, and you can then use the vang to adjust the twist and shape of the mainsail.
Mooring line
A mooring line is a traditional rope lead through a fairlead to the vessel’s cleat and a mooring buoy, key, or pontoon.
Final words
Congratulations! By now, you should have a much better understanding of how the running rig on a sailboat functions. We’ve covered the different lines, their purpose, and the hardware used to operate them. I hope you’ve enjoyed this guide and learned something new.
Now it’s time to take what you’ve learned and put it into practice by getting out on the water, setting sail, and getting hands-on experience with the lines.
Or you can continue to my following guide and learn more about the different types of sails .
Sharing is caring!
Skipper, Electrician and ROV Pilot
Robin is the founder and owner of Sailing Ellidah and has been living on his sailboat since 2019. He is currently on a journey to sail around the world and is passionate about writing his story and helpful content to inspire others who share his interest in sailing.
Leave a Reply Cancel reply
Your email address will not be published. Required fields are marked *
The global authority in superyachting
- NEWSLETTERS
- Yachts Home
- The Superyacht Directory
- Yacht Reports
- Brokerage News
- The largest yachts in the world
- The Register
- Yacht Advice
- Yacht Design
- 12m to 24m yachts
- Monaco Yacht Show
- Builder Directory
- Designer Directory
- Interior Design Directory
- Naval Architect Directory
- Yachts for sale home
- Motor yachts
- Sailing yachts
- Explorer yachts
- Classic yachts
- Sale Broker Directory
- Charter Home
- Yachts for Charter
- Charter Destinations
- Charter Broker Directory
- Destinations Home
- Mediterranean
- South Pacific
- Rest of the World
- Boat Life Home
- Owners' Experiences
- Interiors Suppliers
- Owners' Club
- Captains' Club
- BOAT Showcase
- Boat Presents
- Events Home
- World Superyacht Awards
- Superyacht Design Festival
- Design and Innovation Awards
- Young Designer of the Year Award
- Artistry and Craft Awards
- Explorer Yachts Summit
- Ocean Talks
- The Ocean Awards
- BOAT Connect
- Between the bays
- Golf Invitational
- Boat Pro Home
- Pricing Plan
- Superyacht Insight
- Product Features
- Premium Content
- Testimonials
- Global Order Book
- Tenders & Equipment
.jpg/r%5Bwidth%5D=320/c01b08f0-3198-11ec-b3da-5dc06521023f-Black%20Pearl%20-%20Tom%20Van%20Oossanen%20(3).webp "sailboat rigging names")
The definitive guide to sailing yacht rigging
Related articles, superyacht directory.
Do you know your Bermudan rig from your DynaRig or wingsails? And which is best? BOAT explains it all...
Take a look at a modern racing yacht from above, beating to windward and heeled to the breeze, and you can see at a glance why Bermudan rigs have stood the test of time. With its fore and aft sails bladed into efficient aerodynamic shapes, a modern yacht can slice close to the wind and be driven hard. Such a sight would have been outlandish a century ago. Then, a typical trading barquentine could set 18 sails to catch light airs, but it needed a large crew to battle with canvas far out on the yards. In a modern miracle as incredible in its way as flight, today’s racing yachts can sail faster than the speed of the wind – in some cases several times faster.
A mainsail set on a single spar is an age-old concept but only in the 19th century was it adapted as the Bermudan or Marconi rig. A one-piece mainsail set on a mast without a gaff, hoisted with one halyard and controlled by one sheet, was simpler and more efficient. This revolution became the power train of pleasure yachting and racing.
But perhaps the time is coming for a re-evaluation of simpler rigs requiring fewer crew – alternatives with lower loads operated by automated systems. In an era of reduced carbon consumption, could more radical sailplans even herald a revival in sail power?
The evergreen Bermudan rig
The Bermudan rig is the all-rounder, able to perform well at all angles of sail. It is efficient upwind, while downwind the sail area can be significantly boosted with a big gennaker or spinnaker. For good reasons, it is the first choice for nearly every modern sailing yacht up to around 60 to 65 metres for cruising and regatta racing alike. At larger sizes, however, things start to become trickier, and the trade-offs get interesting.
Over the last decade, sail handling technology has steadily advanced to allow sloop rigs to grow larger and larger. “But with that comes a highly loaded rig, many tonnes of compression from tension in the rigging, and you have to build structure in the boat to accept that,” explains Paul MacDonald, founder and superyacht sales manager of Southern Spars.
“You have to have a lot of deck gear and captive winches below decks and the machinery for that. But over the years, boom furling systems and MPS [Multi Purpose Sails for downwind angles] stored on a drum, for example, have made sail handling safer.
Bill Tripp is the designer behind the 86-metre Aquijo , which broke new ground in 2015 as the world’s largest Bermudan ketch. Tripp prefers to call the rig a "sketch", a portmanteau word for a rig that is neither a sloop nor a ketch “because the main and mizzen are identical”. Even though the sailplan is divided over two masts, each spar is still a towering 90 metres above the water. Aquijo perfectly illustrates the issues involved with a Bermudan rig when scaled up.
“The sloop is great but I prefer the ‘sketch’ for sailing around the world under full control due to the desirability of a two-masted rig for reaching ability, which dominates passages, and the safety of controllable loads when sailing in all kinds of conditions miles from nowhere,” he says.
Upwind, Aquijo sets a jib, staysail, mainsail and mizzen, all in North Sails 3Di, totalling 3,821 square metres. A furling Code sail for reaching and downwind angles increases that to a vast 5,051 square metres.
While Aquijo has a crew retinue of 17, it can be controlled under sail by six or seven people. With custom winches to handle halyards and sheets, the sails can be hoisted astonishingly quickly for such a large rig. “It takes five minutes to put the main up, on average, and the main and mizzen can go up at the same time,” Tripp says. Aquijo has now sailed 100,000 nautical miles around the world and the owner is planning another circumnavigation through the Northwest Passage.
Tripp is not convinced of the wisdom of a much larger single-masted sloop rig. “If you are day sailing in the Med, a sloop would be awesome, but I am not sure if you had fewer sails you would be able to [reduce canvas] well enough. Also the mast is a windage problem when the keel is up and you are beam-to. If you are on anchor, that’s no problem but you’d have to be able to cope with being on the docks in 70 knots. The windage at 120 metres is not only more but the centre of effort is so much higher, and so the heeling loads all go up.”
However, British designer Malcolm McKeon , the name behind the high-performance, sloop-rigged carbon composite superyachts Missy and Ribelle , is pushing the sloop rig to new heights. His 85-metre design concept Apex, developed with Royal Huisman , would be the largest sloop-rigged yacht in the world. “The loads are enormous,” he admits, “but it is all scalable.”
“The big disadvantage is sail handling. The downwind sails are pretty complicated once you start hoisting and retrieving, even with drum and reel systems. It is not straightforward.” But, he adds, “I think we know the advantages of a sloop: if you want all-round performance you can’t beat it, even at the top end.”
Advantages of a clipper rig
The DynaRig has been around as a concept since the 1960s when German engineer Wilhelm Prölss devised these free-standing, rotating rigs as a fuel-saving solution for large commercial vessels. The idea was ahead of its time, so much so that its first realisation came nearly 40 years later when American owner Tom Perkins bought the residual technology and commissioned Dykstra Naval Architects to create a three-masted DynaRig for Maltese Falcon , his 88-metre Perini Navi.
The DynaRig is not as efficient upwind as the Bermudan rig, and is probably not the best solution for a yacht smaller than around 65 metres, suggests Jeroen de Vos of Dykstra. “We wouldn’t advise putting a DynaRig on a small yacht because there are other ways to manage sail handling. But on a larger yacht the DynaRig becomes an alternative because there is no rigging, no highly loaded sheets, low-tech [small] sails and no big winches.”
The beauty of the DynaRig is that its automatic systems can be handled by one or two people and, notes de Vos, “you don’t have to get out of your chair to go sailing. Maltese Falcon can sail on and off the anchor and can set 2,400 square metres of sail in six minutes. On other boats it takes six minutes to get the sail cover off.”
Damon Roberts of Magma Structures, which built the rigs for Maltese Falcon and the only other DynaRig yacht to date, the 106-metre Black Pearl , says: “You can do any manoeuvre easily; it’s like sailing a dinghy. There are no highly loaded sheets or ropes or flogging lines. You can luff up, bear away, tack and gybe at any time and really enjoy sailing the boat without any apparent fuss.”
So with all these advantages, why has the DynaRig been chosen for only two sailing superyachts? For some designers, such as Malcolm McKeon, it is partly to do with compromises imposed by the large mast tubes and bearing diameters on the internal structure and layout, “particularly in the cockpit area,” he says. He also points out that the clipper ship look is not to every owner’s taste. “Sloops are more conventional looking,” he says.
Damon Roberts says there is still development work to be done. He has teamed up with Southern Spars and, with their additional resources, expects evolution with several new projects. “These include two at the moment that are twin-masted DynaRigs,” he says. “We did quite a lot of wind tunnel work early on as we felt that was really the sweet spot for it, and people will be stunned at how efficient these are.”
The future of the wingsail
Wingsails have been around for decades too, but with their adoption by the last two America’s Cups and the confluence with foiling technology, they have undergone rapid and revolutionary development.
To date, there is no proven solution for reefing a wing that would be suitable for offshore cruising or ocean passages. As the pronounced aerodynamic “nose” at the leading edge of a wing can develop force in strong winds, they could potentially make a large yacht uncontrollable in port as well.
“How do you get rid of sail and how does [a boat] handle when caught out in heavy wind conditions – which you will be? How do you keep the angle of attack all the way up the rig and how do you handle squalls?” Roberts asks. “A mechanism to reduce sail might be easy to sketch out but it is difficult to engineer.”
Jeroen de Vos says: “The wingsails are more developed towards performance and I wouldn’t say that they are as practical as soft sails or would ever make handling easier. But if somebody wants that, why not? Reefable soft sails, wings that are inflated, hoisted panels, possibly these are applicable. The development of this area is happening very rapidly.”
Paul MacDonald of Southern Spars agrees that the time is not here yet but thinks it will come. “In reality we are in the early days of wings. For the America’s Cup, they are the most efficient way of sailing by a long shot, but with them comes handling issues, which the industry hasn’t resolved yet. But I am sure they will be in 10 years’ time. Designers such as VPLP are starting to [work on concepts] and we are going to see something that is usable and efficient and suitable for ocean work eventually,” he says. “And whatever the solution is, you imagine that it will scale.”
Looking to the future
A drive for greener superyachts could present an opportunity for sail, but perhaps it needs to be less daunting.
“There is this intimidation of sheets and backstays, and sailing is a language you don’t learn in a year,” Tripp says. “But we have a project we are doing now with a yard with some new rig technology and some soft wings that we think is going to be viable.
“We can uncomplicate sailing more. If we can win people over from motorboats it will help, but we are only winning these battles one or two at a time. We need [more] projects like Sailing Yacht A , which are something really different, and do more things better with less energy. We as architects need to elicit change.”
McKeon also sees change coming. “People are more and more concerned about keeping their image green and sails are the way to do that,” he says. “Simpler sailing systems are needed. The current generation is used to Bermudan sloops. In years to come, the traditionalists will all be gone, and maybe new people will be more accepting of [different ideas]. I think in the future we will certainly have wings.”
More about this yacht
Yachts for sale, similar yachts for sale, yachts for charter, more stories, most popular, from our partners, sponsored listings.
Currency: GBP
- Worldwide Delivery
Mooring Warps and Mooring Lines
- LIROS 3 Strand Polyester Mooring Warps
- LIROS Braided Dockline Mooring Warps
- LIROS Classic Mooring Warps
- LIROS Green Wave 3 Strand Mooring Warps
- LIROS Handy Elastic Mooring Warps
- LIROS Moorex12 Mooring Warps
- LIROS Octoplait Polyester Mooring Warps
- LIROS Polypropylene Floating Mooring Warps
- LIROS Super Yacht Mooring Polyester Docklines
- Marlow Blue Ocean Dockline
Mooring Accessories
- Mooring Cleats and Fairleads
- Mooring Compensators
- Mooring Shackles
- Mooring Swivels
Mooring Strops
- LIROS 3 Strand Nylon Mooring Strops
- LIROS Anchorplait Nylon Mooring Strops
- Small Boat and RIB Mooring Strops
Mooring Bridles
- V shape Mooring Bridles
- Y shape Mooring Bridles
Mooring Strops with chain centre section
- 3 Strand / Chain / 3 Strand
- Anchorplait / Chain / Anchorplait
Bonomi Mooring Cleats
- Majoni Fenders
- Polyform Norway Fenders
- Dock Fenders
- Fender Ropes and Accessories
- Ocean Inflatable Fenders
Mooring Buoys
Max power bow thrusters.
- Coastline Bow Thruster Accessories
50 metre / 100 metre Rates - Mooring
Mooring information.
- Mooring Warps Size Guide
- Mooring Lines - LIROS Recommended Diameters
- Mooring Rope Selection Guide
- Mooring Warp Length and Configuration Guide
- How to estimate the length of a single line Mooring Strop
- Mooring Ropes - Break Load Chart
- Mooring Compensator Advisory
- Rope Cockling Information
- Fender Size Guide
- Majoni Fender Guide
- Polyform Norway Fender Inflation Guide
Custom Build Instructions
- More Article and Guides >
Anchor Warps Spliced to Chain
- LIROS 3 Strand Nylon Spliced to Chain
- LIROS 3 Strand Polyester Spliced to Chain
- LIROS Anchorplait Nylon Spliced to Chain
- LIROS Octoplait Polyester Spliced to Chain
Anchor Warps
- Leaded Anchor Warp
- LIROS 3 Strand Nylon Anchor Warps
- LIROS 3 Strand Polyester Anchor Warps
- LIROS Anchorplait Nylon Anchor Warps
- LIROS Octoplait Polyester Anchor Warps
- Aluminium Anchors
- Galvanised Anchors
- Stainless Steel Anchors
Calibrated Anchor Chain
- Cromox G6 Stainless Steel Chain
- G4 Calibrated Stainless Steel Anchor Chain
- Lofrans Grade 40
- MF DAMS Grade 70
- MF Grade 40
- Titan Grade 43
Clearance Chain
Anchoring accessories.
- Anchor Connectors
- Anchor Trip Hooks and Rings
- Anchoring Shackles
- Bow Rollers and Fittings
- Chain and Anchor Stoppers
- Chain Links and Markers
50 / 100 metre Rates - Anchoring
Chain snubbers.
- Chain Hooks, Grabs and Grippers
- Chain Snubbing Bridles
- Chain Snubbing Strops
Drogue Warps and Bridles
- Lewmar Windlasses
- Lofrans Windlasses
- Maxwell Windlasses
- Quick Windlasses
Windlass Accessories
- Coastline Windlass Accessories
- Lewmar Windlass Accessories
- Lofrans Windlass Accessories
- Lofrans Windlass Replacement Parts
- Maxwell Windlass Accessories
- Quick Windlass Accessories
Anchoring Information
- How To Choose A Main Anchor
- Anchoring System Assessment
- Anchor Chain and Rope Size Guide
- The Jimmy Green Guide to the Best Anchor Ropes
- What Size Anchor Do I Need?
- Anchor Size Guides
- Anchor Rope Break Load and Chain Compatibility Chart
- How to Choose Your Anchor Chain
- How to Establish the Correct Anchor Chain Calibration?
- Calibrated Anchor Chain - General Information
- Calibrated Anchor Chain Quality Control
- Calibrated Chain - Break Load and Weight Guide
- Galvanising - Managing Performance and Endurance expectation
- Can Galvanised Steel be used with Stainless Steel?
- Windlass Selection Guide
- More Articles and Guides
Stainless Steel Wire Rigging and Wire Rope
- 1x19 Wire Rigging
- 7x19 Flexible Wire Rigging
- Compacted Strand Wire Rigging
- Insulated 1x19 Wire Backstays
Wire Rigging Fittings
- Swaged Terminals
- Swageless Terminals
- Turnbuckles / Rigging screws
- Turnbuckle Components
- Backstay Insulators
- Wire Terminals
Rigging Accessories
- Backing Plates
- Backstay Adjuster and Fittings
- Backstay Blocks
- Pins, Rings and Nuts
- Rigging Chafe Protection
Fibre Rigging
- DynIce Dux Fibre Rigging
- LIROS D-Pro Static Rigging
- LIROS D-Pro-XTR Fibre Rigging
- Marlow Excel D12 MAX 78 Rigging
- Marlow M-Rig Max Rigging
Fibre Rigging Fittings
- Bluewave Rope Terminals
- Colligo Marine Terminals
Dinghy Rigging
- Dinghy Rigging Fittings
- Fibre Dinghy Rigging
- Stainless Steel Dinghy Rigging
Wind Indicators
Guard wires, guardrails and guardrail webbing.
- Guard Rail Fittings
- Guard Rails in Fibre and Webbing
- Guard Wire Accessories
- Guard Wires
Furling Systems
- Anti-torsion Stays
- Headsail Reefing Furlers
- Straight Luff Furlers
- Top Down Furlers
Furling Accessories
- Continuous Furling Line Accessories
- Furling Line Accessories
50 / 100 metre Rates - Wire and Fibre
Standing rigging assistance.
- More Articles and Guides >
- Cruising Halyards
- Performance Halyards
- Dinghy Halyards
Rigging Shackles
- Bronze Snap Shackles
- Captive and Key Pin Shackles
- hamma™ Snap Shackles
- Selden Snap Shackles
- Soft Shackles
- Standard Snap Shackles
- Tylaska End Fittings
- Wichard Snap Shackles
Lashing, Lacing and Lanyards
- LIROS 3 Strand Lashing, Lacing and Lanyards
- LIROS Braided Lashing, Lacing and Lanyards
- Cruising Sheets
- Performance Sheets
- Dinghy Sheets
- Continuous Sheets
- Tapered Sheets
Running Rigging Accessories
- Anti-Chafe Rope Protection
- Barton Sail Handling
- Lazy Jack Sail Handling
- Rodkickers, Boomstruts
- Sail Handling Accessories
- Slab Reefing
Shock Cord and Fittings
Control lines.
- Cruising Control Lines
- Performance Control Lines
- Dinghy Control Lines
- Continuous Control Lines
Classic Ropes
- 50 / 100 metres - Classic
- Classic Control Lines
- Classic Docklines
- Classic Halyards
- Classic Sheets
- LIROS Classic 3 Strand Polyester
50 / 100 metre Rates - Running Rigging
- 50 / 100 metres - Cruising Ropes
- 50 / 100 metres - Dinghy Ropes
- 50 / 100 metres - Lashing and Lanyards
- 50 / 100 metres - Performance Ropes
- LIROS Ropes
- Marlow Ropes
Running Rigging Resources
- Running Rigging Rope Fibres and Construction Explained
- How to Select a Suitable Halyard Rope
- How to select Sheets and Guys
- Dyneema Rope - Cruising and Racing Comparison
- Dinghy Rope Selection Guide
- Rope Measurement Information
- Running Rigging - LIROS Recommended Line Diameters
- Running Rigging Break Load Comparison Chart
- Colour Coding for Running Rigging
- Selecting the right type of block, plain, roller or ball bearing
- Replacing your Furling Line
- Recycling Rope
Running Rigging Glossary
Custom build instructions for sheets, halyards, control lines, low friction rings, plain bearing blocks.
- Barton Blocks
- Harken Element Blocks
- Seasure 25mm Blocks
- Selden Yacht Blocks
Wooden Blocks
Ball bearing blocks.
- Barton Ball Bearing Blocks
- Harken Ball Bearing Blocks
- Holt Dynamic Blocks
- Selden Ball Bearing Blocks
Ratchet Blocks
- Harken Ratchet Blocks
- Selden Ratchet Blocks
Roller Bearing Blocks
- Harken Black Magic Blocks
- Selden Roller Bearing Blocks
Clutches and Organisers
- Barton Clutches and Organisers
- Lewmar Clutches
- Spinlock Clutches and Organisers
Genoa Car Systems
- Barton Genoa Sheeting
- Harken Genoa Systems
- Lewmar HTX Genoa Systems
Traveller Systems
- Barton Traveller Systems
- Harken Traveller Systems
Deck Fittings
- Bungs and Hatches
- Bushes and Fairleads
- Deck Eyes, Straps and Hooks
- Pad Eyes, U Bolts and Eye Bolts
Rudder and Transom Fittings
- Pintles and Gudgeons
- Tiller Extensions and Joints
Stanchion Blocks and Fairleads
Snatch blocks.
- Barton K Cam Cleats
- Harken Ball Bearing Cam Cleats
- Holt Cam Cleats
- Selden Cam Cleats
- Spinlock PXR Cleats
Block and Tackle Purchase Systems
- Barton Winches, Snubbers and Winchers
- Coastline Electric Winch Accessories
- Harken Winches, Handles and Accessories
- Karver Winches
- Lewmar Winches, Handles and Accessories
- Winch Servicing and Accessories
Deck Hardware Support
- Blocks and Pulleys Selection Guide
- Barton High Load Eyes
- Dyneema Low Friction Rings Comparison
- Seldén Block Selection Guide
- Barton Track Selection Guide
- Barton Traveller Systems Selection Guide
- Harken Winch Selection Guide
- Karver Winch Comparison Chart
- Lewmar Winch Selection Guide - PDF
- Winch Servicing Guide
Sailing Flags
- Courtesy Flags
- Red Ensigns
- Blue Ensigns
- Flag Accessories
- Flag Staffs and Sockets
- Flag Making and Repair
- Signal Code Flags
- Galvanised Shackles
- Stainless Steel Shackles
- Titanium Shackles
- Webbing only
- Webbing Restraint Straps
- Webbing Sail Ties
- Webbing Soft Shackles
Hatches and Portlights
Sail care and repair.
- Sail Sewing
Maintenance
- Antifouling
- Fillers and Sealants
- Primers and Thinners
- PROtect Tape
Fixings and Fastenings
- Monel Rivets
- Screws, Bolts, Nuts and Washers
- U Bolts, Eye Bolts and Pad Eyes
Splicing Accessories
- Fids and Tools
- Knives and Scissors
General Chandlery
- Barrier Ropes
- Canvas Bags and Accessories
- Carabiners and Hooks
- Netting and Accessories
- Rope Ladders
Seago Boats and Tenders
Chandlery information, flag articles.
- Flag Size Guide
- Bending and Hoisting Methods for Sailing Flags
- Courtesy Flags Identification, Labelling and Stowage
- Courtesy Flag Map
- Flag Etiquette and Information
- Glossary of Flag Terms and Parts of a Flag
- Making and Repairing Flags
- Signal Code Message Definitions
Other Chandlery Articles
- Anchorplait Splicing Instructions
- Antifoul Coverage Information
- Hawk Wind Indicator Selection Guide
- Petersen Stainless - Upset Forging Information
- Speedy Stitcher Sewing Instructions
- Thimble Dimensions and Compatible Shackles
Jackstays and Jacklines
- Webbing Jackstays
- Stainless Steel Wire Jackstay Lifelines
- Fibre Jackstay Lifelines
- Jackstay and Lifeline Accessories
Safety Lines
Lifejackets.
- Children's Life Jackets
- Crewsaver Lifejackets
- Seago Lifejackets
- Spinlock Lifejackets
Buoyancy Aids
Life jackets accessories.
- Lifejacket Lights
- Lifejacket Rearming Kits
- Lifejacket Spray Hoods
Overboard Recovery
- Lifebuoy Accessories
- Purchase Systems
- Slings and Throwlines
Floating Rope
- LIROS Multifilament White Polypropylene
- LIROS Yellow Floating Safety Rope
- Danbuoy Accessories
- Jimmy Green Danbuoys
- Jonbuoy Danbuoys
- Seago Danbuoys
- Liferaft Accessories
- Seago Liferafts
Safety Accessories
- Fire Safety
- Grab Bag Contents
- Grab Bags and Polybottles
- Handheld VHF Radios
- Sea Anchors and Drogues
Safety Resources
- Guard Wires - Inspection and Replacement Guidance
- Guard Wire Stud Terminal Dimensions
- Webbing Jackstays Guidance
- Webbing Jackstays - Custom Build Instructions
- Danbuoy Selection Guide
- Danbuoy Instructions - 3 piece Telescopic - Offshore
- Liferaft Selection Guide
- Liferaft Servicing
- Man Overboard Equipment - World Sailing Compliance
- Marine Safety Information Links
- Safety Marine Equipment List for UK Pleasure Vessels
Sailing Clothing
- Sailing Jackets
- Sailing Trousers
- Thermal Layers
Leisure Wear
- Accessories
- Rain Jackets
- Sweatshirts
Sailing Footwear
- Dinghy Boots and Shoes
- Sailing Wellies
Leisure Footwear
- Walking Shoes
Sailing Accessories
- Sailing Bags and Holdalls
- Sailing Gloves
- Sailing Kneepads
Clothing Clearance
Clothing guide.
- What to wear Sailing
- Helly Hansen Mens Jacket and Pant Size Guide
- Helly Hansen Womens Sailing Jacket and Pant Size Guide
- Lazy Jacks Mens and Womens Size Charts
- Musto Men's and Women's Size Charts
- Old Guys Rule Size Guide
- Sailing Gloves Size Guides
- Weird Fish Clothing Size Charts
The Jimmy Green Clothing Store
Lower Fore St, Beer, East Devon, EX12 3EG
- Adria Bandiere
- Anchor Marine
- Anchor Right
- August Race
- Barton Marine
- Blue Performance
- Brierley Lifting
- Brook International
- Brookes & Adams
- Captain Currey
- Chaineries Limousines
- Coastline Technology
- Colligo Marine
- Cyclops Marine
- Douglas Marine
- Ecoworks Marine
- Exposure OLAS
- Fire Safety Stick
- Fortress Marine Anchors
- Hawk Marine Products
- Helly Hansen
- International
- Jimmy Green Marine
- Maillon Rapide
- Mantus Marine
- Marling Leek
- Meridian Zero
- MF Catenificio
- Ocean Fenders
- Ocean Safety
- Old Guys Rule
- Petersen Stainless
- Polyform Norway
- PSP Marine Tape
- Sidermarine
- Stewart Manufacturing Inc
- Team McLube
- Technical Marine Supplies
- Titan Marine (CMP)
- Ultramarine
- Waterline Design
- William Hackett
Clearance August Race Boat Cleaning Kit £26.00
Clearance LIROS Racer Dyneema £55.08
Clearance Folding Stock Anchor £123.25
Clearance LIROS Herkules £0.00
Clearance Barton Size 0 Ball Bearing Blocks - 5mm £10.13
Clearance Marlow Blue Ocean® Doublebraid £18.48
Mooring Clearance
Anchoring clearance, standing rigging clearance, running rigging clearance, deck hardware clearance, chandlery clearance, safety clearance, sailboat rigging can be divided in to 2 categories:.
Standing Rigging - the wires and ropes that hold up the mast, also known as shrouds or stays.
Running Rigging - the ropes (and wires) that control the sails on a yacht.
There are a large number of different terms that cover the use for which each rope is employed.
The most common generic terms are sheets and halyards.
Normally attached to the clew of the sail and control the shape and angle to the wind - each individual sheet is identified by the name of the sail as a prefix e.g. Jib sheets, genoa sheets, yankee sheets, staysail sheets, code zero sheets, gennaker sheets, cruising chute sheets, mainsheets, mizzen sheets - where these are a pair, they may also be classified as port or starboard. Spinnaker Sheets are used in conjunction with Spinnaker Guys and a spinnaker pole to control the shape of the spinnaker on either gybe.
Attached to the head of a sail and used to haul a sail up the mast - in the same way as sheets, each halyard is identified by the name of the sail as a prefix e.g. main halyard.
Sheets and halyards are part of a more generic category: Control Lines or a little more obscurely, Preventers. Control Lines include sheets and halyards and all the other ropes and wires that contribute to the efficient mangement of a yacht's sail area. A rope that stops an accidental gybe is commonly referred to as a preventer. However, most of the ropes that comprise a yacht's running rigging can be described as preventers i.e. a rope that is preventing something or control lines i.e. a rope that is controlling something.
Control Lines:
Tack Line - attached to the tack of a sail to make the length of the luff adjustable - common on loose footed reaching/running headsails e.g. gennakers but also used on more traditional rigs e.g. dipping lugsails
In Hauler or Tweaker - attached to a headsail (jib/genoa/yankee/code zero) sheet and used to bring the angle of the lead nearer to the centreline than the normal setting.
Barber Hauler - attached to a headsail sheet and used to create more downward pressure and generally from a point further outboard than the normal fairlead setting.
Downhaul or Cunningham - attached to the tack of a mainsail and used to create tension in the luff.
Kicker or Vang - diagonal line or purchase system (block and tackle) from base of mast to a point on the underside of the boom - used to create downward tension on the boom and subsequently the leach of the sail.
Outhaul - generally attached to the clew of a mainsail to adjust the foot tension.
Reefing Line or Reefing Pennant - Lines reeved through the boom and the mainsail to facilitate a reduction in mainsail area.
Lazyjack Line - used for guiding and controlling the mainsail as it is dropped.
Running Backstays or Checkstays - adjustable version of the backstay, generally consisting of a very low stretch standing part (single line) attached to a purchase system for adjusting the tension.
Preventer - line deployed to prevent the mainsail boom from accidentally gybing or control the speed of the boom's transition during a gybe.
- English - United Kingdom
Straight Talking – Mast and Standing Rigging Terminology
Published date: september 26 2020.

©Future Fibres
Upffront.com is all about performance sailing hardware and rigging systems. The heart, and driving force, of any sailing yacht is its mast and standing rigging which support the sails. If you are interested in optimising / upgrading your sailing systems it is important for us to have a common language, so we can share performance improvement ideas and options. In this blog we outline the key terminology of modern masts and rigging.
Overall Rig Layout
The mast tube is nominally (not physically!) split into " Panels ", numbered from the deck upwards. Between the deck and the first set of spreaders is “Panel 1”, and between the first and second sets of spreaders is “Panel 2” etc. Spreaders are also numbered from deck upwards – Spreader 1, Spreader 2 and can be further split between port and starboard e.g. Spr1 Stbd.
The standing rigging is the fixed / structural stays which support the mast. These are often split into Fore & aft (forestay and backstay) and then the lateral rigging (side shrouds). In wire rigging world, people often refer to the Cap shroud (running all the way from deck to masthead) and intermediate stays, however when we start talking rod and composite rigging we need to be more explicit and break the lateral rigging elements down in more detail.

© Armare Ropes Instead of a single cap shroud we have Vertical shrouds ( Verticals ), numbered as individual elements between the spreaders. The V1 connects the deck chainplate to the tip of the first spreader and the V2 runs between the first and second spreader etc.
Any stay joining the mast is called a Diagonal , and these are again numbered, relative to the mast panel e.g. D1, D2 etc. Across the top spreader there is normally a single stay with no junction i.e. it just bends around the spreader end. This single rod/wire/cable is often referred to as the " Top-span ". In the lower half, it is acting as a vertical and then up to the mast it is a diagonal. On a 2-spreader rig this top-span cable is called the V2/D3 and on a 3-spreader rig V3/D4.
Mast Interfaces
Standing rigging attachment points on the mast are called Tangs . There are many different types of tangs and when working on rigging projects it is critical to know what you are dealing with. For example. a forestay tang can be a single plate ( Lug ), which requires a fork interface, or two plates on the rig ( Jaw ), designed for an eye fitting. Pin hole diameters, plate thicknesses and overall geometry are all crucial measurements when working with these types of tangs.
The top Diagonal tang is called the Cap tang and the others referred to by the Diagonal number e.g. D2 tang. Again, there are many different types, but most modern yachts will use tangs designed for Stemball end fittings. These will either be fixed to the mast wall - Clamp Tang – or a lower profile, lighter weight solution uses a through-bar system and commonly called a Micro Tang .

It is critically important that you use the correct stemball for your tang. It is standard industry practice to source your stemballs from the same manufacturer as your tangs. The geometry and the radius of the stemball has to exactly match the seat in the tang, to minimize wear and metal fatigue.N.B. The stemball is mounted on the rod prior to cold heading.

Deck Interfaces
The deck attachment points for the standing rigging are called Chainplates . These are key structural elements of any sailing boat and, like the forestay tang, they will generally be either a Lug or a Jaw arrangement. Interestingly, but unsurprisingly, the pin diameters in your chainplates ultimately define most of the hardware specification on your boat. For example – one of the critical specification criteria for any headsail furling system is the forestay chainplate pin diameter.
Masts move......... and articulation is an essential element of any structural rigging joint. The reason stemballs are so popular is that they are essentially a ball joint which allows articulation. For any other mast or deck attachment a Toggle is used to allow articulation in two planes.

Soft Solutions

© Offshore Spars - Lash Tang
Saving weight aloft has major benefits in terms of your boats sailing performance (refer to previous blog on the subject here ). There are an increasing number of new materials, technologies and products available which can be retrofitted to an older rig to turbo-charge your faithful ride.
If you would like to explore the options for a retrofit to composite rigging on your boat please use the link below, or contact us at [email protected]

Phil Anniss
- There are no suggestions because the search field is empty.
We are constantly reporting on the latest innovations in the marine industry which offer weight savings whilst, at the same time, increasing safety factors. The result: lighter, faster, safer and more exciting sailing.

Recent Posts
Popular posts.
- Furling (55)
- Code Zero Furling (43)
- Karver (40)
- Ronstan (30)
- Electronics (29)
- Blocks and Sheaves (25)
- Sheets (25)
- Winches (25)
- Facnor (24)
- Halyards (24)
- Harken (24)
- Control Lines (23)
- Gottifredi Maffioli (23)
- Dyneema® (22)
- All Purpose Blocks (20)
- Soft Shackles (18)
- Spars and Rigging (17)
- Upffront (17)
- Jib Furlers (16)
- Manual Winches (16)
- Clutches and Organisers (13)
- Mooring and Anchoring (13)
- Spinlock (13)
- Upffront News (13)
- Andersen (12)
- Furling Lines (12)
- Instrument Systems (12)
- Electric Winches (11)
- Loop Products (11)
- Shackles and Fixings (11)
- Armare Ropes (10)
- Morfrac Systems (10)
- Sailing GPS Computers (10)
- Toolkit (10)
- Bowsprit (9)
- Halyard Locks (9)
- Spinnaker Gear (9)
- Winch Handles (9)
- Fenders (8)
- Kohlhoff Rigging (8)
- Standing Rigging (8)
- Structural Furlers (8)
- Tips and Tricks (8)
- Ubi Maior Italia (8)
- Code Zero Furling Sets (7)
- Cyclops Marine (7)
- Oleu Watersports (7)
- Rope Clutches (7)
- Sailing Shackles (7)
- Tylaska (7)
- Velocitek (7)
- Boat Anchors (6)
- Cylindrical Fenders (6)
- Furling Sets (6)
- KZ Race Furler (6)
- Navigation Lights (6)
- PROtect Tapes (6)
- Profurl (6)
- Rigging Projects (6)
- Rope Cleats (6)
- Rope Jammer (6)
- Torsion Cables (6)
- Wichard (6)
- Allen Brothers (5)
- Autopilots (5)
- Boat Compasses (5)
- Code Zero and Asymmetric Furler Accessories (5)
- Deck Organisers (5)
- Mooring Lines (5)
- Outils Ocean (5)
- Premium Ropes (5)
- Racing Halyards (5)
- Racing Sheets (5)
- Robline (5)
- Round Fenders (5)
- Runner Blocks (5)
- Sailmon (5)
- Top-Down Furler Sets (5)
- Trogear (5)
- Anchor Chains (4)
- B&G (4)
- Backstay Cables (4)
- Cam Cleats (4)
- Digital Load Cells (4)
- Electric Furlers (4)
- Fenderess (4)
- Ferrules and Rings (4)
- Headfoils (4)
- Industry News (4)
- Morfblock (4)
- Reef Hooks (4)
- Snap Shackles (4)
- Structural Furler Accessories (4)
- Backstay (3)
- Bottom-up Furler Sets (3)
- Bullet Locks (3)
- Calypso Electronics (3)
- Cousin Tresec (3)
- Electric Winch Accessories (3)
- Fairleads (3)
- Flat Fenders (3)
- Foot and Cheek Blocks (3)
- Headsail Furling (3)
- Individual parts (3)
- Instrument Displays (3)
- Internal Locks (3)
- Life Jackets (3)
- Lifelines (3)
- Lopolight (3)
- Novasail (3)
- Race Computers (3)
- Sail Hanks (3)
- Sail Hardware (3)
- Sailing instruments (3)
- Snatch Blocks (3)
- Snuffers (3)
- Tiller Extensions (3)
- Tuff Luff and Harken Sets (3)
- TuffLuff (3)
- UK Sailmakers (3)
- Wireless Modules (3)
- Autopilot Drives (2)
- Black Box Snuffers (2)
- Boat Fairleads and Organisers (2)
- Clutch units (2)
- Cutter Rig (2)
- Ewincher (2)
- Excrusion Only (2)
- External Locks (2)
- Fiddle Blocks (2)
- Fixed Tiller Extensions (2)
- Foredeck Club (2)
- Future Fibres (2)
- Grab Bags (2)
- Hall Spars (2)
- Handheld VHF Radios (2)
- Ino-rope (2)
- Lash Thimbles (2)
- Life Jacket Accessories (2)
- Main Halyard Shackles (2)
- Mainsheet Purchase systems (2)
- Mantagua (2)
- PTFE Tapes (2)
- Padeyes (2)
- Polyform fenders (2)
- Resins, Lubes and Gels (2)
- Rope Bags (2)
- Safety Lines (2)
- Sailing Dogbones (2)
- Seasure (2)
- Sheaves (2)
- Soft Hanks (2)
- Solent Rig (2)
- Southern Spars (2)
- Storm Sails (2)
- Tellescopic Tiller Extensions (2)
- Tiller Pilots (2)
- Top down sets with stay (2)
- Winch Feeders (2)
- fendress (2)
- 3:1 Purchase (1)
- ACR Electronics (1)
- Alphalock (1)
- Autohelm Processors (1)
- Backstay Tensioners (1)
- Boom Vangs (1)
- Bow Shackles (1)
- Carbo-Link (1)
- Clevis pins (1)
- Clutch Parts (1)
- Clutch Repair Kits (1)
- Continuous Furling Lines (1)
- D-Shackles (1)
- DCSolar (1)
- DrSails (1)
- Dyneema® Covers (1)
- Electronics Accessories (1)
- Fendertex (1)
- Fids and Spikes (1)
- Flipper (1)
- Fourthcape (1)
- Halyard Blocks (1)
- Horn Cleats (1)
- Jackline (1)
- Jib Furler Accessories (1)
- Lead blocks (1)
- Life Jacket Spares (1)
- Low Friction Rings (1)
- Mainsail Furling (1)
- Manual Genoa Furlers (1)
- Navisafe (1)
- Polyform (1)
- Polyform US (1)
- Prism 2 (1)
- Reckmann (1)
- Rigging Tools (1)
- Rigid Boom Vangs (1)
- Rope Covers (1)
- Rope Purchases (1)
- Sailing Dinghy Tape Kits (1)
- Sailserver (1)
- Schaefer Marine (1)
- Single Furling Lines (1)
- Smartlink (1)
- Smarttune (1)
- Solar Power (1)
- Staysail (1)
- Strops and Loops (1)
- Swivel Locks (1)
- Tikal Tef-Gel (1)
- Top-Down Adapters (1)
- Torsion Ropes (1)
- Vakaros (1)
- Winch Service Accessories (1)
- Wired Navigation Lights (1)
- fender covers (1)
- Customer Support
Payment Methods
- Testimonials
- News & Blog
- Download Centre
- Image Credits
- Terms & Conditions
- Privacy Policy
- Interest Based Ads
- +49 431 2202140
- : [email protected]

- Rigging/Sails
Sailboat Rigging Parts: A Comprehensive Guide
by Emma Sullivan | Aug 5, 2023 | Sailboat Maintenance
Short answer sailboat rigging parts:
Sailboat rigging parts are the various components used to support and control the sails on a sailboat. They include standing rigging (such as shrouds and stays) which provide stability, and running rigging (such as sheets and halyards) which allow for adjustment of the sails. These parts are crucial for safe and efficient sailing.
Understanding Sailboat Rigging Parts: A Comprehensive Guide
Sailing can be an exhilarating experience, with the wind in your hair and the ocean at your fingertips. But have you ever wondered how a sailboat is able to harness the power of the wind? The answer lies in its rigging parts.
In this comprehensive guide, we will delve into the world of sailboat rigging parts, explaining their functions, types, and importance in ensuring a smooth sailing experience. So grab your sea legs and get ready to dive deeper into this intriguing topic!
Mast: Let’s start from the top – quite literally. The mast is the vertical spar that supports your boat’s sails . Think of it as the backbone of your entire rigging system. Without a sturdy mast, your sails wouldn’t be able to catch any wind . Masts are typically made from aluminum or carbon fiber for strength and durability.
Boom: Now let’s move downwards towards the boom – no, not a loud sound but yet another essential part of sailboat rigging! The boom is a horizontal spar attached to the lower part of the mast. Its primary function is to hold out and control the foot or bottom edge of your mainsail when it’s extended.
Standing Rigging: The standing rigging refers to all those components that help support the mast – keeping it upright against various forces such as wind pressure and waves. These include shrouds (sideways cables on each side of masts) and forestays (forward-facing cable attaching to bow). Both are crucial for maintaining stability and preventing your mast from flopping overboard!
Running Rigging: Unlike standing rigging, running rigging allows you to adjust specific areas of your sail according to weather conditions and boat maneuvering. Running riggings include halyards (cables used to hoist sails), sheets (lines controlling angles and tension), downhauls (used for tensioning sails downwards), and many others. Mastery of running rigging is essential in optimizing your sail’s performance .
Winches: Now, what good are all these elaborate rigging parts if you don’t have any means to control them effectively? This is where winches come into play – ultimately making your life as a sailor much easier. Winches are mechanical devices that allow you to apply force and tension on lines easily. They give you the advantage of leveraging your strength, especially when it comes to hoisting heavy sails or adjusting line tensions during maneuvers .
Blocks: Here’s a little tidbit for you – blocks are small yet mighty companions in sailboat rigging! Blocks, often made with stainless steel or strong composite materials, act as pulleys throughout your rigging system. They help redirect lines in different directions, ensuring smooth movement with minimum friction. A good set of blocks guarantees efficient performance and saves lots of effort!
Cleats: Let’s not overlook the unsung heroes – cleats! Cleats provide secure attachment points for lines and serve as anchors when needed. With proper cleating techniques, you can adjust tension or lock lines quickly without hassle. These small but mighty pieces keep everything precisely where they should be.
Understanding the intricacies of sailboat rigging requires continuous learning and practice over time. But once you grasp the roles each part plays in the grand symphony of sailing, you’ll unlock a world of possibilities on the water.
So whether you’re preparing for your first sailing adventure or well-versed in navigating the high seas, knowing these sailboat rigging parts will undoubtedly enhance your understanding and appreciation for this beautiful sport.
Remember, knowledge is power – especially when combined with the wind at your back and a sail full of confidence!
How to Choose the Right Sailboat Rigging Parts for Your Vessel
When it comes to sailing, having the right sailboat rigging parts is essential for a smooth and successful journey on the high seas. Whether you’re a seasoned sailor or just starting out, choosing the right rigging parts for your vessel can make all the difference in performance and safety. In this blog post, we will guide you through the process of selecting the perfect rigging parts for your sailboat, ensuring that every aspect of your sailing experience is elevated to new heights.
Firstly, it’s important to understand the various types of sailboat rigging parts available in the market. The most common types include turnbuckles, shackles, blocks, and cleats. Each of these components plays a crucial role in controlling and adjusting your sails while providing stability to your vessel . Therefore, it’s critical to consider factors such as size, material quality, and durability when making your selection.
Size matters! Before diving headfirst into purchasing rigging parts for your boat, take measurements of every component that requires replacement or upgrade. Comparing these dimensions with industry standards will help ensure that each part fits seamlessly into its designated place. Moreover, having properly sized rigging parts not only enhances overall performance but also minimizes stress and strain on other vital elements of your sailboat.
Material quality is another significant factor that should be considered when choosing rigging parts. Opt for high-quality materials like stainless steel or titanium that are resistant to corrosion and sea-water damage. These materials offer superior strength and longevity compared to their counterparts made from inferior metals such as aluminum or galvanized steel. Investing in top-notch materials may come at a higher upfront cost but will pay off in terms of durability and maintenance savings in the long run.
Durability is key when it comes to sailboat rigging parts since they bear substantial loads during navigation. It’s crucial to select components designed to withstand both intense weather conditions and wear-and-tear over time. Look for manufacturers with a solid reputation for producing reliable and long-lasting rigging parts. Reading customer reviews or seeking advice from experienced sailors can provide valuable insights into the durability of various brands in the market.
Additionally, consider the specific needs of your sailboat and sailing style while choosing rigging parts. For example, if you’re an adventurous sailor who frequently participates in regattas, opt for high-performance rigging parts with features like low-friction blocks and adjustable turnbuckles. On the other hand, if you enjoy leisurely cruises, focus on parts that prioritize comfort and ease of handling. Tailoring your choices to suit your individual requirements ensures that you can fully enjoy every moment on board without compromising safety or functionality.
Lastly, don’t underestimate the importance of aesthetics! While it may not directly impact performance, having sleek and visually appealing rigging parts adds a touch of elegance to your sailboat. Opting for well-designed components not only enhances the overall appearance but also reflects your attention to detail and passion for sailing.
In conclusion, choosing the right sailboat rigging parts is a task that deserves careful consideration. By taking into account factors such as size, material quality, durability, specific needs, and aesthetics; you can elevate your sailing experience to new heights. Remember to consult with experts or experienced sailors when in doubt and invest in top-quality components that will keep you sailing smoothly for years to come. Happy sailing!
Step-by-Step Installation Guide for Sailboat Rigging Parts
Title: A Nautical Masterclass: A Foolproof Guide to Installing Sailboat Rigging Parts
Introduction: Setting sail on the open sea is an exhilarating experience for any sailing enthusiast. However, before you can embark on your nautical adventure, it’s crucial to ensure that your sailboat rigging parts are installed correctly for optimal performance and safety. In this step-by-step installation guide, we’ll take you through each meticulous stage of the process, ensuring your rigging parts are professionally and securely installed.
Step 1: Preparation – Inspecting Your Rigging Parts: Before diving into the installation process, it’s essential to conduct a thorough inspection of all rigging parts. Look out for any signs of wear and tear, rust, or damage that may compromise their functionality or structural integrity. Replacing any faulty components at this stage will save you from troubles later on.
Step 2: Documentation – Know Your Components: Familiarize yourself with each sailboat rigging part and its purpose. Whether it’s shrouds, stays, turnbuckles, or clevis pins – understanding the role they play in ensuring stability and control over your sails is crucial . Exploring comprehensive resources like manufacturer manuals or online forums can provide valuable insights into specific installations.
Step 3: Proper Tools – Equip Yourself Like a Pro: To successfully install sailboat rigging parts, having the right tools at your disposal is paramount. Ensure you have a variety of wrenches (box-end and open-end), wire cutters, pliers, electrical tape, cotter pins or rings as per requirements, and quality marine-grade lubricants for ease of assembly.
Step 4: Removing Old Rigging Components: If you’re replacing existing rigging parts rather than installing them from scratch on a new boat build, carefully remove any old components while documenting their placements along with measurements if needed. This documentation will help ensure accurate placement during the reinstallation process.
Step 5: Planning – Diagram and Label: Create a detailed diagram or use labels to mark the location of each sailboat rigging part on your boat. This step helps you keep track of where each component belongs, avoiding confusion during installation. It also assures consistency should you need future replacements or repairs.
Step 6: Expert Connections – Assembling Your Rigging Parts: Gather all the necessary components and begin assembling them in proper order as indicated by manufacturer guidelines. Use appropriate connectors such as turnbuckles, clevis pins, or cotter rings to secure connections tightly. Pay meticulous attention to detail, ensuring that each connection is snug but not overtightened to allow for natural movement when sailing.
Step 7: Adjustments – Fine-Tuning for Optimal Sail Performance: Once all rigging parts are securely connected, it’s time for fine-tuning your setup. Start with tensioning the shrouds by adjusting their length evenly. Aim for an optimal balance where they provide sufficient support without excessively straining your mast or stays. Additionally, ensure turnbuckles are adjusted symmetrically on both sides for uniform tension throughout the rigging system.
Conclusion: Installing sailboat rigging parts demands precision, knowledge, and a keen eye for detail. By following this step-by-step guide, you’re well on your way to achieving a sturdy and reliable rigging system on your sailboat. Remember to prioritize safety above all else while enjoying countless ventures across the shimmering seas!
Frequently Asked Questions about Sailboat Rigging Parts Answered
Welcome to our blog! Today, we will be answering some frequently asked questions about sailboat rigging parts. Sailboat rigging is a vital component of any sailing vessel, and understanding the different parts involved can greatly enhance your sailing experience. So, let’s dive right in and address these popular queries!
1. What are the primary sailboat rigging parts? The primary sailboat rigging parts include the mast, boom, standing rigging (such as shrouds and stays), running rigging (halyards and sheets), blocks or pulleys, turnbuckles, cleats, winches, and various fittings. Each of these components has its specific purpose in controlling the sails’ position and tension.
2. How do I properly maintain sailboat rigging parts? Maintaining your sailboat rigging parts is crucial for their longevity and overall performance on the water. Regular inspections for rust or corrosion should be done, along with lubrication of moving parts using appropriate marine-grade lubricants. Additionally, replacing worn-out lines or damaged hardware promptly ensures safety while sailing .
3. Are all sailboat rigs created equal? Absolutely not! Sailboats come in different sizes and designs, necessitating varying types of rigs . From sloop rigs with a single mast to ketches with two masts to schooners with multiple masts—each configuration demands specific types of rigging parts tailored to the vessel’s characteristics.
4. Can I upgrade my current sailboat rigging? Certainly! Upgrading your sailboat’s rigging can enhance performance and make handling sails easier. However, it requires careful consideration of factors such as boat design, sailing conditions where you usually venture out to sea, budget constraints, etc. Consulting a professional rigger would give valuable insights into what upgrades would better suit your needs.
5. Is stainless steel always the best choice for standing rigging? Stainless steel is widely used due to its excellent corrosion resistance and strength. However, depending on the sailboat’s design and specific application, other materials like carbon fiber or high-performance synthetic fibers might be more suitable alternatives. Factors such as weight, flexibility, and cost must be weighed when choosing the optimal material for your standing rigging.
6. How often should I replace my running rigging? Running rigging is subject to wear and tear due to constant use and exposure to elements. While there isn’t a fixed timeframe for replacement, regular inspections of lines for fraying, stretching, or degradation are necessary. If signs of damage are visible or if the lines no longer hold their shape properly, it may be time for replacement.
7. Can I mix different brands of sailboat rigging parts? While it’s generally recommended to stick with one brand for consistency in design and quality, mixing different brands is not uncommon. However, it is important to ensure compatibility between various components by considering factors such as load capabilities, dimensions, and fitting types.
8. What tools do I need for sailboat rigging repairs? Having basic tools like wrenches (adjustable or socket), wire cutters, swaging tool (for crimping fittings), tape measure or calipers (for measuring lengths), spare shackles/pins/connectors would prove invaluable during sailboat rigging repairs or adjustments onboard.
We hope these answers provided you with insights into the world of sailboat rigging parts! Remember that proper maintenance of your rig ensures a safe and enjoyable sailing experience. If you require any further guidance or have specific queries related to your vessel’s rigging setup, reach out to our expert team who can assist you in making informed decisions tailored to your needs!
Essential Sailboat Rigging Parts Every Sailor Should Know About
Title: Essential Sailboat Rigging Parts Every Sailor Should Know About
Introduction: Sailing, an exhilarating activity that combines skill, strategy, and a deep connection with nature. As a sailor, understanding your rigging is essential in ensuring smooth sailing experiences. In this blog post, we will explore the key sailboat rigging parts that every sailor should be acquainted with. From essential components to clever solutions, let’s delve into the intriguing world of sailboat rigging.
1. Standing Rigging: The backbone of your sailboat’s mast support, standing rigging consists of wires or synthetic lines that keep the mast securely in place. Made up of stays (front and side) and shrouds (side and back), standing rigging offers stability against wind forces while allowing controlled movement for optimized performance .
2. Running Rigging: Unlike standing rigging which holds the mast in place, running rigging plays a pivotal role in adjusting sails for speed and maneuverability. Components like halyards (ropes used to raise/lower sails), sheets (lines controlling the angle of sails), and control lines (used for fine-tuning various aspects) are all part of this dynamic system. Understanding their functions empowers sailors to harness wind power effectively.
3. Masthead Fittings: Atop your sailboat’s mast lies a world hidden from plain sight – masthead fittings. These crucial elements determine your ability to achieve efficient sail trim through mechanisms such as sheaves (pulleys guiding halyards), tangs (sturdy attachments for stays/shrouds), and spinnaker halyard blocks offering controlled hoisting abilities even when battling relentless gusts.
4. Harken Batten Car Systems: A testament to innovation in technology comes in the form of Harken batten car systems – clever solutions that enhance sail control efficiency during races or leisurely cruises alike. With these ingenious fittings, sailors can fine-tune the camber of their mainsails to adapt swiftly to changing wind conditions, ensuring optimal speed and performance .
5. Blocks and Pulleys: Imagine rigging as the intricate web that connects your actions to the boat ‘s responses. Blocks and pulleys – humble yet indispensable components within this web – enable mechanical advantage for efficient sail handling. Cleverly designed blocks from leading manufacturers like Ronstan or Harken offer low friction, high load capabilities, making sheeting in or easing out sails a breeze even under immense pressure.
6. Tensioning Devices: Maintaining proper tension in standing rigging is crucial for safety and optimal sailing performance . Turnbuckles (mechanical devices with threaded shafts) allow precise adjustment of stays and shrouds’ tension, ensuring the mast remains upright yet flexible enough to respond to various forces encountered at sea.
7. Mast Steps or Mast Climbing Systems: For those daring sailors who venture up masts either for maintenance or picturesque views, mast steps or climbing systems are saviors. Conveniently installed on the mast exterior, these stepping mechanisms provide secure footing during ascents or descents—no acrobatics required!
Conclusion: Mastering sailboat rigging parts unlocks a world of possibilities for every sailor embarking on an adventure across vast waters. From understanding standing and running rigging’s intricacies to embracing innovative solutions like batten car systems and advanced blocks, each element plays a vital role in achieving excellent sailing experiences. So whether you’re cruising leisurely or chasing racing glory, enrich your knowledge of these essential rigging parts—your sailboat will thank you with smooth glides through the open seas !
Troubleshooting Common Issues with Sailboat Rigging Parts: Tips and Solutions
Introduction:
Sailboat rigging plays a crucial role in the performance and safety of your vessel. From the mast to the lines, each component needs to be properly maintained and functional. However, like any equipment, problems can arise. In this blog post, we will explore some common issues that sailors face with sailboat rigging parts and provide you with practical tips and solutions to troubleshoot them effectively.
1. Stiff or Difficult-to-Use Lines: One of the most frustrating issues sailors encounter is when their lines become stiff or hard to handle. This can be caused by a variety of factors such as dirt buildup, saltwater corrosion, or UV damage. To address this problem, start by thoroughly cleaning the lines with mild soap and water. Rinse them off carefully and allow them to dry completely before applying a suitable lubricant specifically designed for marine applications. Additionally, consider investing in high-quality UV-resistant lines that are less prone to degradation over time.
2. Stretched or Slacking Shrouds: Shrouds are essential components of sailboat rigging that provide support for the mast. Over time, they may stretch or slacken due to constant tension and stress during sailing trips. To troubleshoot this issue, start by inspecting the turnbuckles on both ends of each shroud for any signs of wear or damage; if necessary, replace them accordingly. Next, adjust the tension by tightening or loosening the turnbuckle until reaching the desired level indicated in your boat’s manual or consulting a professional rigger if unsure.
3. Leaking Stay Plates: Stay plates serve as structural reinforcement for boat masts by connecting them securely to the deck or hull through various fittings known as chainplates. Sometimes these chainplates develop leaks due to worn-out sealants or cracks caused by age or impact. To address leaking stay plate issues effectively, first remove any corroded fittings and replace all sealants with specialized marine-grade products. Gently inspect the chainplates for any signs of cracks or excessive wear, and if necessary, consult with a specialized technician to assess whether replacement is needed.
4. Blockage in Winches and Blocks: Winches and blocks are critical mechanisms for manipulating sailboat rigging lines. Nonetheless, they can become clogged or jammed due to various reasons like dirt, saltwater residue, or worn-out bearings. Regular maintenance is key to preventing blockage issues. Start by cleaning winches and blocks with fresh water after each sailing trip, removing any debris present. Inspecting bearings for smooth rotation is essential; if you notice resistance or grinding sounds, they may need lubrication or replacement. Always refer to your specific winch manufacturer’s instructions for proper care.
5. Corroding Mast Fittings: Mast fittings are exposed to the harshest elements while sailing – from rain and saltwater spray to extreme sunlight exposure. Consequently, these fittings may experience significant corrosion over time. To combat corrosion effectively, conduct regular inspections of all mast fittings using a magnifying glass to identify even minor signs of damage or rust build-up on screws, bolts, rivets, or other fastening components. If corrosion is detected early enough, it can be addressed by thoroughly cleaning the affected area and applying an appropriate anti-corrosion treatment or protective coating.
Conclusion:
Addressing common issues with sailboat rigging parts does not have to be a daunting task when armed with practical tips and solutions such as those outlined above. By paying attention to regular maintenance routines and addressing problems promptly, sailors can ensure their sailboat rigging remains reliable and safe for many future adventures on the open water. Remember that it is always prudent to consult qualified professionals for advice if you encounter any challenges beyond your expertise in sailboat rigging troubleshooting.
Happy sailing!
Recent Posts

- Sailboat Gear and Equipment
- Sailboat Lifestyle
- Sailboat Maintenance
- Sailboat Racing
- Sailboat Tips and Tricks
- Sailboat Types
- Sailing Adventures
- Sailing Destinations
- Sailing Safety
- Sailing Techniques

Beginner’s Guide: How To Rig A Sailboat – Step By Step Tutorial
Alex Morgan
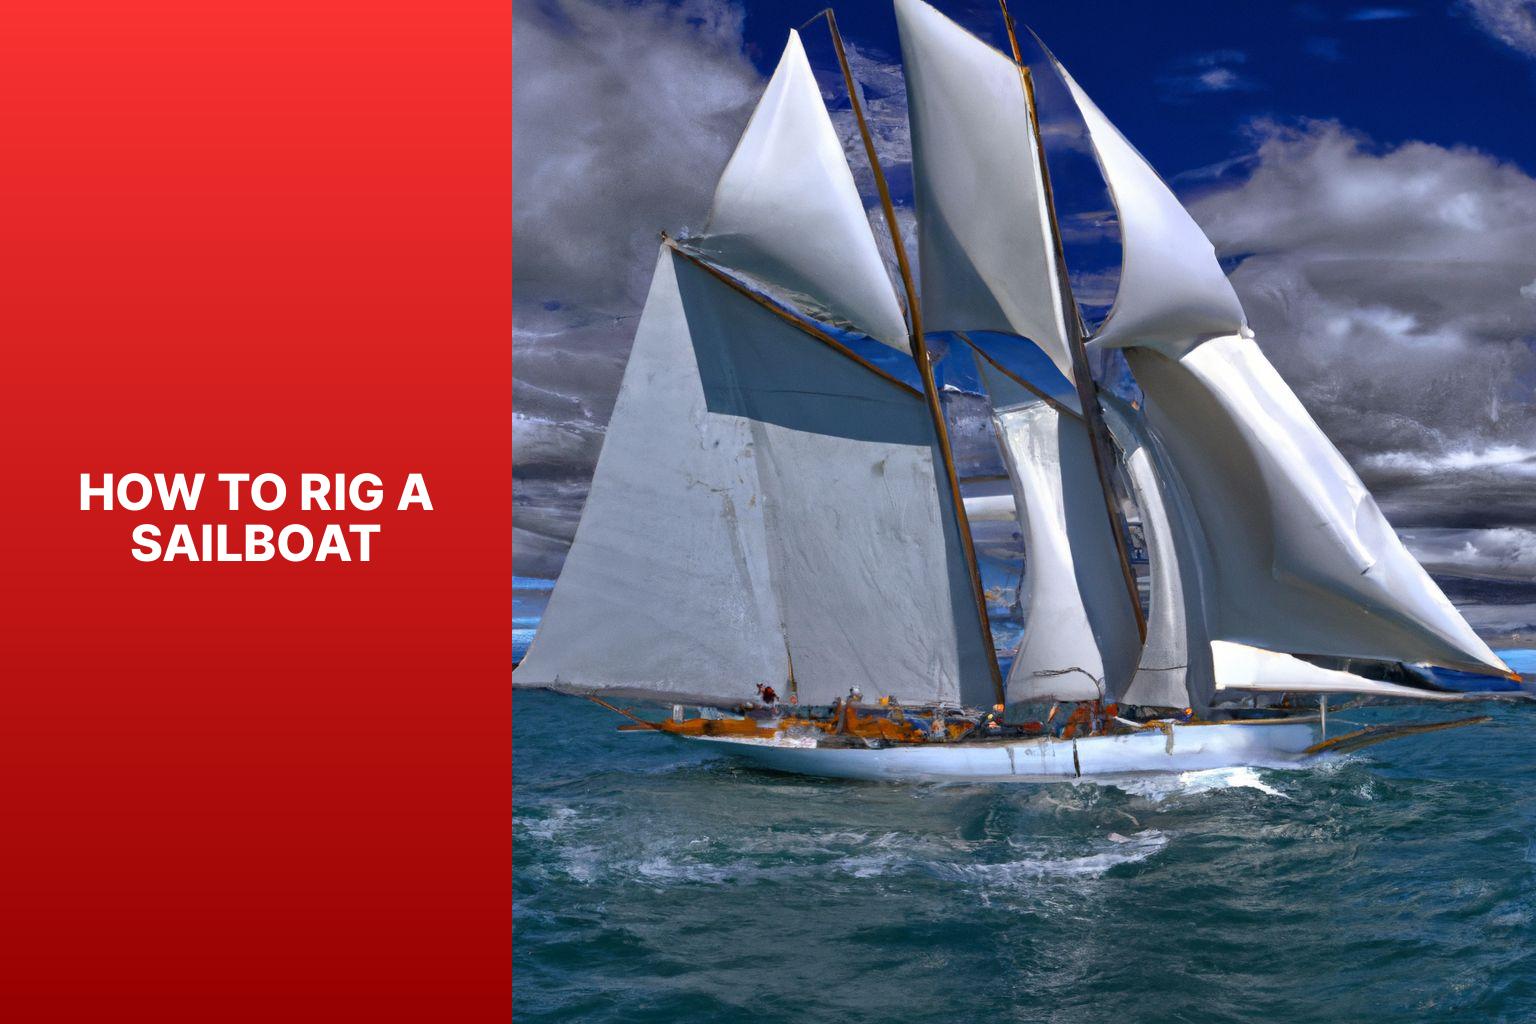
Rigging a sailboat is a crucial process that ensures the proper setup and functioning of a sailboat’s various components. Understanding the process and components involved in rigging is essential for any sailor or boat enthusiast. In this article, we will provide a comprehensive guide on how to rig a sailboat.
Introduction to Rigging a Sailboat
Rigging a sailboat refers to the process of setting up the components that enable the sailboat to navigate through the water using wind power. This includes assembling and positioning various parts such as the mast, boom, standing rigging, running rigging, and sails.
Understanding the Components of a Sailboat Rigging
Before diving into the rigging process, it is important to have a good understanding of the key components involved. These components include:
The mast is the tall vertical spar that provides vertical support to the sails and holds them in place.
The boom is the horizontal spar that runs along the bottom edge of the sail and helps control the shape and position of the sail.
- Standing Rigging:
Standing rigging consists of the wires and cables that support and stabilize the mast, keeping it upright.
- Running Rigging:
Running rigging refers to the lines and ropes used to control the sails, such as halyards, sheets, and control lines.
Preparing to Rig a Sailboat
Before rigging a sailboat, there are a few important steps to take. These include:
- Checking the Weather Conditions:
It is crucial to assess the weather conditions before rigging a sailboat. Unfavorable weather, such as high winds or storms, can make rigging unsafe.
- Gathering the Necessary Tools and Equipment:
Make sure to have all the necessary tools and equipment readily available before starting the rigging process. This may include wrenches, hammers, tape, and other common tools.
- Inspecting the Rigging Components:
In the upcoming sections of this article, we will provide a step-by-step guide on how to rig a sailboat, as well as important safety considerations and tips to keep in mind. By following these guidelines, you will be able to rig your sailboat correctly and safely, allowing for a smooth and enjoyable sailing experience.
Key takeaway:
- Rigging a sailboat maximizes efficiency: Proper rigging allows for optimized sailing performance, ensuring the boat moves smoothly through the water.
- Understanding sailboat rigging components: Familiarity with the various parts of a sailboat rigging, such as the mast, boom, and standing and running riggings, is essential for effective rigging setup.
- Importance of safety in sailboat rigging: Ensuring safety is crucial during the rigging process, including wearing a personal flotation device, securing loose ends and lines, and being mindful of overhead power lines.
Get ready to set sail and dive into the fascinating world of sailboat rigging! We’ll embark on a journey to understand the various components that make up a sailboat’s rigging. From the majestic mast to the nimble boom , and the intricate standing rigging to the dynamic running rigging , we’ll explore the crucial elements that ensure smooth sailing. Not forgetting the magnificent sail, which catches the wind and propels us forward. So grab your sea legs and let’s uncover the secrets of sailboat rigging together.
Understanding the mast is crucial when rigging a sailboat. Here are the key components and steps to consider:
1. The mast supports the sails and rigging of the sailboat. It is made of aluminum or carbon fiber .
2. Before stepping the mast , ensure that the area is clear and the boat is stable. Have all necessary tools and equipment ready.
3. Inspect the mast for damage or wear. Check for corrosion , loose fittings , and cracks . Address any issues before proceeding.
4. To step the mast , carefully lift it into an upright position and insert the base into the mast step on the deck of the sailboat.
5. Secure the mast using the appropriate rigging and fasteners . Attach the standing rigging , such as shrouds and stays , to the mast and the boat’s hull .
Fact: The mast of a sailboat is designed to withstand wind resistance and the tension of the rigging for stability and safe sailing.
The boom is an essential part of sailboat rigging. It is a horizontal spar that stretches from the mast to the aft of the boat. Constructed with durable yet lightweight materials like aluminum or carbon fiber, the boom provides crucial support and has control over the shape and position of the sail. It is connected to the mast through a boom gooseneck , allowing it to pivot. One end of the boom is attached to the mainsail, while the other end is equipped with a boom vang or kicker, which manages the tension and angle of the boom. When the sail is raised, the boom is also lifted and positioned horizontally by using the topping lift or lazy jacks.
An incident serves as a warning that emphasizes the significance of properly securing the boom. In strong winds, an improperly fastened boom swung across the deck, resulting in damage to the boat and creating a safety hazard. This incident highlights the importance of correctly installing and securely fastening all rigging components, including the boom, to prevent accidents and damage.
3. Standing Rigging
When rigging a sailboat, the standing rigging plays a vital role in providing stability and support to the mast . It consists of several key components, including the mast itself, along with the shrouds , forestay , backstay , and intermediate shrouds .
The mast, a vertical pole , acts as the primary support structure for the sails and the standing rigging. Connected to the top of the mast are the shrouds , which are cables or wires that extend to the sides of the boat, providing essential lateral support .
The forestay is another vital piece of the standing rigging. It is a cable or wire that runs from the top of the mast to the bow of the boat, ensuring forward support . Similarly, the backstay , also a cable or wire, runs from the mast’s top to the stern of the boat, providing important backward support .
To further enhance the rig’s stability , intermediate shrouds are installed. These additional cables or wires are positioned between the main shrouds, as well as the forestay or backstay. They offer extra support , strengthening the standing rigging system.
Regular inspections of the standing rigging are essential to detect any signs of wear, such as fraying or corrosion . It is crucial to ensure that all connections within the rig are tight and secure, to uphold its integrity. Should any issues be identified, immediate attention must be given to prevent accidents or damage to the boat. Prioritizing safety is of utmost importance when rigging a sailboat, thereby necessitating proper maintenance of the standing rigging. This ensures a safe and enjoyable sailing experience.
Note: <p> tags have been kept intact.
4. Running Rigging
Running Rigging
When rigging a sailboat, the running rigging is essential for controlling the sails and adjusting their position. It is important to consider several aspects when dealing with the running rigging.
1. Choose the right rope: The running rigging typically consists of ropes with varying properties such as strength, stretch, and durability. Weather conditions and sailboat size should be considered when selecting the appropriate rope.
2. Inspect and maintain the running rigging: Regularly check for signs of wear, fraying, or damage. To ensure safety and efficiency, replace worn-out ropes.
3. Learn essential knot tying techniques: Having knowledge of knots like the bowline, cleat hitch, and reef knot is crucial for securing the running rigging and adjusting sails.
4. Understand different controls: The running rigging includes controls such as halyards, sheets, and control lines. Familiarize yourself with their functions and proper usage to effectively control sail position and tension.
5. Practice proper sail trimming: Adjusting the tension of the running rigging significantly affects sailboat performance. Mastering sail trimming techniques will help optimize sail shape and maximize speed.
By considering these factors and mastering running rigging techniques, you can enhance your sailing experience and ensure the safe operation of your sailboat.
The sail is the central component of sailboat rigging as it effectively harnesses the power of the wind to propel the boat.
When considering the sail, there are several key aspects to keep in mind:
– Material: Sails are typically constructed from durable and lightweight materials such as Dacron or polyester. These materials provide strength and resistance to various weather conditions.
– Shape: The shape of the sail plays a critical role in its overall performance. A well-shaped sail should have a smooth and aerodynamic profile, which allows for maximum efficiency in capturing wind power.
– Size: The size of the sail is determined by its sail area, which is measured in square feet or square meters. Larger sails have the ability to generate more power, but they require greater skill and experience to handle effectively.
– Reefing: Reefing is the process of reducing the sail’s size to adapt to strong winds. Sails equipped with reefing points allow sailors to decrease the sail area, providing better control in challenging weather conditions.
– Types: There are various types of sails, each specifically designed for different purposes. Common sail types include mainsails, jibs, genoas, spinnakers, and storm sails. Each type possesses its own unique characteristics and is utilized under specific wind conditions.
Understanding the sail and its characteristics is vital for sailors, as it directly influences the boat’s speed, maneuverability, and overall safety on the water.
Getting ready to rig a sailboat requires careful preparation and attention to detail. In this section, we’ll dive into the essential steps you need to take before setting sail. From checking the weather conditions to gathering the necessary tools and equipment, and inspecting the rigging components, we’ll ensure that you’re fully equipped to navigate the open waters with confidence. So, let’s get started on our journey to successfully rigging a sailboat!
1. Checking the Weather Conditions
Checking the weather conditions is crucial before rigging a sailboat for a safe and enjoyable sailing experience. Monitoring the wind speed is important in order to assess the ideal sailing conditions . By checking the wind speed forecast , you can determine if the wind is strong or light . Strong winds can make sailboat control difficult, while very light winds can result in slow progress.
Another important factor to consider is the wind direction . Assessing the wind direction is crucial for route planning and sail adjustment. Favorable wind direction helps propel the sailboat efficiently, making your sailing experience more enjoyable.
In addition to wind speed and direction, it is also important to consider weather patterns . Keep an eye out for impending storms or heavy rain. It is best to avoid sailing in severe weather conditions that may pose a safety risk. Safety should always be a top priority when venturing out on a sailboat.
Another aspect to consider is visibility . Ensure good visibility by checking for fog, haze, or any other conditions that may hinder navigation. Clear visibility is important for being aware of other boats and potential obstacles that may come your way.
Be aware of the local conditions . Take into account factors such as sea breezes, coastal influences, or tidal currents. These local factors greatly affect sailboat performance and safety. By considering all of these elements, you can have a successful and enjoyable sailing experience.
Here’s a true story to emphasize the importance of checking the weather conditions. One sunny afternoon, a group of friends decided to go sailing. Before heading out, they took the time to check the weather conditions. They noticed that the wind speed was expected to be around 10 knots, which was perfect for their sailboat. The wind direction was coming from the northwest, allowing for a pleasant upwind journey. With clear visibility and no approaching storms, they set out confidently, enjoying a smooth and exhilarating sail. This positive experience was made possible by their careful attention to checking the weather conditions beforehand.
2. Gathering the Necessary Tools and Equipment
To efficiently gather all of the necessary tools and equipment for rigging a sailboat, follow these simple steps:
- First and foremost, carefully inspect your toolbox to ensure that you have all of the basic tools such as wrenches, screwdrivers, and pliers.
- Make sure to check if you have a tape measure or ruler available as they are essential for precise measurements of ropes or cables.
- Don’t forget to include a sharp knife or rope cutter in your arsenal as they will come in handy for cutting ropes or cables to the desired lengths.
- Gather all the required rigging hardware including shackles, pulleys, cleats, and turnbuckles.
- It is always prudent to check for spare ropes or cables in case replacements are needed during the rigging process.
- If needed, consider having a sailing knife or marlinspike tool for splicing ropes or cables.
- For rigging a larger sailboat, it is crucial to have a mast crane or hoist to assist with stepping the mast.
- Ensure that you have a ladder or some other means of reaching higher parts of the sailboat, such as the top of the mast.
Once, during the preparation of rigging my sailboat, I had a moment of realization when I discovered that I had forgotten to bring a screwdriver . This unfortunate predicament occurred while I was in a remote location with no nearby stores. Being resourceful, I improvised by utilizing a multipurpose tool with a small knife blade, which served as a makeshift screwdriver. Although it was not the ideal solution, it allowed me to accomplish the task. Since that incident, I have learned the importance of double-checking my toolbox before commencing any rigging endeavor. This practice ensures that I have all of the necessary tools and equipment, preventing any unexpected surprises along the way.
3. Inspecting the Rigging Components
Inspecting the rigging components is essential for rigging a sailboat safely. Here is a step-by-step guide on inspecting the rigging components:
1. Visually inspect the mast, boom, and standing rigging for damage, such as corrosion, cracks, or loose fittings.
2. Check the tension of the standing rigging using a tension gauge. It should be within the recommended range from the manufacturer.
3. Examine the turnbuckles, clevis pins, and shackles for wear or deformation. Replace any damaged or worn-out hardware.
4. Inspect the running rigging, including halyards and sheets, for fraying, signs of wear, or weak spots. Replace any worn-out lines.
5. Check the sail for tears, wear, or missing hardware such as grommets or luff tape.
6. Pay attention to the connections between the standing rigging and the mast. Ensure secure connections without any loose or missing cotter pins or rigging screws.
7. Inspect all fittings, such as mast steps, spreader brackets, and tangs, to ensure they are securely fastened and in good condition.
8. Conduct a sea trial to assess the rigging’s performance and make necessary adjustments.
Regularly inspecting the rigging components is crucial for maintaining the sailboat’s rigging system’s integrity, ensuring safe sailing conditions, and preventing accidents or failures at sea.
Once, I went sailing on a friend’s boat without inspecting the rigging components beforehand. While at sea, a sudden gust of wind caused one of the shrouds to snap. Fortunately, no one was hurt, but we had to cut the sail loose and carefully return to the marina. This incident taught me the importance of inspecting the rigging components before sailing to avoid unforeseen dangers.
Step-by-Step Guide on How to Rig a Sailboat
Get ready to set sail with our step-by-step guide on rigging a sailboat ! We’ll take you through the process from start to finish, covering everything from stepping the mast to setting up the running rigging . Learn the essential techniques and tips for each sub-section, including attaching the standing rigging and installing the boom and sails . Whether you’re a seasoned sailor or a beginner, this guide will have you ready to navigate the open waters with confidence .
1. Stepping the Mast
To step the mast of a sailboat, follow these steps:
1. Prepare the mast: Position the mast near the base of the boat.
2. Attach the base plate: Securely fasten the base plate to the designated area on the boat.
3. Insert the mast step: Lower the mast step into the base plate and align it with the holes or slots.
4. Secure the mast step: Use fastening screws or bolts to fix the mast step in place.
5. Raise the mast: Lift the mast upright with the help of one or more crew members.
6. Align the mast: Adjust the mast so that it is straight and aligned with the boat’s centerline.
7. Attach the shrouds: Connect the shrouds to the upper section of the mast, ensuring proper tension.
8. Secure the forestay: Attach the forestay to the bow of the boat, ensuring it is securely fastened.
9. Final adjustments: Check the tension of the shrouds and forestay, making any necessary rigging adjustments.
Following these steps ensures that the mast is properly stepped and securely in place, allowing for a safe and efficient rigging process. Always prioritize safety precautions and follow manufacturer guidelines for your specific sailboat model.
2. Attaching the Standing Rigging
To attach the standing rigging on a sailboat, commence by preparing the essential tools and equipment, including wire cutters, crimping tools, and turnbuckles.
Next, carefully inspect the standing rigging components for any indications of wear or damage.
After inspection, fasten the bottom ends of the shrouds and stays to the chainplates on the deck.
Then, securely affix the top ends of the shrouds and stays to the mast using adjustable turnbuckles .
To ensure proper tension, adjust the turnbuckles accordingly until the mast is upright and centered.
Utilize a tension gauge to measure the tension in the standing rigging, aiming for around 15-20% of the breaking strength of the rigging wire.
Double-check all connections and fittings to verify their security and proper tightness.
It is crucial to regularly inspect the standing rigging for any signs of wear or fatigue and make any necessary adjustments or replacements.
By diligently following these steps, you can effectively attach the standing rigging on your sailboat, ensuring its stability and safety while on the water.
3. Installing the Boom and Sails
To successfully complete the installation of the boom and sails on a sailboat, follow these steps:
1. Begin by securely attaching the boom to the mast. Slide it into the gooseneck fitting and ensure it is firmly fastened using a boom vang or another appropriate mechanism.
2. Next, attach the main sail to the boom. Slide the luff of the sail into the mast track and securely fix it in place using sail slides or cars.
3. Connect the mainsheet to the boom. One end should be attached to the boom while the other end is connected to a block or cleat on the boat.
4. Proceed to attach the jib or genoa. Make sure to securely attach the hanks or furler line to the forestay to ensure stability.
5. Connect the jib sheets. One end of each jib sheet should be attached to the clew of the jib or genoa, while the other end is connected to a block or winch on the boat.
6. Before setting sail, it is essential to thoroughly inspect all lines and connections. Ensure that they are properly tensioned and that all connections are securely fastened.
During my own experience of installing the boom and sails on my sailboat, I unexpectedly encountered a strong gust of wind. As a result, the boom began swinging uncontrollably, requiring me to quickly secure it to prevent any damage. This particular incident served as a vital reminder of the significance of properly attaching and securing the boom, as well as the importance of being prepared for unforeseen weather conditions while rigging a sailboat.
4. Setting Up the Running Rigging
Setting up the running rigging on a sailboat involves several important steps. First, attach the halyard securely to the head of the sail. Then, connect the sheets to the clew of the sail. If necessary, make sure to secure the reefing lines . Attach the outhaul line to the clew of the sail and connect the downhaul line to the tack of the sail. It is crucial to ensure that all lines are properly cleated and organized. Take a moment to double-check the tension and alignment of each line. If you are using a roller furling system, carefully wrap the line around the furling drum and securely fasten it. Perform a thorough visual inspection of the running rigging to check for any signs of wear or damage. Properly setting up the running rigging is essential for safe and efficient sailing. It allows for precise control of the sail’s position and shape, ultimately optimizing the boat’s performance on the water.
Safety Considerations and Tips
When it comes to rigging a sailboat, safety should always be our top priority. In this section, we’ll explore essential safety considerations and share some valuable tips to ensure smooth sailing. From the importance of wearing a personal flotation device to securing loose ends and lines, and being cautious around overhead power lines, we’ll equip you with the knowledge and awareness needed for a safe and enjoyable sailing experience. So, let’s set sail and dive into the world of safety on the water!
1. Always Wear a Personal Flotation Device
When rigging a sailboat, it is crucial to prioritize safety and always wear a personal flotation device ( PFD ). Follow these steps to properly use a PFD:
- Select the appropriate Coast Guard-approved PFD that fits your size and weight.
- Put on the PFD correctly by placing your arms through the armholes and securing all the straps for a snug fit .
- Adjust the PFD for comfort , ensuring it is neither too tight nor too loose, allowing freedom of movement and adequate buoyancy .
- Regularly inspect the PFD for any signs of wear or damage, such as tears or broken straps, and replace any damaged PFDs immediately .
- Always wear your PFD when on or near the water, even if you are a strong swimmer .
By always wearing a personal flotation device and following these steps, you will ensure your safety and reduce the risk of accidents while rigging a sailboat. Remember, prioritize safety when enjoying water activities.
2. Secure Loose Ends and Lines
Inspect lines and ropes for frayed or damaged areas. Secure loose ends and lines with knots or appropriate cleats or clamps. Ensure all lines are properly tensioned to prevent loosening during sailing. Double-check all connections and attachments for security. Use additional safety measures like extra knots or stopper knots to prevent line slippage.
To ensure a safe sailing experience , it is crucial to secure loose ends and lines properly . Neglecting this important step can lead to accidents or damage to the sailboat. By inspecting, securing, and tensioning lines , you can have peace of mind knowing that everything is in place. Replace or repair any compromised lines or ropes promptly. Securing loose ends and lines allows for worry-free sailing trips .
3. Be Mindful of Overhead Power Lines
When rigging a sailboat, it is crucial to be mindful of overhead power lines for safety. It is important to survey the area for power lines before rigging the sailboat. Maintain a safe distance of at least 10 feet from power lines. It is crucial to avoid hoisting tall masts or long antenna systems near power lines to prevent contact. Lower the mast and tall structures when passing under a power line to minimize the risk of contact. It is also essential to be cautious in areas where power lines run over the water and steer clear to prevent accidents.
A true story emphasizes the importance of being mindful of overhead power lines. In this case, a group of sailors disregarded safety precautions and their sailboat’s mast made contact with a low-hanging power line, resulting in a dangerous electrical shock. Fortunately, no serious injuries occurred, but it serves as a stark reminder of the need to be aware of power lines while rigging a sailboat.
Some Facts About How To Rig A Sailboat:
- ✅ Small sailboat rigging projects can improve sailing performance and save money. (Source: stingysailor.com)
- ✅ Rigging guides are available for small sailboats, providing instructions and tips for rigging. (Source: westcoastsailing.net)
- ✅ Running rigging includes lines used to control and trim the sails, such as halyards and sheets. (Source: sailingellidah.com)
- ✅ Hardware used in sailboat rigging includes winches, blocks, and furling systems. (Source: sailingellidah.com)
- ✅ A step-by-step guide can help beginners rig a small sailboat for sailing. (Source: tripsavvy.com)
Frequently Asked Questions
1. how do i rig a small sailboat.
To rig a small sailboat, follow these steps: – Install or check the rudder, ensuring it is firmly attached. – Attach or check the tiller, the long steering arm mounted to the rudder. – Attach the jib halyard by connecting the halyard shackle to the head of the sail and the grommet in the tack to the bottom of the forestay. – Hank on the jib by attaching the hanks of the sail to the forestay one at a time. – Run the jib sheets by tying or shackling them to the clew of the sail and running them back to the cockpit. – Attach the mainsail by spreading it out and attaching the halyard shackle to the head of the sail. – Secure the tack, clew, and foot of the mainsail to the boom using various lines and mechanisms. – Insert the mainsail slugs into the mast groove, gradually raising the mainsail as the slugs are inserted. – Cleat the main halyard and lower the centerboard into the water. – Raise the jib by pulling down on the jib halyard and cleating it on the other side of the mast. – Tighten the mainsheet and one jibsheet to adjust the sails and start moving forward.
2. What are the different types of sailboat rigs?
Sailboat rigs can be classified into three main types: – Sloop rig: This rig has a single mast with a mainsail and a headsail, typically a jib or genoa. – Cutter rig: This rig has two headsails, a smaller jib or staysail closer to the mast, and a larger headsail, usually a genoa, forward of it, alongside a mainsail. – Ketch rig: This rig has two masts, with the main mast taller than the mizzen mast. It usually has a mainsail, headsail, and a mizzen sail. Each rig has distinct characteristics and is suitable for different sailing conditions and preferences.
3. What are the essential parts of a sailboat?
The essential parts of a sailboat include: – Mast: The tall vertical spar that supports the sails. – Boom: The horizontal spar connected to the mast, which extends outward and supports the foot of the mainsail. – Rudder: The underwater appendage that steers the boat. – Centerboard or keel: A retractable or fixed fin-like structure that provides stability and prevents sideways drift. – Sails: The fabric structures that capture the wind’s energy to propel the boat. – Running rigging: The lines or ropes used to control the sails and sailing equipment. – Standing rigging: The wires and cables that support the mast and reinforce the spars. These are the basic components necessary for the functioning of a sailboat.
4. What is a spinnaker halyard?
A spinnaker halyard is a line used to hoist and control a spinnaker sail. The spinnaker is a large, lightweight sail that is used for downwind sailing or reaching in moderate to strong winds. The halyard attaches to the head of the spinnaker and is used to raise it to the top of the mast. Once hoisted, the spinnaker halyard can be adjusted to control the tension and shape of the sail.
5. Why is it important to maintain and replace worn running rigging?
It is important to maintain and replace worn running rigging for several reasons: – Safety: Worn or damaged rigging can compromise the integrity and stability of the boat, posing a safety risk to both crew and vessel. – Performance: Worn rigging can affect the efficiency and performance of the sails, diminishing the boat’s speed and maneuverability. – Reliability: Aging or worn rigging is more prone to failure, which can lead to unexpected problems and breakdowns. Regular inspection and replacement of worn running rigging is essential to ensure the safe and efficient operation of a sailboat.
6. Where can I find sailboat rigging books or guides?
There are several sources where you can find sailboat rigging books or guides: – Online: Websites such as West Coast Sailing and Stingy Sailor offer downloadable rigging guides for different sailboat models. – Bookstores: Many bookstores carry a wide selection of boating and sailing books, including those specifically focused on sailboat rigging. – Sailing schools and clubs: Local sailing schools or yacht clubs often have resources available for learning about sailboat rigging. – Manufacturers: Some sailboat manufacturers, like Hobie Cat and RS Sailing, provide rigging guides for their specific sailboat models. Consulting these resources can provide valuable information and instructions for rigging your sailboat properly.
About the author

Leave a Reply Cancel reply
Your email address will not be published. Required fields are marked *
Save my name, email, and website in this browser for the next time I comment.
Latest posts

The history of sailing – from ancient times to modern adventures
History of Sailing Sailing is a time-honored tradition that has evolved over millennia, from its humble beginnings as a means of transportation to a beloved modern-day recreational activity. The history of sailing is a fascinating journey that spans cultures and centuries, rich in innovation and adventure. In this article, we’ll explore the remarkable evolution of…

Sailing Solo: Adventures and Challenges of Single-Handed Sailing
Solo Sailing Sailing has always been a pursuit of freedom, adventure, and self-discovery. While sailing with a crew is a fantastic experience, there’s a unique allure to sailing solo – just you, the wind, and the open sea. Single-handed sailing, as it’s often called, is a journey of self-reliance, resilience, and the ultimate test of…

Sustainable Sailing: Eco-Friendly Practices on the boat
Eco Friendly Sailing Sailing is an exhilarating and timeless way to explore the beauty of the open water, but it’s important to remember that our oceans and environment need our protection. Sustainable sailing, which involves eco-friendly practices and mindful decision-making, allows sailors to enjoy their adventures while minimizing their impact on the environment. In this…

A Guide to the Different Parts of a Sailboat

Table of Contents
When you use Boatsetter, you have the opportunity to choose from a myriad of different sailboat rentals from all over the United States and beyond . A sailboat is a perfect way to relax on the water, either on a solo adventure or on an excursion with friends and family.
When you rent a sailboat with Boatsetter, you will have the option to book a captained sailboat to enjoy your day out on the water or book bareboat to hone your sailing skills. Either way, you may be interested in the intricacies of a sailboat and its different parts. If this sounds like you, you have come to the right place. In this article, we go in-depth about the different parts of a sailboat so that you can be more knowledgeable about whatever boat you may choose and come away from reading this feeling more confident about the whole sailing experience.
A basic sailboat is composed of at least 12 parts: the hull , the keel , the rudder , the mast, the mainsail, the boom, the kicking strap (boom vang), the topping lift, the jib, the spinnaker, the genoa, the backstay, and the forestay. Read all the way through for the definition of each sailboat part and to know how they work.
Explore sailboats for rent near you or wherever you want to go

In short, the hull is the watertight body of the ship or boat. There are different types of hulls that a sailboat may have, and these different hulls will often affect the speed and stability of the boat.
Displacement Hulls
Most sailboats have displacement hulls , like round bottom hulls, which move through the water by pushing water aside and are designed to cut through the water with very little propulsion. The reason these are called displacement hulls is that if you lower the boat into the water, some of the water moves out of the way to adjust for the boat, and if you could weigh the displayed water, you would find that it equals the weight of the boat, and that weight is the boat’s displacement. One thing to know about displacement hulls is that boats with these hulls are usually limited to slower speeds.
Planing Hull
Another type of hull is a planing hull. These hulls are designed to rise and glide on top of the water when enough power is supplied. When there is not enough power behind the boat, these boats often act as displacement hulls, such as when a boat is at rest. However, they climb to the surface of the water as they begin to move faster. Unlike the round bottom displacement hulls, these planing hulls will often have flat or v-shaped bottoms. These are very common with motor-driven water vessels, such as pontoon boats, but they can also be found on smaller sailboats which allow them to glide quickly over the water.
Finally, sailboats can differ depending on the number of hulls that they have. There are three options: monohulls (one hull), catamarans (two hulls), and trimarans (three hulls).
Monohulls , which have only a single hull, will usually be the typical round bottom displacement hull or occasionally the flat bottomed or v-shaped planning hull. Catamarans have two hulls with a deck or a trampoline in between, with the extra hulls providing increased stability. Finally, trimarans have three hulls — a main hull in the middle and two side hulls used for stability. These trimarans have gained popularity because of their excellent stability and ability to go at high speeds.
When evaluating a sailboat , it is important to pay attention to the type of hull that the boat has because the type of hull a sailboat has can drastically change the sailing experience, especially when it comes to stability and speed.

All sailboats have a keel, a flat blade sticking down into the water from the sailboat’s hull bottom. It has several functions: it provides counterbalance, life, controls sideways movement, holds the boat’s ballast , and helps prevent the boat from capsizing. When a boat leans from one side to the other, the keel and its ballast counteract the movement and prevent the boat from completely tipping over.
As with hulls, there are a number of different types of keels, though the two most common types of keels on recreational sailboats are the full keel or the fin keel. A full keel is larger than a fin keel and is much more stable. The full keel is generally half or more of the length of the sailboat. However, it is much slower than the fin keel. A fin keel, which is smaller than the full keel, offers less water resistance and therefore affords higher speeds.
A more recent feature on sailboats is the “winged keel,” which is short and shallow but carries a lot of weight in two “wings” that run sideways from the keel’s main part. Another more recent invention in sailing is the concept of the canting keels, which are designed to move the weight at the bottom of the sailboat to the upwind side. This invention allows the boat to carry more sails.
The Rudder

A rudder is the primary control surface used to steer a sailboat. A rudder is a vertical blade that is either attached to the flat surface of the boat’s stern (the back of the boat) or under the boat. The rudder works by deflecting water flow. When the person steering the boat turns the rudder, the water strikes it with increased force on one side and decreased force on the other, turning the boat in the direction of lower pressure.
On most smaller sailboats, the helmsman — the person steering the boat — uses a “ tiller ” to turn the rudder. The “tiller” is a stick made of wood or some type of metal attached to the top of the rudder. However, larger boats will generally use a wheel to steer the rudder since it provides greater leverage for turning the rudder, necessary for larger boats’ weight and water resistance.

The mast of a sailboat is a tall vertical pole that supports the sails. Larger ships often have multiple masts. The different types of masts are as follows:
(1) The Foremast — This is the first mast near the bow (front) of the boat, and it is the mast that is before the mainmast.
(2) The Mainmast — This is the tallest mast, usually located near the ship’s center.
(3) The Mizzen mast — This is the third mast closest to the stern (back), immediately in the back of the mainmast. It is always shorter than the mainmast and is typically shorter than the foremast.
The Main Sail

The mainsail is the principal sail on a sailboat, and it is set on the backside of the mainmast. It is the main source that propels the boat windward.

A boom is a spar (a pole made of wood or some other type of lightweight metal) along the bottom of a fore-and-aft rigged sail, which greatly improves the control of the angle and the shape of the sail, making it an indispensable tool for the navigation of the boat by controlling the sailes. The boom’s primary action is to keep the foot (bottom) of the sail flatter when the sail angle is away from the centerline of the sailboat.
The Kicking Strap (Boom Vang)
The boom vang is the line or piston system on a sailboat used to exert a downward force on the boom, enabling one to control the sail’s shape. The vang typically runs from the base of the mast to a point about a third of the way out the boom. It holds the boom down, enabling it to flatten the mainsail.
The Topping Lift
The topping lift is a line that is a part of the rigging on a sailboat, which applies an upward force on a spar (a pole) or a boom. Topping lifts are also used to hold a boom up when it’s sail is lowered. This line runs from the free end of the boom forward to the top of the mast. The line may run over a block at the top of the mast and down the deck to allow it to be adjusted.

A jib is a triangular staysail set ahead of the foremost mast of a sailboat. Its tack is fixed to the bowsprit, the bow, or the deck between the bowsprit and the foremost mast. Jibs and spinnakers are the two main types of headsails on modern boats.
The Spinnaker

A spinnaker is a type of sail designed specifically for sailing off the wind from a reaching downwind course. The spinnaker fills up with wind and balloons out in front of the sailboat when it is deployed. This maneuver is called “flying.” The spinnaker is constructed of very lightweight material, such a nylon fabric and on many sailing vessels, it is very brightly colored.
Another name for the spinnaker is the “chute” because it often resembles a parachute, both in the material it is constructed from and its appearance when it is full of wind.
People often use the term genoa and jib as if they were the same thing, but there is a marked difference between these two types of sails. A job is no larger than a foretriangle, the triangular area formed by the mast, the deck or bowsprit, and the forestay. On the other hand, a genoa is larger than the jib, with part of the sail going past the mast and overlapping the mainsail. These two sails, however, serve very similar purposes.
The Backstay

The backstay is a standing rigging that runs from the mast to the transom (the vertical section at the back of the boat), counteracting the forestay and the jib. The backstay is an important sail trip, control and directly affects the mainsail’s shape and the headsail.
There are two general categories of backstays:
1) A permanent backstay is attached to the top of the mast and may or may not be readily adjustable.
2) A running backstay is attached about two-thirds up the mast and sometimes at multiple locations along the mast. Most modern sailboats will have a permanent backstay, and some will have permanent backstays combined with a running backstay.
The Forestay

A forestay is a piece of standing rigging that keeps the mast from falling backward. It is attached at the very top of the mast, or at certain points near the top of the mast, with the other end of the forestay being attached to the bow (the front of the boat). Often a sail, such as a jib or a genoa, is attached to the forestay.
A forestay might be made from stainless steel wire, stainless steel rod or carbon rod, or galvanized wire or natural fibers.
Parts of a sail
Sails are vital for sailboats, made up of complex parts that improve performance and maneuverability. In this section, we’ll take a closer look at the different parts of that make up the sails.
Luff – The luff is a vertical sail part that maintains its shape and generates lift by interacting with the wind. It attaches securely with a bolt rope or luff tape for easy hoisting.
Leech – The leech controls air flow and reduces turbulence. Battens or leech lines are used to maintain shape and prevent fluttering.
Foot – The foot of a sail connects the luff and leech at the bottom edge. It helps define the sail’s shape and area. The outhaul is used to adjust its tension and shape.
Head – The sail’s head is where the luff and leech meet. It has a reinforced section for attaching the halyard to raise the sail.
Battens -The b attens are placed horizontally in sail pockets to maintain shape and optimize performance in varying wind conditions. They provide structural support from luff to leech.
Telltales – Sailors use telltales to adjust sail trim and ensure optimal performance.
Clew – The clew is important for shaping the sail and connecting the sheet, which regulates the angle and tension, producing energy. It’s located at the lower back corner of the sail.
Sailing is a favorite pastime for millions of Americans across the country. For some, there is nothing better than gliding across the water propelled by nothing more than the natural force of the wind alone. For both experienced and non-experienced sailors alike, Boatsetter is the perfect place to get your ideal sailboat rental from the mouthwatering Florida keys to the crystal blue waters of the Caribbean .
Smaller sailing boats are perfect for a single day out on the water, either by yourself or with friends and family. In comparison, larger sailing boats and sailing yachts can allow you days of luxury on longer excursions full of adventure and luxury.
Whatever your sailing dreams are, it is always good to know, for both the experienced sailor and the novice, all about the sailboat’s different parts. In this article, we learned all about the boat’s hull, the keel, the rudder, the mast, the mainsail, the boom, the kicking strap (boom vang), the topping lift, the jib, the spinnaker, the genoa, the backstay, and the forestay, which make up the basic parts of any sailboat you might find yourself on.
About us
Boatsetter is the go-to app for boat rentals and on-water experiences. Whatever the adventure, we’ve got a boat for that—Set sail , start the party , go yachting , make your trophy catch , and hone your watersports skills! Download the Boatsetter app ( App Store | Google Play ). Make sure to follow @boatsetter on Instagram, and tag us in all your boat day pictures for the chance to be featured.
Rent. List. Share—Only at Boatsetter
Boatsetter empowers people to explore with confidence by showing them a world of possibility on the water. Rent a boat, list your boat, or become a Boatsetter captain today.
Browse by experience

Explore articles

Spotlight on Key West Boat Rentals and Yacht Charters

5 Ways to Make the Most of Your Fishing Trip When Renting a Boat

How to Support Surfside Relief Efforts #surfsidestrong

8 Best Beaches in Key West
17 Sailboat Types Explained: How To Recognize Them
Ever wondered what type of sailboat you're looking at? Identifying sailboats isn't hard, you just have to know what to look for. In this article, I'll help you.
Every time I'm around a large number of sailboats, I look around in awe (especially with the bigger ones). I recognize some, but with most of them, I'll have to ask the owner. When they answer, I try to hide my ignorance. The words don't make any sense!
So here's a complete list with pictures of the most common sailboat types today. For each of them, I'll explain exactly where the name comes from, and how you can recognize it easily.

So here's my list of popular sailboat types, explained:
Bermuda sloop, sailing hydrofoil, dutch barge, chinese junk, square-rigged tall ship, in conclusion, how to recognize any sailboat.
Before we get started, I wanted to quickly explain what you should look for when you try to identify a sailboat.
The type of sailboat is always determined by one of these four things:
- The type of hull
- The type of keel
- The number of masts
- And the type of sails and rig
The hull is the boat's body. There are basically three hull types: monohull, catamaran, and trimaran. Simply said: do I see one hull, two hulls (catamaran) or three hulls (trimaran)? Most sailboats are monohulls.
Next, there is the keel type. The keel is the underwater part of the hull. Mostly, you won't be able to see that, because it's underwater. So we'll leave that for now.
The sail plan
The last factor is the number of masts and the sail plan. The sail plan, simply put, is the number of sails, the type of sails, and how the sails are mounted to the masts (also called rigging ).
Sailboat are mostly named after the sail plan, but occasionally, a sail type is thrown in there as well.
So now we know what to pay attention to, let's go and check out some sailboats!

Dinghies are the smallest and most simple sailboats around.
They are your typical training sailboats. Small boats with an open hull, with just one mast and one sail. Perfect for learning the ways of the wind.
On average, they are between 6 and 20 ft long. Mostly sailed single-handed (solo). There's no special rigging, just the mainsail. The mainsail is commonly a Bermuda (triangular) mainsail. Dinghies have a simple rudder stick and no special equipment or rigging.
Dinghies are great for learning how to sail. The smaller the boat, the better you feel the impact of your trim and actions.
How to recognize a sailing dinghy:
- short (8ft)
- one Bermuda sail
- open hull design
- rudder stick
Common places to spot them: lakes, near docks

If you'd ask a kid to draw a sailboat, she'll most probably draw this one. The Bermuda Sloop is the most popular and most common sailboat type today. You'll definitely recognize this one.
How to recognize a Bermuda Sloop:
- triangular mainsail (called a Bermuda sail)
- a foresail (also called the jib)
- fore-and-aft rigged
- medium-sized (12 - 50 ft)
Fore-and-aft rigged just means "from front to back". This type of rigging helps to sail upwind.
Any sailboat with one mast and two sails could still be a sloop. Even if the sails are another shape or rigged in another way. For example, here's a gaff-rigged sloop (more on the gaff rig later):

If you want to learn all about sail rigs, check out my full Guide to Understanding Sail Rig Types here. It has good infographics and explains it in more detail
The Bermuda sloop has a lot of advantages over other sailboat types (which is why it's so popular):
- the Bermuda rig is very maneuverable and pretty fast in almost all conditions
- it's really versatile
- you can sail it by yourself without any problems
- it's a simple setup
Common places to spot a sloop: everywhere. Smaller sloops are more common for inland waters, rivers, and lakes. Medium-sized and large sloops are very popular cruising boats.

Cutters have one mast but three or more sails. Most cutters are Bermuda rigged, which means they look a lot like sloops.
How to recognize a cutter:
- looks like a sloop
- two or more headsails instead of one
- commonly one mast
- sometimes an extra mast with mainsail
Cutters have more sail area, which makes them faster, but also harder to sail single-handed. There's also more strain on the mast and rigging.
Common places to spot a cutter: everywhere. Cutters are very popular for cruising.
They mostly have a Bermuda rig, which means triangular sails. But there are also gaff cutters and naval cutters, and some have two masts.
Here's an example of a two-masted naval cutter with an extra gaff mainsail and top gaff:

The Hydrofoil is a pretty new sailboat design. It's a racing sailboat with thin wing foils under the hull. These lift up the hull, out of the water, reducing the displacement to nearly zero. The foils create downforce and keep it from lifting off entirely.
This makes the hydrofoil extremely fast and also impressive.
The hydrofoil refers to the keel type. There are both monohull and multihull hydrofoils.
How to recognize a hydrofoil:
- it flies above the waterline and has small fins
Common places to spot a hydrofoil: at racing events

Famous catamaran: La Vagabonde from Sailing La Vagabonde
A catamaran is a type of cruising and racing multihull sailboat with two hulls. The hulls are always the same size.
Most catamarans have a standard Bermuda rig. The catamaran refers to the hull, so it can have any number of masts, sails, sail types and rig type.
How to recognize a catamaran:
- any boat with two hulls is called a catamaran
Common places to spot catamarans: coastal waters, The Caribbean, shallow reefs
The advantages of a catamaran: Catamarans heel less than monohulls and are more buoyant. Because of the double hull, they don't need as deep a keel to be stable. They have a smaller displacement, making them faster. They also have a very shallow draft. That's why catamarans are so popular in the Caribbean, where there's lots of shallow water.
Catamarans are nearly impossible to capsize:
"Compared with a monohull, a cruising catamaran sailboat has a high initial resistance to heeling and capsize—a fifty-footer requires four times the force to initiate a capsize than an equivalent monohull." Source: Wikipedia

How to recognize a trimaran:
- any boat with three hulls is called a trimaran
Trimarans have three hulls, so it's a multi-hull design. It's mostly a regular monohull with two smaller hulls or floaters on the sides. Some trimarans can be trailered by winching in the auxiliary hulls, like this:

This makes them very suitable for long-term cruising, but also for regular docking. This is great for crowded areas and small berths, like in the Mediterranean. It sure is more cost-effective than the catamaran (but you also don't have the extra storage and living space!).
Common places to spot Trimarans: mostly popular for long-term cruising, you'll find the trimaran in coastal areas.

Gaffer refers to gaff-rigged, which is the way the sails are rigged. A gaff rig is a rectangular sail with a top pole, or 'spar', which attaches it to the mast. This pole is called the 'gaff'. To hoist the mainsail, you hoist this top spar with a separate halyard. Most gaffers carry additional gaff topsails as well.
Gaff rigs are a bit less versatile than sloops. Because of the gaff, they can have a larger sail area. So they will perform better with downwind points of sail. Upwind, however, they handle less well.
How to recognize a gaffer:
- sail is rectangular
- mainsail has a top pole (or spar)
Since a gaffer refers to the rig type, and not the mast configuration or keel type, all sailboats with this kind of rigging can be called 'gaffers'.
Common places to spot a gaffer: Gaffers are popular inland sailboats. It's a more traditional rig, being used recreationally.

Schooners used to be extremely popular before sloops took over. Schooners are easy to sail but slower than sloops. They handle better than sloops in all comfortable (cruising) points of sail, except for upwind.
How to recognize a schooner:
- mostly two masts
- smaller mast in front
- taller mast in the back
- fore-and-aft rigged sails
- gaff-rigged mainsails (spar on top of the sail)
Common places to spot a schooner: coastal marinas, bays

How to recognize a ketch:
- medium-sized (30 ft and up)
- smaller mast in back
- taller mast in front
- both masts have a mainsail
The ketch refers to the sail plan (mast configuration and type of rig). Ketches actually handle really well. The back mast (mizzenmast) powers the hull, giving the skipper more control. Because of the extra mainsail, the ketch has shorter masts. This means less stress on masts and rigging, and less heel.
Common places to spot a ketch: larger marinas, coastal regions

How to recognize a yawl:
- main mast in front
- much smaller mast in the back
- back mast doesn't carry a mainsail
The aft mast is called a mizzenmast. Most ketches are gaff-rigged, so they have a spar at the top of the sail. They sometimes carry gaff topsails. They are harder to sail than sloops.
The yawl refers to the sail plan (mast configuration and type of rig).
Common places to spot a yawl: they are not as popular as sloops, and most yawls are vintage sailboat models. You'll find most being used as daysailers on lakes and in bays.

Dutch Barges are very traditional cargo ships for inland waters. My hometown is literally littered with a very well-known type of barge, the Skutsje. This is a Frisian design with leeboards.
Skutsjes don't have a keel but use leeboards for stability instead, which are the 'swords' or boards on the side of the hull.
How to recognize a Dutch Barge:
- most barges have one or two masts
- large, wooden masts
- leeboards (wooden wings on the side of the hull)
- mostly gaff-rigged sails (pole on top of the sail, attached to mast)
- a ducktail transom
The clipper is one of the latest sailboat designs before steam-powered vessels took over. The cutter has a large cargo area for transporting cargo. But they also needed to be fast to compete with steam vessels. It's a large, yet surprisingly fast sailboat model, and is known for its good handling.
This made them good for trade, especially transporting valuable goods like tea or spices.
How to recognize a Clipper:
- mostly three masts
- square-rigged sails
- narrow but long, steel hull
Common places to spot a clipper: inland waters, used as houseboats, but coastal waters as well. There are a lot of clippers on the Frisian Lakes and Waddenzee in The Netherlands (where I live).

This particular junk is Satu, from the Chesapeake Bay Area.
The Chinese Junk is an ancient type of sailboat. Junks were used to sail to Indonesia and India from the start of the Middle Ages onward (500 AD). The word junk supposedly comes from the Chinese word 'jung', meaning 'floating house'.
How to recognize a Chinese junk:
- medium-sized (30 - 50 ft)
- large, flat sails with full-length battens
- stern (back of the hull) opens up in a high deck
- mostly two masts (sometimes one)
- with two mainsails, sails are traditionally maroon
- lug-rigged sails
The junk has a large sail area. The full-length battens make sure the sails stay flat. It's one of the flattest sails around, which makes it good for downwind courses. This also comes at a cost: the junk doesn't sail as well upwind.

The cat rig is a sail plan with most commonly just one mast and one sail, the mainsail.
Most sailing dinghies are cats, but there are also larger boats with this type of sail plan. The picture above is a great example.
How to recognize a cat rig:
- smaller boats
- mostly one mast
- one sail per mast
- no standing rigging
Cat-rigged refers to the rigging, not the mast configuration or sail type. So you can have cats with a Bermuda sail (called a Bermuda Cat) or gaff-rigged sail (called a Gaff Cat), and so on. There are also Cat Ketches and Cat Schooners, for example. These have two masts.
The important thing to know is: cats have one sail per mast and no standing rigging .
Most typical place to spot Cats: lakes and inland waters

Famous brig: HMS Beagle (Charles Darwin's ship)
A brig was a very popular type of small warship of the U.S. navy during the 19th century. They were used in the American Revolution and other wars with the United Kingdom. They carry 10-18 guns and are relatively fast and maneuverable. They required less crew than a square-rigged ship.
How to recognize a brig:
- square-rigged foremast
- mainmast square-rigged or square-rigged and gaff-rigged
How to recognize a tall ship:
- three or four masts
- square sails with a pole across the top
- multiple square sails on each mast
- a lot of lines and rigging
Square-rigged ships, or tall ships, are what we think of when we think of pirate ships. Now, most pirate ships weren't actually tall ships, but they come from around the same period. They used to be built from wood, but more modern tall ships are nearly always steel.
Tall ships have three or four masts and square sails which are square-rigged. That means they are attached to the masts with yards.
We have the tall ship races every four years, where dozens of tall ships meet and race just offshore.
Most common place to spot Tall Ships: Museums, special events, open ocean

This is a bonus type since it is not very common anymore. As far as I know, there's only one left.
The Trabaccolo is a small cargo ship used in the Adriatic Sea. It has lug sails. A lug rig is a rectangular sail, but on a long pole or yard that runs fore-and-aft. It was a popular Venetian sailboat used for trade.
The name comes from the Italian word trabacca , which means tent, referring to the sails.
How to recognize a Trabaccolo:
- wide and short hull
- sails look like a tent
Most common place to spot Trabaccolo's: the Marine Museum of Cesenatico has a fully restored Trabaccolo.
So, there you have it. Now you know what to look for, and how to recognize the most common sailboat types easily. Next time you encounter a magnificent sailboat, you'll know what it's called - or where to find out quickly.

I loved this article. I had no idea there were so many kinds of sailboats.
i have a large sailing boat about 28ft. that im having a difficult time identifying. it was my fathers & unfortunately hes passed away now. any helpful information would be appreciated.
Jorge Eusali Castro Archbold
I find a saleboat boat but i can find the módem…os registré out off bru’x, and the saleboat name is TADCOZ, can you tell me who to go about this matter in getting info.thank con voz your time…
Leave a comment
You may also like, guide to understanding sail rig types (with pictures).
There are a lot of different sail rig types and it can be difficult to remember what's what. So I've come up with a system. Let me explain it in this article.

The Ultimate Guide to Sail Types and Rigs (with Pictures)

How Much Sailboats Cost On Average (380+ Prices Compared)
Own your first boat within a year on any budget.
A sailboat doesn't have to be expensive if you know what you're doing. If you want to learn how to make your sailing dream reality within a year, leave your email and I'll send you free updates . I don't like spam - I will only send helpful content.
Ready to Own Your First Boat?
Just tell us the best email address to send your tips to:
Better Sailing

Names of Sails on a Sailboat
Are you a beginner sailor and want to get acquainted with the names of the sails? Are you an experienced sailor and want to learn more details about the sails on a sailboat? Then this article is written for you! Sails form a crucial part of the sailboat because without them, there’s no starting up. For that reason, there are many details about different types of sails concerning their utility, functionality, fabrication materials, and performance. Simply put, each sail serves different purposes when out on the water. Since the sail is the engine of your sailboat, in terms of it being the basic source of propulsion, it’s important to know when best to use either type of sail and why.
Types of Sails on a Sailboat
So, in order to better explain the types of sails, let’s look at their characteristics. The first important distinction between sails is their placement. Generally, the mainsail is placed aft of the mast , which means behind. On the contrary, the headsail is in front of the mast. There are also other sorts of sails that are used for specific conditions. These can be the spinnakers or balloon-shaped sails for downwind use. The second important distinction for the sails is their functionality. The specialized sails have different functionalities and are used in different sailing circumstances and weather conditions. A rule about sails is that large sails are appropriate for downwind use, whereas small sails are good for upwind use. Moreover, large sails perform better on weak winds while small sails are good for strong winds.
The Parts of a Sail and its Shapes
- Head: This is the top of the sail.
- Luff: The forward edge of the sail.
- Leech: Back edge of the sail.
- Tack: The lower front corner of the sail.
- Clew: The bottom back corner of the sail.
- Foot: Bottom of the sail.
There are two sail shapes, the fore-and-aft rigged sails, and square-rigged sails. Nowadays, fore-and-aft sails are more popular, have better performance and maneuverability. To grasp the idea square sails are the ones that Vikings had on their ships and are good at sailing downwind because they run from side to side. But they’re not suitable at all when sailing upwind. On the other hand, a fore-and-aft sail is tied from the front of the mast to the stern and is much better at sailing upwind.

Also Read: What is Sailboat Rigging?
Types and Names of Sails
There are a lot of reasons why you’d want to put one sail over another, but the most important thing to remember has to do with the point of your sail and the wind strength. These points help you understand how your sailboat generates wind power. These points of sail include: into the wind (in irons), beam-reaching, broad-reaching, close-hauled, close-reaching, and running. They all go from windward to leeward and are symmetric from port to starboard . So, let’s get to the point and see the names and explanation of each sail:
- Mainsail : The large sail behind the mast which is attached to the mast and the boom, is called the mainsail. Mainsails cover a lot of surface area concerning incoming winds and by doing that they don’t need very strong winds to provide forward propulsion on a sailboat.
- Headsail or Jib : The small sail placed in front of the mast, attached to the mast and forestay (ie. jib or genoa), is called the headsail. Headsails are smaller than mainsails, thus their surface area is smaller. As a result, they can’t catch the same wind as a mainsail does. However, this is important because in case that the current wind is strong and the mainsail has been enough trimmed, being able to remove the mainsail and depend on the headsail alone, is a good strategy in order to reduce speed.
- Genoa : A genoa is like a large jib and it’s attached to the front of the forestay, like a headsail. When you use a genoa sail then you are expecting light to medium winds. Also, your sailboat would be somehow in a rush point of sail, meaning that the wind comes directly from the rear. Moreover, the surface area of a genoa sail is quite large, so it’s important to use it when winds are relatively low.
- Spinnaker : These downwind sails are symmetrical which makes them more sensitive to the reaching points of the sail and therefore more suitable for the running point of sail. Spinakkers are lighter than other types of jibs, and they don’t cover the mast like a genoa sail. Moreover, they remain unattached to the forestay and stretch out toward and past the bow of a sailboat.
- Gennaker : Gennakers are a mixture of genoa and spinnaker sails. There are small and big gennakers and both are downwind sails. They aren’t as symmetric as a spinnaker and aren’t attached to the forestay like a headsail. Furthermore, the gennaker sail is able to take on a more flexible point of sail while taking advantage of softer winds.
- Drifter Reacher : A drifter is a light air sail, and it’s basically a larger genoa for use in light winds. Its extra sail area offers better downwind performance than a genoa. It’s mostly made from lightweight nylon.
- Code Zero Reacher : This sail is a type of spinnaker, but it looks like a large genoa. However, code zero is designed for better reaching which makes it much flatter than the spinnaker.
- Windseeker : This sail is small, and it’s designed to guide light air onto the lee side of the mainsail. Moreover, it’s tall and thin and ensures a smoother flow of air.
Sail and Mast Configurations
Now that you got an idea of the different types of sails on a sailboat, it would also be an advantage to know how these types of sails are related to the configuration of a sailboat’s mast. There are numerous combinations when it comes to sails and mast configurations, let’s see some of them!
- Cat: A cat is similar to a dinghy and has one mast and one sail. The mast is located at the bow of the sailboat.
- Sloop: The sloop has the classic single mast and a double sail setup. The headsail can be different kinds of jibs, is connected with the forestay on the mast, and runs all the way up to the mast.
- Fractional Rig Sloop: A fractional rig sloop is different from the sloop because its forestay doesn’t reach the top of the mast. Its headsail is restricted to a fractional amount of space and this means that less wind can be captured, therefore the speed of the sailboat is reduced.
- Cutter: Having two forestays on the mast and cutters that are able to house two headsails this setup allows easy cruising because it offers a wide combination of points of sail for different strengths of wind.
- Ketch: Just like a sloop the ketch has a mast that enables the mainsail and headsail to a full range forestay. However, it also has a smaller mast between the mainmast and the stern of the sailboat.
- Schooner: A schooner is when a sailboat has two or more masts but it has a couple of sails to manage. A schooner’s aft mast is taller than the forward mast and sometimes a schooner can have up to six masts.
Names of Sails on a Sailboat – Summary
So, how many types of sails are there? In general, sailboats have one mainsail and one headsail. The rigging also affects the types of sails you can use. As we’ve explained before, the mainsail is a fore-and-aft Bermuda rig. Then, for a headsail, we use a jib or genoa. Most experienced sailors use extra sails to ensure better performance for their sailboat. For example, the spinnaker (a common downwind sail), the gennaker, the code zero (for upwind use), and the storm sail. Keep in mind that every sail has its own use and performance. Want to go downwind fast? Use a spinnaker. Don’t just raise any sail you think suits you best and go for it! It’s of great importance to understand the functionality, use, and performance of each sail.

Peter is the editor of Better Sailing. He has sailed for countless hours and has maintained his own boats and sailboats for years. After years of trial and error, he decided to start this website to share the knowledge.
Related Posts

Lagoon Catamaran Review: Are Lagoon Catamarans Good?

Best Inboard Boat Engine Brands

Are O’Day Sailboats Good? A Closer Look at a Classic Brand

Why Do Sailboats Lean?
- Buyer's Guide
- Destinations
- Maintenance
- Sailing Info
Hit enter to search or ESC to close.
IMAGES
VIDEO
COMMENTS
Rigging varies for different rig types, but since most sailboats are use a sloop rig, nearly all sailboats use the following running rigging: Halyards -'Halyard' is simply the nautical name for lines or ropes that are used to raise and lower the mainsail.
Gaff ketch - two-masted (mizzen), two mainsails, staysails, fore-and-aft rigged. Full-rigged ship or tall ship - three or more masts, mainsail on each mast, staysails, square-rigged. The first word is the shape and rigging of the mainsail. So this is the way the sail is attached to the mast. I'll go into this later on.
Bermuda Rig - Also known as a Marconi rig, this is the typical configuration of most modern sailboats. It has been used since the 17th century and remains one of the most efficient types of rigs. The rig revolves around setting a triangular sail aft of the mast with the head raised to the top of the mast.
Sailboats are powered by sails using the force of the wind. They are also referred to as sailing dinghies, boats, and yachts, depending on their size. Sailboats range in size, from lightweight dinghies like the Optimist dinghy (7'9") all the way up to mega yachts over 200 feet long. The length is often abbreviated as LOA (length overall), which ...
A sailboat's standing rigging is generally built from wire rope, rod, or occasionally a super-strong synthetic fibered rope such as Dyneema ®, carbon fiber, kevlar or PBO. 1×19 316 grade stainless steel Wire Rope (1 group of 19 wires, very stiff with low stretch) is standard on most sailboats. Wire rope is sized/priced by its diameter which ...
The difference between standing rigging and running rigging. Sometimes things can get confusing as some of our nautical terms are used for multiple items depending on the context. Let me clarify just briefly: The rig or rigging on a sailboat is a common term for two parts:. The standing rigging consists of wires supporting the mast on a sailboat and reinforcing the spars from the force of the ...
By Robin Iversen January 12, 2024. The running rigging on a sailboat consists of all the lines used to hoist, lower, and control the sails and sailing equipment. These lines usually have different colors and patterns to easily identify their function and location on the vessel. Looking at the spaghetti of lines with different colors and ...
Credit: Bill Tripp Design. The Bermudan rig is the all-rounder, able to perform well at all angles of sail. It is efficient upwind, while downwind the sail area can be significantly boosted with a big gennaker or spinnaker. For good reasons, it is the first choice for nearly every modern sailing yacht up to around 60 to 65 metres for cruising ...
Short answer sail rigging types: Sail rigging types refer to the various configurations and arrangements of ropes, cables, and fittings used to support and control sails on a sailing vessel. Common types include the sloop, cutter, ketch, yawl, schooner, and catboat. Each type has different advantages and is suited for different sailing conditions and purposes.
Sailboat Rigging can be divided in to 2 categories: Standing Rigging - the wires and ropes that hold up the mast, also known as shrouds or stays. Running Rigging - the ropes (and wires) that control the sails on a yacht. There are a large number of different terms that cover the use for which each rope is employed.
The 5 most common two-masted rigs are: Lugger - two masts (mizzen), with lugsail (cross between gaff rig and lateen rig) on both masts. Yawl - two masts (mizzen), fore-and-aft rigged on both masts. Main mast much taller than mizzen. Mizzen without mainsail. Ketch - two masts (mizzen), fore-and-aft rigged on both masts.
A beginners guide to sailboat rigging, including standing rigging and running rigging. This animated tutorial is the first in a series and covers sails, line...
The standing rigging is the fixed / structural stays which support the mast. These are often split into Fore & aft (forestay and backstay) and then the lateral rigging (side shrouds). In wire rigging world, people often refer to the Cap shroud (running all the way from deck to masthead) and intermediate stays, however when we start talking rod ...
PLEASE NOTE: THIS VIDEO HAS BEEN UPDATED WITH ENHANCED GRAPHICS AND IMPROVED SOUND. CHECK IT OUT HERE https://youtu.be/tRgWtPaCQQcA beginners guide to sailbo...
Glossary of marine rigging and sailing terms for marine sailing and rigging.. Quality Rigging Since 1988 Lloyds Accredited First in Service and Installs: 954-764-6001 · 800-328-9782: ... A brand name for a depth measuring device. FCC Rules Federal Communications Commission Rules governing radio equipment and operation in the United States.
Sailboat rigging components refer to the various parts and systems that help support and control the sails on a sailboat. These components include standing rigging (the fixed parts) and running rigging (lines that can be adjusted). Some common examples of rigging components are the mast, boom, shrouds, stays, halyards, sheets, and blocks. 2.
Know-how: Modern Rigs 101. Peter Nielsen. Mar 5, 2020. This classic Sabre carries the kind of masthead rig typical of its era; note how the large genoa sheets outside the shrouds (left); This X-Yachts performance-cruiser provides an excellent example of a modern fractional rig; note the narrow headsail (right).
The primary sailboat rigging parts include the mast, boom, standing rigging (such as shrouds and stays), running rigging (halyards and sheets), blocks or pulleys, turnbuckles, cleats, winches, and various fittings. Each of these components has its specific purpose in controlling the sails' position and tension. 2.
To step the mast of a sailboat, follow these steps: 1. Prepare the mast: Position the mast near the base of the boat. 2. Attach the base plate: Securely fasten the base plate to the designated area on the boat. 3. Insert the mast step: Lower the mast step into the base plate and align it with the holes or slots. 4.
A basic sailboat is composed of at least 12 parts: the hull, the keel, the rudder, the mast, the mainsail, the boom, the kicking strap (boom vang), the topping lift, the jib, the spinnaker, the genoa, the backstay, and the forestay. Read all the way through for the definition of each sailboat part and to know how they work.
one mast. triangular mainsail (called a Bermuda sail) a foresail (also called the jib) fore-and-aft rigged. medium-sized (12 - 50 ft) Fore-and-aft rigged just means "from front to back". This type of rigging helps to sail upwind. Any sailboat with one mast and two sails could still be a sloop.
288 results. As a premier supplier of quality sailboat rigging hardware, Fisheries Supply stocks every component needed to maintain robust standing and running rigging, which comprises the wires, lines, fittings, and tools supporting mast stability. Discover a comprehensive selection of sailboat rigging ranging from specialty wire rope and ...
Luff: The forward edge of the sail. Leech: Back edge of the sail. Tack: The lower front corner of the sail. Clew: The bottom back corner of the sail. Foot: Bottom of the sail. There are two sail shapes, the fore-and-aft rigged sails, and square-rigged sails.