

Login to my account
Enter your e-mail and password:
New customer? Create your account
Lost password? Recover password
Recover password
Enter your email:
Remembered your password? Back to login
Your cart is empty

Pond Yachts: How to Build & Sail Them
Description.
This is beautifully illustrated in watercolors, and shows you a bunch of neat detail items to make your model building all the easier and more pleasurable.
Table of Contents:
- Introduction
- Getting a Perspective
- The Rule and why have a Rule
- Designing to fit the Rule: ideas for shape, aesthetics, of hull design, displacement ,and other practical matters.
- Materials needed
- Carving the hull
- Making and fixing the keel
- Making a rudder
- Paint and Finishes for hull, keel, rudder, mast, etc.
- Boat stands
- Going for a sail
- Living with a pond model
- Other boats to build
- Appendices: Glossary, Materials, Miscellaneous Helps
by M. de Lesseps
86 pp., hidden wire-o-binding, softcover
Customer Reviews
This a helpful book very informative and clear language about the principals of design and construction.
very handy for my project
I was expecting the information to be a little more technical
Recently viewed
Our Store is in Brooklin, Maine
at 84 Great Cove Drive. We're open Mon-Fri 8am to 4:30 pm Call 1.800.273.7447. WE'RE RIGHT HERE .
Timely Shipping
We are 99-3/4% sure... that we will ship your order within 24 hours Granted, that does not include weekends and holidays.
Secure payments
Rest assured... not only is our site secure, we do not hold your credit card/payment info.
- Opens in a new window.
POPULAR SEARCHES:
- Raspberry Pi
- Woodworking
- 3D Printing
- Maker Faire

- All Stories
- Magazine Projects
- Board Guide
- Magazine Issues
Projects from Make: Magazine
Wooden mini yacht.
Build a Wooden Mini Yacht this weekend.
- Time Required: A weekend
- Print this Project

By Thomas Martin
Thomas martin.

When my son was 3 years old, I made a small bathtub boat with him, using scrap wood and a piece of dowel. It lasted much longer and got more of his attention than any dollar-store bath toy, and about six years later we decided to try building a larger boat for the pool and local ponds we fished.
Here’s the result of our experimentation: a simple and worthy pond sailer that’s rigged and scaled like a real yacht. You can build it in a weekend using readily available materials and tools.
Project Steps
Prepare the sailcloth..
It’s hard to find waterproof fabric that’s easy to cut and won’t fray. You can make your own by stretching ripstop nylon loosely over a frame or 2 hangers, and spraying it lightly (in a well-ventilated area) with polyurethane.
First spray up and down, and then back and forth, until the fabric is well coated but not saturated.
Let dry overnight.
Mark and cut the parts.
Download the project plan and print it at full size. Following the plan, measure and mark the mast, jib boom, and mainsail boom lengths on the ¼” dowel. Trace the hull from the printed pattern onto the top and 2 ends of the cedar block; cut templates or use carbon paper. Draw the keel and masthead crane patterns on the brass strips, and draw the bowser (rigging clip) pattern 8 times on the thin plastic.
Cut and drill all the parts. Any fine-tooth saw will cut the dowel, or you can roll it under an X-Acto blade and snap the score. Heavy-duty shears or a hacksaw will cut the brass; be sure to file away the sharp edges afterward. You can saw or file down the hull’s shape, then use a hobby knife or thin chisel to excavate the slot for the keel. Drill all holes, plus pilot holes for the screw eyes (in the hull, just poke pilot holes in by hand with a thumbtack).
Finally, file, sand, and smooth all parts. The more time you spend here, the better — especially if you plan to use a clear finish over the wood.
Mount the keel.
On the underside of the hull, mask both sides of the keel’s slot with tape. Wearing gloves, and in a well ventilated location, mix and spread some 5-minute epoxy into the slot using a scrap stick or wooden match.
Slide the keel into position and hold it there while the epoxy cures. You can square it up using a business card on each side.
Use a gloved finger to smooth the epoxy along the joint line, and fill any voids with more epoxy.
Finish the wood.
Finish the hull uniformly, or for a big-boat look, paint the outside of the hull and stain the deck.
Sand the hull with 100-grit paper over a sanding block, and again with 150-grit. Apply a first coat of paint or varnish, and re-sand with 180-grit before each subsequent coat.
For a stained deck, first paint the hull upside down, then re-sand the top perimeter to remove any overspray. Rub stain into the deck and edge, let dry, and coat with varnish or polyurethane.
For the mast and boom pieces, bevel the cut edges for a more finished look, then sand with fine grit to remove any fuzz. Stain if desired, and cover with at least 2 coats of varnish or polyurethane sealer, sanding lightly between coats.
Assemble the mast and booms.
Cut a slot in the top of the mast and glue in the masthead crane. Once that’s secure, follow the plan to install all screw eyes: 4 to the mast, 1 on the fore end of each boom, 1 more on the mainsail boom (for the boom vang), and 4 to the deck. Screw these in until the shank of the screw is completely into the wood.
Insert the brass brad down through the hole in the jib boom and bend it into a clew hook.
Use needle nose pliers to open the mainsail boom eye, hook it onto the eye on the mast, and close it. This forms the gooseneck, the joint that lets the boom swing from side to side (far left in the photo). Press the mast down into the hole in the deck with the masthead crane centered afterward, and tap it gently down into its hole with a hammer.
Add the sails.
After the sail material is dry, trace and cut it to the plan patterns. Lay the boat on its side on a hard surface with the masts and booms in place and fit the sails to the areas for rigging. For the grommets, cut a small X at each sail corner, insert a grommet up through the hole, press the cloth down around it, and tap the grommet flat with the eyelet tool until it firmly grips the cloth.
NOTE: It’s a good idea to practice setting grommets first with a couple of sailcloth scraps and extra grommets. It’s time for rigging. Knot and cut a short length of dacron line, thread it through a bowser, and string the boom vang. For these and all other knots, add a tiny drop of cyanoacrylate glue immediately after tying; the line is slippery and won’t hold knots otherwise.
Use 5″ lengths of line to tie each sail grommet to its corresponding screw eyelet or drilled hole with a square knot. You’ll need about 10″ for the top of the jib sail, which threads through 2 eyelets before tying off to the uphaul bowser.
Referring to the plans, tie the 4 lower connections on the booms first, and then add the upper lines for tension, so there are no wrinkles in the sails along the booms. Thread a bowser onto the jib uphaul as indicated: for their final tensions, you’ll adjust the jib using the uphaul at the top, and the mainsail using the boom vang.
For the backstay, tie in a long length of line at the masthead crane and install a bowser, routing the line through the eyelet at the stern.
Tighten the backstay and the sails so that they’re fairly tight but the mast is not bowed forward or aft. Finally, add the 2 lines called sheets. For these, cut two 15″ lines. Tie each one through the hole in the aft end of a boom, thread it through the sheet eyelet on the deck just underneath, then through 2 holes in a bowser, through the other sheet’s eyelet, and finally through the last hole in the bowser, doubleknotting the line.
NOTE: It’s important to tie the bowsers exactly as shown on the plan to make them work. The sheets let you adjust the angle (trim) of the sails — slack for downwind sailing or tight for crosswind — letting you cross a pond or pool in any direction that isn’t too close to directly upwind.
This project first appeared in MAKE Volume 20 , page 56.
From the Shed: New Arrivals

DIY Arcade Joystick Kit

Make: Arduino Electronics Starter Pack

Maker's Notebook - Hardcover 3rd Edition

Transistor Cat Kit

Our websites use cookies to improve your browsing experience. Some of these are essential for the basic functionalities of our websites. In addition, we use third-party cookies to help us analyze and understand usage. These will be stored in your browser only with your consent and you have the option to opt-out. Your choice here will be recorded for all Make.co Websites.

Escape to an island of imagination + innovation as Maker Faire Bay Area returns for its 15th iteration!
Buy tickets today save 15% and lock-in your preferred date(s)..
March / April Issue No. 297 Preview Now
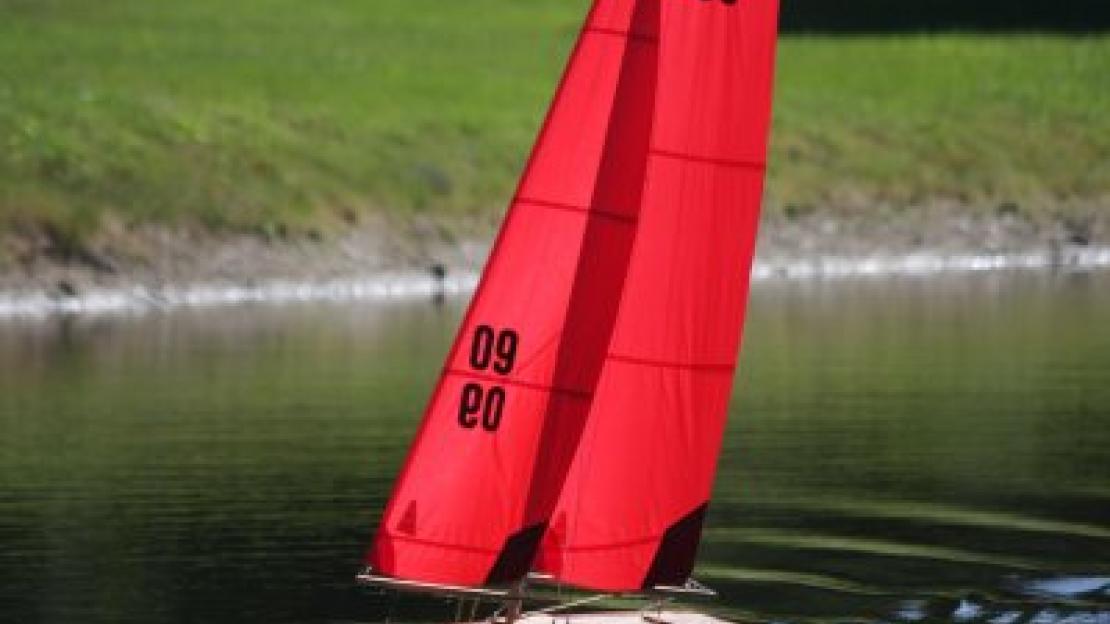
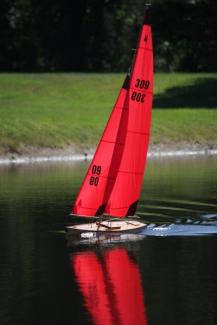
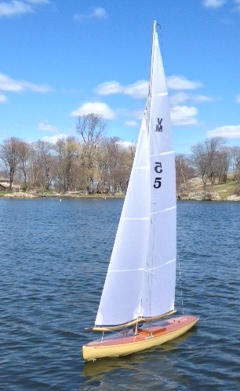
50/800 Marblehead Pond Yacht
After taking Thom McLaughlin’s class on building pond yachts at the WoodenBoat School in 2009, John Stoudt spent the rest of that year into the early winter of 2010 working on this model. It is a 50/800 Marblehead Vintage class design that John built with very thin planks, tacked to wood frames. John also planked the deck. All of the fittings are solid brass.
Design Specifications
ACCESS TO EXPERIENCE
Subscribe today.
Publishing dynamic editorial content on boat design construction, and repair for more than 40 years.
1 YEAR SUBSCRIPTION (6 ISSUES)
Print $39.95, digital $28.00, print+digital $42.95, from launching.

SAUNDRA MAE

From the Community

1962 40' Sparkman & Stephens Yawl
Alita is a Sparkman & Stephens yawl (design #1245-S), built in 1962 by Astillero Bottini in M

1947 Quincy Adams 17 -Price reduction to $9,000. Make offer.
Mahogany planked on oiled oak frames. Spruce spars and stainless rigging.

New Lion 550 Trailer Sloop
2023 Lion 550 18ft Sloop.

26' Luders 16 sailboat
Beautiful 1945 26' Luders 16 sailboat #18, excellent condition. $15,000.
DO IT NOW! David Beede GAFF KETCH CHAMELEON For ages 5 to 95... Dream Catcher Pond Skiffs ... I'm no longer building these pond boats,but I'm leaving the page up to inspire home builders. A Celebration of Traditional Sail... 3 Models and many rigs - I have a book in the works with full sized plans! BLUE HERON SHARPIE Projects... Summer Breeze Wins Design Contest! Click the duck! This is an 11'8" skiff from two sheets of plywood inspired by Phil Bolger's Teal. I was gratified to win best overall, and best use of materials Duckworks 2001 contest. All drawing and most current build notes here . Prototype build diary Maiden voyage All the entries were very impressive so I won by a slim margin. Please check them out. Summer Breeze sea trials at the Cedar Key mess about 2002! Steve Bates , of Australia, did a bang-up job on his mini-sharpie - then turned her into a double ender and had a ship wreck! Check it out! Mini Sharpie Here's a one sheet high bowed sharpie skiff of my own design. A Family builds her. She gets a sail rig! Daydream... var options = {}; options.mediaPath = "http://www.simplicityboats.com/Day%20Dream.mp3"; var params = {}; params.allowScriptAccess = "always"; swfobject.embedSWF("http://www.simplicityboats.com/OriginalMusicPlayer.swf", "player-holder", "250", "90", "9.0.0",false, options, {}, {}); A.K.A. Least Cuts Boat This is a 15' Sharpie Skiff made with all straight saw cuts! Rob Smith and 2 nephews build her in 22 hrs in South Africa! Brian Schmittling's Daydream ! A couple of One Sheet boats with capacity for 2 Adults! (click the pic) Wackless Lassie - A double paddle canoe. Cygnet - A One Sheet Skiff designed by Herb McLeod. Featherwind - actually Dave Carnel's $200 sailboat Alternative Methods and Materials for boat building! Yuloh info... - a collection of resources on the oriental sculling oar. $10 Yuloh!! Shantydock! - This is an 8' x 16' swim platform with an arched canopy roof. Dream Catcher Pond Skiffs ... are here! " Coolwater " a shoe string shanty boat! Also.... Shantyboat Dreams - sketches and resources... Model making - this one is a one sheet skiff of my own design superceded by my Mini Sharpie. Local Builders See what the local (North Florida) boys are up to. Old Boat Plans from the 40s, 50s & 60s This is a cheap and quick boat shelter that can be easily broken down and moved. PVC and poly tarp to the rescue again! Alternative Methods and Materials for boat building! Miscellaneous ... Resources - informational and inspirational stuff like Gavin Atkin's Free Design Page - Gav, in addition to starting the Boat Design group on Yahoo, won the Duckworks design contest in 2000 and originated the "Mouse" line of boats, which are being built all over the globe! (Good starting point... less overwhelming than the links page.) Links from my bookmarks for the last year, loosely categorized. A Rant Ravings about boat building, music, and life as spectator sport. [the above email link is NOT clickable - thanks to the spam web bots - please type it in]
The truth about Acorn
ail freesailor line sailing pond skiff model sailboat model boat model sailboat toy sailboat toy boat model sailboat pond sailer model boat sailboat pond sailer pond boat pond boat model yacht miniature yacht toy boat toy boat toy boat pondsailer pond sailer pond boat model pondsailor pond sailor sailboat model sailboat models sail sail sail sail sail toy toy toy boats sailing sailing model sailing model miniature sailboat model sailboat boat kit sailboat kit ship model sailing model scale model scale model scale boat scale boat scale sailing model ship model fun yacht sloop model sloop model yacht sailboat model sailboat radio control model sailboat modelsailboat pond yacht
tion. Boat design addiction may lead to a new 12 step program.

- Basic Kayaking Knowledge , Learn
15 Free Boat Plans You Can Build This Week (with PDFs)
Boatbuilding is one of the most ancient forms of craftsmanship still alive today. As long as our ancestors have had a curiosity about exploring open waters, they have been practicing and honing their boatbuilding skills.
To be honest, however, building a boat is no small task. It will require a lot of work and patience to ultimately create a finished product that you are happy with and that is actually seaworthy.
Of course, we have also included a few free boat plans. You can keep in your back pocket for the next time you are asked to build a cardboard boat as part of a contest or lakefront teambuilding adventure.
We hope that these resources help you in your journey to build your own boat!

Photo by SeventyFour via Shutterstock
Free Boat Plans
Why build your own boat, 1. the wanigan, 2. the mouse, 3. the slipper, 4. the handy andy, 5. the junior, 6. the jolly roger, 7. the cork, 8. the hobby kat, 9. the tern, 10. the falcon, 11. the white duck, 12. the sea midge, 13. the zephyr, 14. the gypsy, 15. the crazy cardboard boat, 15 free boat plans you can build this week (with pdfs) – final thoughts, share on pinterest.
- The Wanigan
- The Slipper
The Handy Andy
- The Jolly Roger
- The Hobby Kat
The White Duck
- The Sea Midge
The Crazy Cardboard Boat

Photo by Halsey via Shutterstock
There are a lot of reasons why you should explore building your own boat versus buying a pre-made model. Here is a quick breakdown of the most obvious benefits:
- You will know the ins and outs of your finished boat better than anyone
- It can be a great project to work on with your teenage or even adult children
- You will gain valuable skills molding and shaping wood and other materials
- You can design your boat for your specific needs
- You don’t have to trust the sometimes-questionable manufacturing of mass-produced boats
- You can create a boat that functions as your second home on the water
- You can save money if you source materials mindfully
Of course, most first-time boatbuilders still experience some level of trial-and-error. With patience and perseverance, however, you can craft a one-of-a-kind vessel that has no equal anywhere in the world.
Free Boat Plans You Can Build This Week (with PDFs)
PC Duckworks Boat Builders Supply
The Wanigan boat began as a garvey design, which is one of the older boat plans known to the Americas. Traditionally, these boats were built as work scows and were very popular among American summer camps.
The design itself is very simple, but these boats can carry heavy loads. It can also handle a trolling motor being mounted to the stern so you can cover more ground if you want to use it as a fishing boat.
The creator of this boat plan became aware of some of the downsides of the garvey design, such as the heavier weight that made it less efficient than some other designs. So he combined elements of dory and wanigan designs to create a hybrid.
The main changes include an enlarged beam, tilted lathes to provide a stiffer hull, and knocking off the top strakes to reduce the boat’s overall weight.
The Wanigan text
These additional The Wanigan drawings  may also prove useful for your build process!

The Mouse is one of the most compact and nimble boat plans we have found for this list. It is an easy build and also a great boat for two kids or a single teenage paddler.
The original builder began with a one-sheet boat design in an effort to create the lightest and most affordable boat possible. This means it is only suited for calm waters and should not be used in high winds or wavy conditions.
That said, it was built in roughly 12 to 24 hours of work time and doesn’t require a full workshop to construct. The main material that is required for building this boat is quarter-inch plywood. But the builder recommends using one-inch by half-inch pine or something a little sturdier.
The plywood and pine components are held together using a method called ”˜stitch and glue’. This method requires choosing one of the best glues for kayak outfitting , which are typically made of epoxy and glass tape rather than something cheaper like polyurethane.
The Mouse Instructions
Also, here are a few extra useful The Mouse Notes for builders

The Slipper is the first of many sailboat plans on our list and it is faster, easier, and cheaper to build than most. It also features a deeper cockpit than many other sailboat designs, which makes it safer for intermediate sailors.
This sailboat plan features dual steering stations so that you can sail from inside or outside of the helm. It also includes a centerboard trunk that hardly intrudes into the cabin at all. So that, it is easier to work around while you are in the cockpit.
The exterior hull and cabin of this sailboat feature a modified dory design using two sheets of plywood ripped to three feet wide before being joined together. The resulting hull is a modified V-shape that reduces drag.
The centerboard of this boat can also be winched up to the level of the top of the cabin or lowered down to alter the draft. This allows you to customize the boat design for a stiffer and more weather-worthy vessel if you need it.
The Slipper was also intentionally designed with an aft cabin that naturally helps to keep the bow pointed into the wind whether you are underway or the boat is anchored in the port.
The Building Slipper

PC DIY Wood Boat
The Handy Andy is a great little 10-foot portable rowboat for hunting, camping, fishing, and other recreational uses. It is actually the only folding boat design on our list, which makes it best for folks that need the most portable boat plan possible.
This boat features a 42-inch beam and a depth of about 15 inches at the mid-section. It also weighs roughly 80 pounds when assembled and can handle up to three average-sized human passengers.
The design boasts a flat bottom with canvas-bound edges and the primary material used for construction is ⅜-inch marine-grade plywood. Despite its lightweight nature, this rowboat can handle trolling motors or even outboard motors with a maximum of five horsepower.
Once finished, the hull can be folded or unfolded in less than a minute’s time.
This design makes it one of the only boats on this list that can be stored in a truck bed or easily carried by two people to be launched at more remote locations.

If you are looking for an all-purpose dinghy that can handle almost any use you might imagine, look no further than The Junior free boat plan. It can carry three or four average-sized adults and is much easier to row than a traditional dinghy.
It is also durable enough to be equipped with a small outboard motor. You could even set it up with sailing equipment if you want to use it as a sailing vessel. As we said, this is truly an all-around boat design!
This boat plan requires constructing three frames that will provide the majority of the load-bearing support. The builder recommends using ¾-inch framing with ⅜-inch plywood as the exterior material for this boat build.
Resin glue and flathead screws are also required to hold this boat together. But there is a full list of materials included in the plans we have linked to below. Sticking to that plan should also give you enough leftover materials to construct two six-foot oars for rowing this boat until you install a trolling motor or outboard motor down the line!

Channel your inner Captain Morgan when you are following these plans to build your very own Jolly Roger boat. This flat bottom boat design is designed for pond fishing . It can also be a useful yacht dinghy for getting from your dock to a larger vessel anchored offshore.
The plan follows conventional dinghy construction methods but also includes a few modifications that will save you time and energy. The wide design is super stable for boaters of all ages.
The keel, frame, chines, and risers are all cut from ¾-inch oak, ash, or any other trusted hardwood you can get your hands on. For the smaller components, the builder recommends using cedar, cypress, fir, or white or yellow pine.
Because this boat plan is also sturdy enough to handle a small motor, it includes important points for protecting the wooden hull from spark plug damage.
Be careful to follow these guidelines to build the safest boat possible if you imagine installing a motor down the line.
The Jollyroger

The Cork is another simple rowboat design. This one trends away from the flat bottom plans that we have included thus far. Instead, it features a deeper, V-shaped hull that makes it better suited to more efficient rowing and easier maneuverability.
It can be rowed easily from either seating position and is durable enough to handle up to three average-sized adult passengers. The ends of the boat are identical, which allows for multi-directional rowing.
The list of materials required for this boat plan should cost you between $30 and $50, depending on your location and hardware costs there. The resulting build is lightweight enough for two people to be carried and also to be transported on top of a vehicle .
Inside the boat, the builders use aluminum tubing to secure the struts that hold the seats. This material choice keeps the overall weight of the boat down while still adding the necessary rigidity across the beam of the boat.

The Hobie Cat is one of the most iconic and recognizable small sailing vessels ever made. This Hobby Kat plan is your answer to building your own iconic sailboat without spending thousands of dollars.
Your finished boat will be able to handle speeds of up to 20 miles per hour. It will be a super fun vessel for windy days on the lake or bay. The builder was able to construct the hulls, decking, and rudder for this boat while spending little more than $200.
From there, they purchased and installed the mast, boom, sail, and rigging, which brought the total amount spent to roughly $650 (still much less than a name-brand Hobie!). Without the mast and sail, this boat weighs roughly 165 pounds and is constructed using primarily 3/16-inch marine plywood.
You can also elect to build your own mast, boom, and sail if you have the time and skills to do so.
Those elements are not included in this boat plan, but they do offer some recommendations for where to buy these components!
The HobbyKat

Named after the common seabird found around the world, the Tern is a lightweight and nimble sailboat with a 72 square foot base design. She is made for inland sailing and planes very well in moderate breezes.
The hull design also provides minimal water resistance and the small floor plan makes this boat easier for intermediate sailors to handle. Even though it offers a small footprint, this boat is sturdy enough to handle up to four adult passengers.
One of the best things about this boat plan is that it can be built almost entirely by using only common hand tools.
Of course, you can speed things up if you have power tools and you are skilled enough to use them correctly.
The Tern boat plan includes a 20-foot mast, but you can shorten that length if you desire. The plan includes a complete list of materials and step-by-step instructions on how to plane and assemble each element.

As you might expect from its name alone, the Falcon is an incredibly speedy sailboat for its size. It boasts a 14-foot centerboard and can handle two to four passengers, depending on its size and weight.
In tests of the original build, the creators claim that this boat out-distanced many Snipe and Comet sailing vessels as well as pacing evenly alongside longer 18-foot sailboats. When finished, your boat will have a six-foot beam and a total weight of roughly 475 pounds.
For the main framing components, they recommend using white oak and plywood will be the main material used in the hull construction. The hull features a V-shaped that was inspired by larger schooners.
The Falcon is best suited to sailing on bays, lakes, and wide rivers. It is also a boat plan with just under 120 square feet of deck space and it is a great build for amateur craftsmen and sailors.

The White Duck is a flat-bottomed rowboat with a total length of 13’6” and a four-foot beam. The cockpit is approximately 15 inches deep all the way around and this boat can handle up to five passengers while maintaining buoyancy and stability.
When fully constructed, it will weigh roughly 200 pounds, but the final weight will depend on the type of lumber you choose for your build. This boat plan features plywood planking over solid wooden frames.
The White Duck is built with a pointed bow that cuts nicely through the water. The flat stern of this boat design will make it easy to attach a small outboard motor with a maximum of six horsepower.
As you might expect from its name, this rowboat is a great option for duck hunting trips. That being said, it is a highly versatile craft that can also be used for pond fishing or casual rowing on your nearby lake.

The Sea Midge is one of the smallest rowboats on our list and it is ideally suited for one average-sized rower or two small paddlers. It is only about 8 feet in length and offers a 52-inch beam at its widest point.
The Midge’s small dimensions make her ideal for navigating narrower creeks and streams. With an approximate weight of 62 pounds, she is easy to maneuver on the water and can also be much more easily transported than some of the larger boat plans on our list
The Seamidge

The Zephyr is a compact and speedy dinghy sailboat that measures roughly 14 feet long and approximately five feet across. This boat style was originally developed for safely crossing the English Channel. This means it can stand up well in rough waters.
When finished, it is also light enough to be transported on a small trailer or on top of a larger vehicle.
The boat plan calls for using hemlock or fir for the framing and oak or Douglas fir for the keel and chines.

The Gypsy is a small cruising sailboat that is meant to be equipped with an outboard motor for powered locomotion. The original design resulted in an incredibly seaworthy vessel that logged more than 6,000 nautical miles in her lifetime.
It includes a comfortable cabin that makes it well-suited for multi-day sailing adventures. This boat plan includes improvements on the original design that will help you build an extremely durable and long-lasting sailboat.
The Gypsy boat design will help you construct a vessel that can handle a motor up to 25 horsepower so that you can enjoy cruising speeds of up to nine miles per hour.
While it may require a bit more of an investment in time and money, it will also help you produce one of the best boats you can build with a free boat plan!

PC Saint Dominic Catholic School
Finally, let’s talk about a crazy cardboard boat plan that you can build in less than a day. This is a great boat plan to bookmark for your next teambuilding project so that you can earn bragging rights with your coworkers.
The plan calls for using 1.5 sheets of cardboard. But you can use the remaining half sheet to build your own boat paddle if you want to get creative.
Triple-thick cardboard is best for this boat plan. But you can always double up thinner sheets if that is all you can find.
These plans include an easy-to-follow diagram for marking, cutting, and folding the cardboard sheets to create the hull of your boat. From there, it calls for using contact cement and construction adhesive to seal the edges and corners.
If you are looking to save a little money on this build you could also use duct tape and then wrap the entire design in plastic sheeting to provide waterproof qualities.
Overall, this build is one of the cheapest and easiest on our list. It is also a great project for hot summer camp days on the lake or river!

Photo by Alexandra Soloviova via Shutterstock
We hope that you now have a couple of free boat plans to inspire you to begin your own construction project.
Don’t hesitate to check out YouTube for some useful boat-building videos when you are getting into the nitty-gritty of these build processes!
Enjoyed 15 Free Boat Plans You Can Build This Week (with PDFs)? Share it with your friends so they too can follow the Kayakhelp journey.

Peter Salisbury
Pete is the Owner of KayakHelp.com. Born and raised in Cleveland, Ohio, he grew up kayaking, fishing, sailing, and partaking in outdoor adventures around the Great Lakes. When he’s not out on the water, you can find him skiing in the mountains, reading his favorite books, and spending time with his family.

Important Registration Information - 2024 Registration
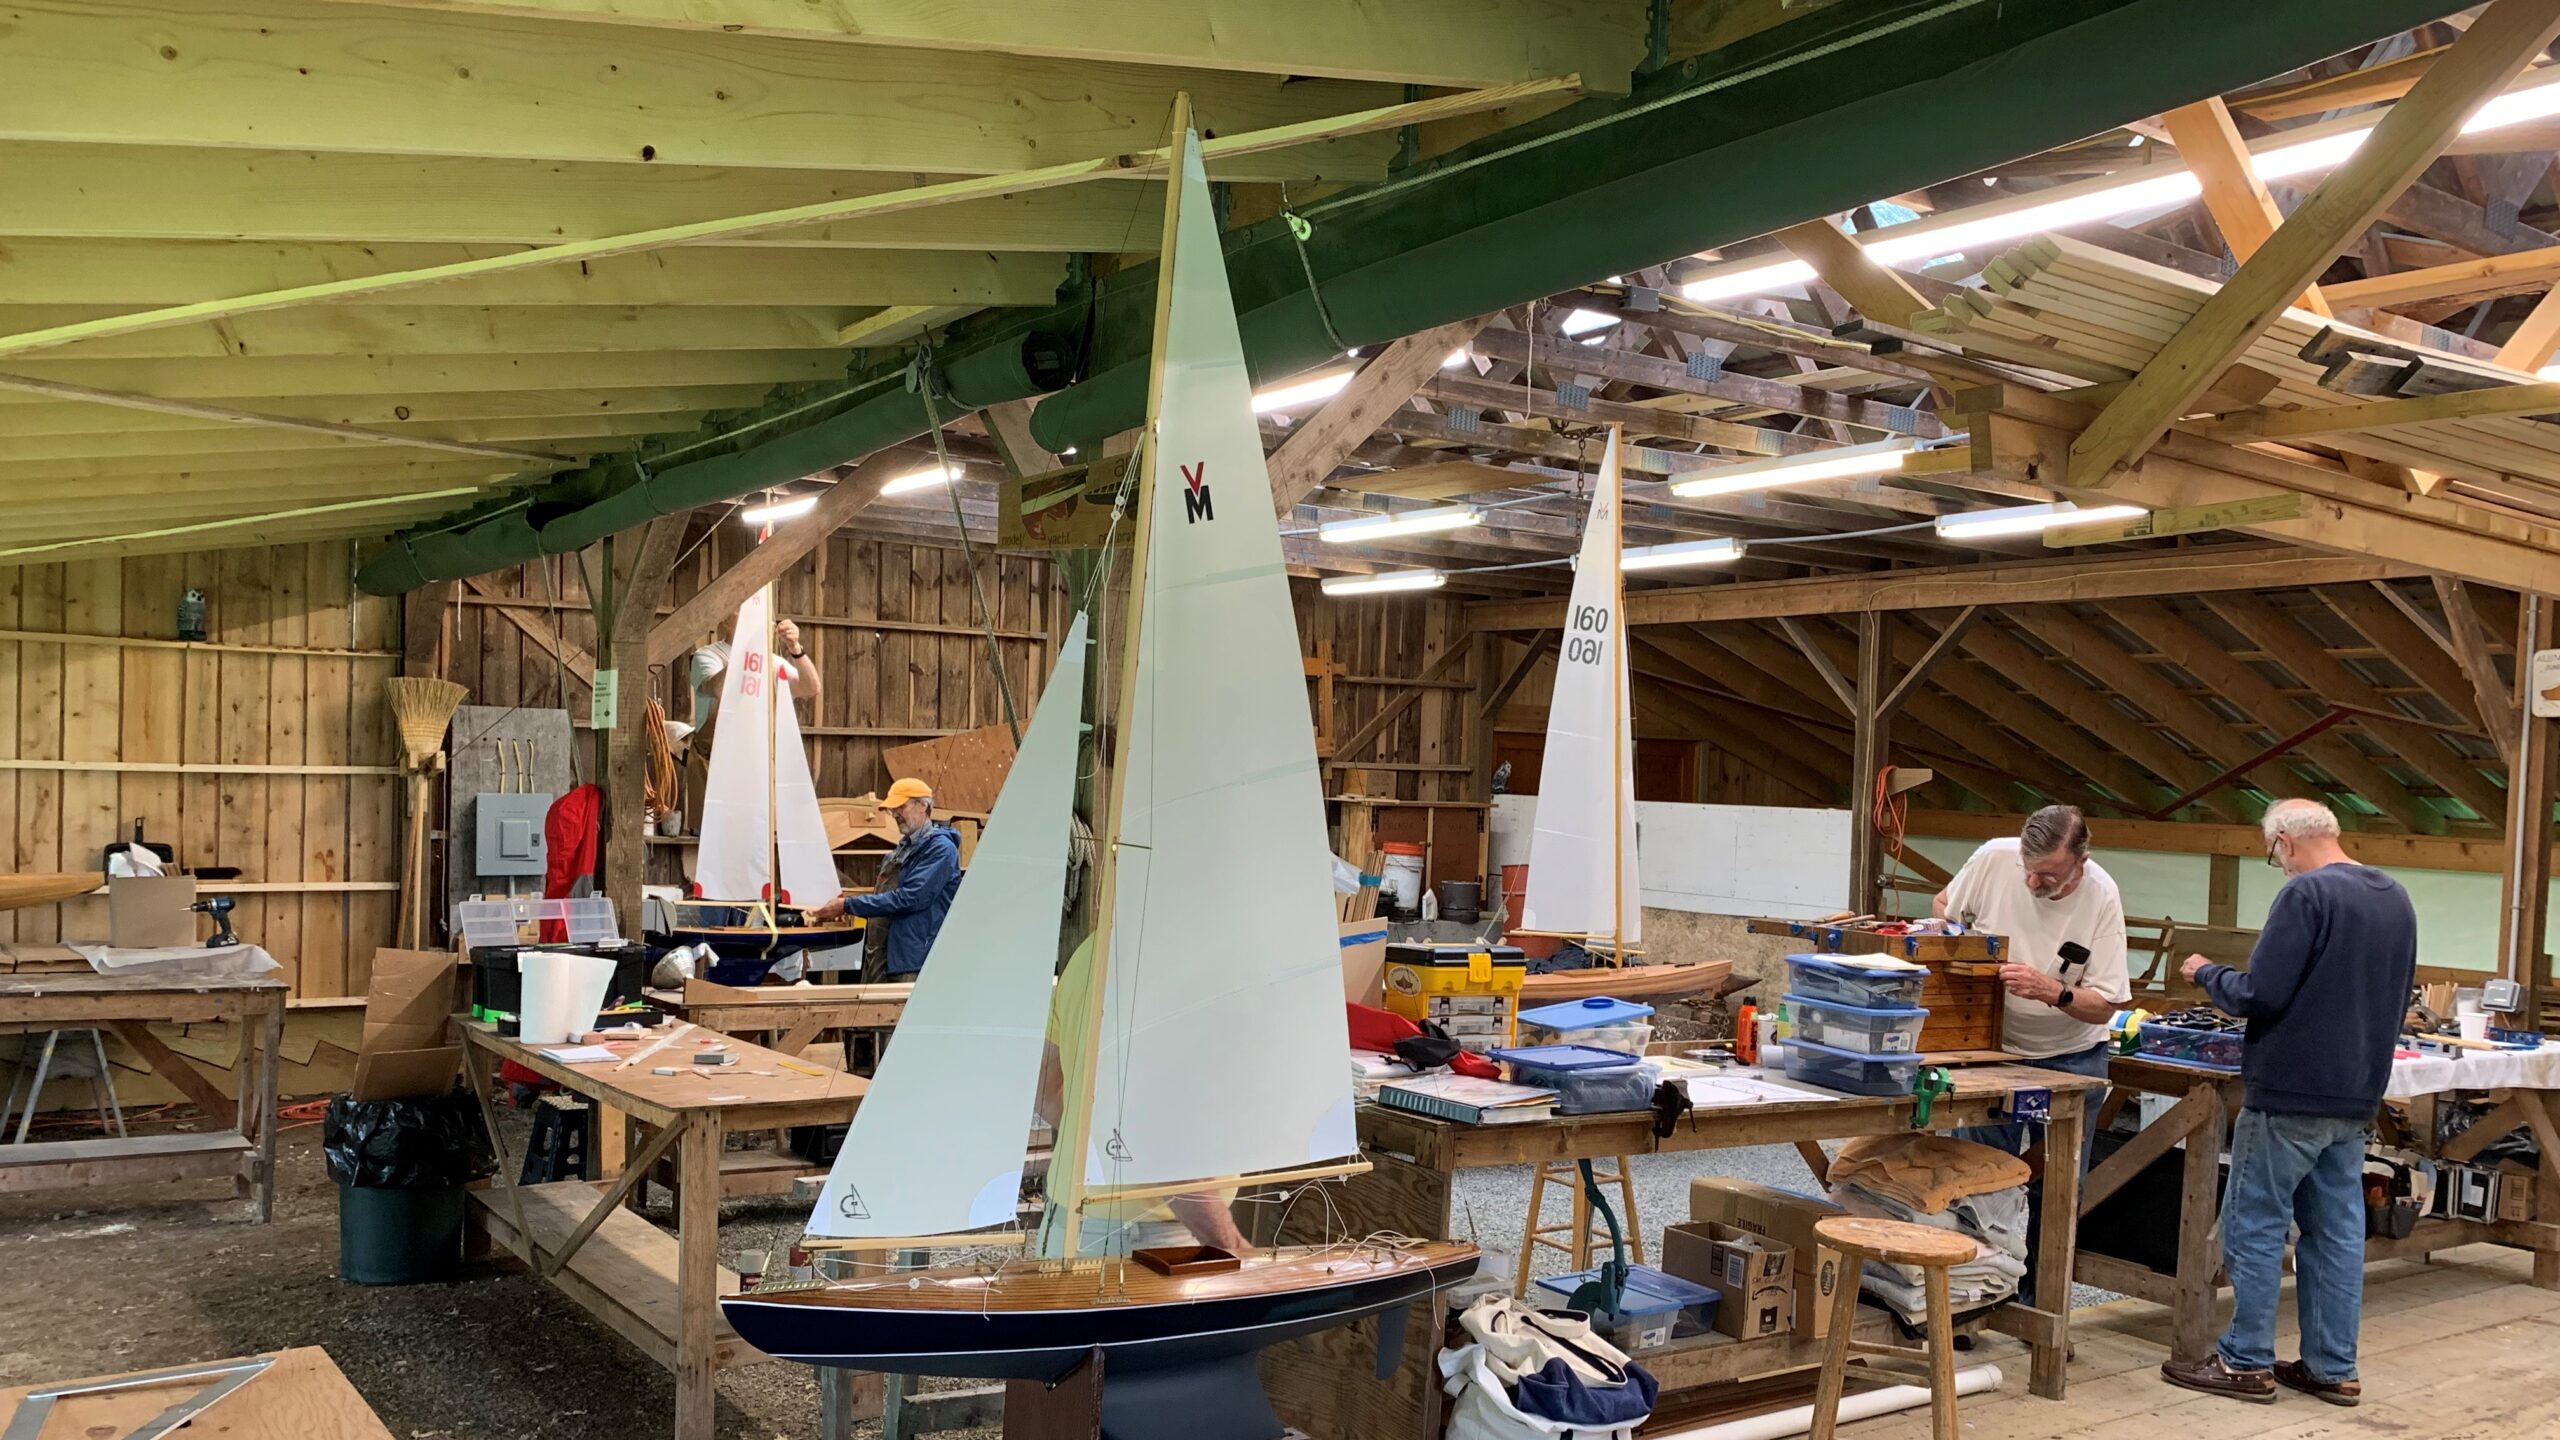
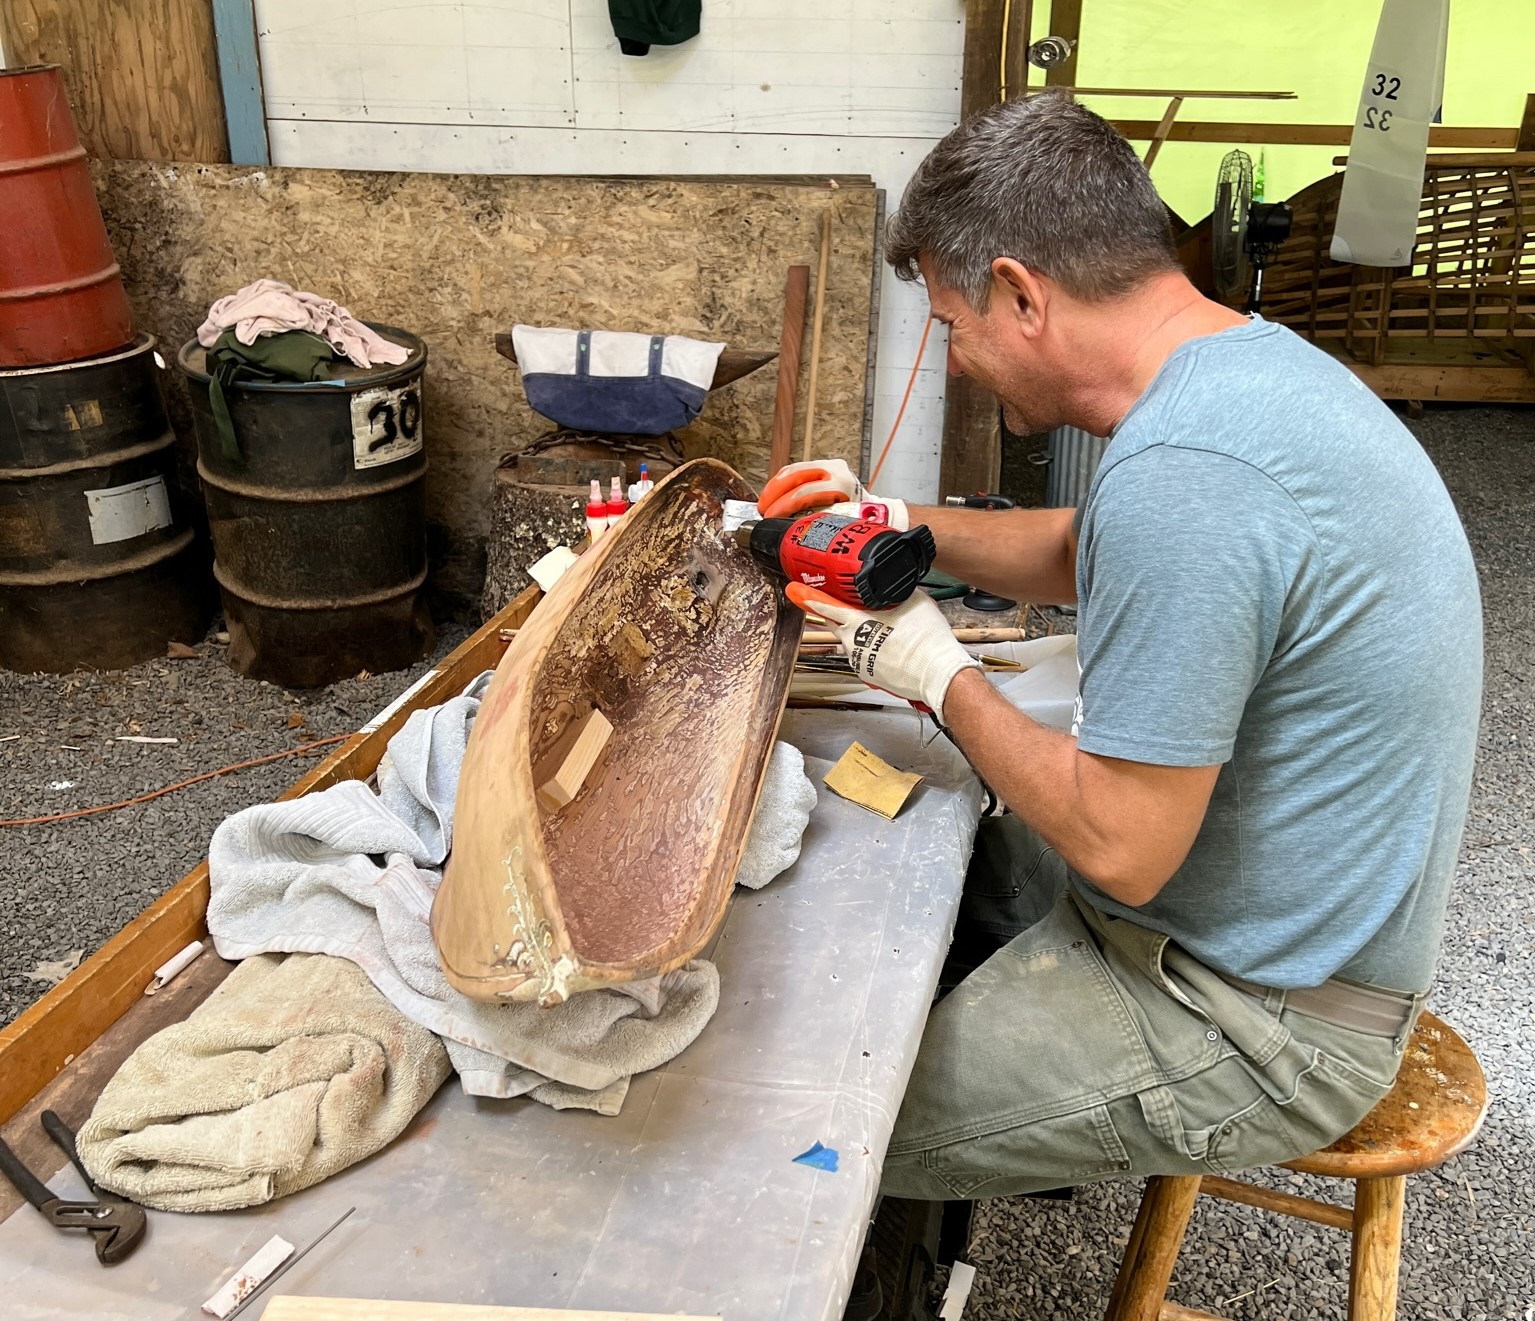
Pond Yacht Restoration
Restore/complete your own pond yacht and get it ready for sailing or display..
John Stoudt was an industrial arts teacher focusing on woodworking, metalworking, and architectural and engineering drawing. He honed his skills and further developed his expertise here at WoodenBoat School. John took his first class with Alan Suydam, returning many years to build and sail model yachts. He has built and restored over 100 model boats, including many vintage model yachts. His skill set enables him to build a complete boat including hull construction, custom fittings, casting ballasts, making the sails, and tuning the rig for sailing. John is president of the United States Vintage Model Yacht Group (USVMYG) and an associate regional director of the American Model Yacht Association. He collects model yachts and currently has over 60 boats in his collection. John races various pond yachts in Maryland, New Jersey, and Pennsylvania and has participated in National events, placing in the top three on multiple occasions in the vintage Marblehead class USVMYG National Championship regatta with his 1934 vintage Marblehead.
This course is appropriate for students with some knowledge and experience. Basic knowledge and use of hand tools is required for most shop courses. Basic knowledge and ability to sail is required for most waterfront courses.
This course involves a low level of activity throughout the week including: occasional standing and working, seating is usually available, working on your own project at your own pace is common.
This is a six-day course ending Saturday
There are various models and pond yachts out in the world in need of repair or restoration. The boat may have been a family heirloom, a model you found in an antique shop or at a flea market, or a project that you began but couldn’t find time to complete. If you happen to have such a boat, this week with John Stoudt will present you with the opportunity to evaluate your model and determine a plan for its restoration and completion. The work might include repairing a damaged hull, building a new rig, making fittings, repairing a vane gear, getting the electronics working, installing new electronics, or re-rigging the boat. An unfinished boat could have a planked deck built and installed, hatch openings framed, hatches built and fitted, spars constructed, electronics installed and set up, or the rig built and installed. A display and travel stand could also be built. And there may even be the chance to establish a waterline and paint the model to your specifications.
Students may bring any type of pond yacht, especially those rigged for remote control. Some older self-steering boats could be reconfigured for remote control sailing or the self-steering mechanism could be repaired. If you have any questions about the boat or model you have, you can contact the instructor through the WoodenBoat School office.
John Stoudt will consult with each student prior to the course to develop an understanding of your boat and plan of work. Together you will determine what materials and supplies you will need to bring along and what John will make available. He will have other materials and parts on hand for the unexpected. A final plan for the restoration and/or completion of your boat will be established on the first day of class. Each morning, the students and John will evaluate where they are, how they have progressed, and how to proceed. Come spend a week at WoodenBoat School and develop a passion for models that is both fun and rewarding!
This course is appropriate for students with some knowledge and experience. Basic knowledge and use of hand tools is required for most shop courses.
What Our Students Are Saying
John Stoudt is absolutely one of the best instructors I’ve had here at your school. Very knowledgeable and willing to share his expertise with all his students. POND YACHT RESTORATION was exactly what I wanted and needed. I would definitely take this course again!
T.B., Kenosha, Wisconsin

Register For This Course
Courses fill quickly, so don't delay if this is a course you want to take.
Related Courses
Woodcarving, carving name boards, build your own plank constructed pond yacht, introduction to woodworking.
You are using an outdated browser. Upgrade your browser today or install Google Chrome Frame to better experience this site.
If you would like to add an event to this list, or if you are the organizer of one of the events listed and need to update or correct anything here, please contact [email protected].
« All Events
- This event has passed.
Build Your Own Plank-Constructed Pond Yacht
September 9, 2018 - september 14, 2018.

The WoodenBoat School, Brooklin, ME, is offering a class this summer for those interested in building their own pond yacht. The course will be offered September 9–14, 2018.
The course boat Norumbega was designed by Thom McLaughlin; its name is derived from the Downeast area of Maine where WoodenBoat School is located. Construction of this pond yacht will pleasantly challenge and inform students in planking practices similar to those used in building full-sized boats. Students will make decisions based on blueprints and develop an eye for form. During the week, the boat will be planked and faired, and the fin and rudder will be fabricated. Thom will also discuss the steps that follow to complete the boat—decking, rigging, electronic installation, and painting.
Students who have started construction of their model in previous years at WoodenBoat School are also welcome to participate in this course to finish their boat. This week will be an excellent opportunity for further guidance. This will also allow those just beginning their boat to view firsthand the final steps in construction.
Tuition: $850.00. Materials: Pond Yacht I – $310.00, includes CNC cut molds, strongback, keelson, planking, fin, and rudder. Pond Yacht II – $160.00, includes material to finish the boat other than sails, fittings, and electronics.
Located on the beautiful coast of Maine, in the small community of Brooklin, WoodenBoat School is a meeting place where people of all ages, backgrounds, and experience levels can gather to meet, live, and work among others who share similar interests. The school has been offering 1- and 2-week courses designed around the arts of boatbuilding, woodworking, seamanship, and related crafts for the past 37 years. Courses on pond yacht construction and elements of sailing these radio-controlled boats have been offered at WoodenBoat School since 1999.
Landlocked in the Midwest, Thom McLaughlin grew up working on farms and having the cycles of nature deeply rooted under his skin. After finishing a graduate degree in visual arts (sculpture), he found himself surrounded by water as an art professor at the University of South Florida. In 1993, while searching for an art form that could more directly inspire an awe of nature, he stumbled onto pond yachts. Since then he has written articles on, investigated the history of, and made many vintage pond yachts. He is currently the Southeast regional vice-president of the US Vintage Model Yacht Group. In the last seven Vintage Marblehead National Regattas, boats of Thom’s design had third or better placing in final standings. In the 2011 National Regatta, he placed first overall in class and also received the Craftsmanship Award.
For more information contact: Rich Hilsinger, Director [email protected] 207-359-4651 https://www.thewoodenboatschool.com/

- Google Calendar
- Outlook 365
- Outlook Live
DIY Boat Building Plans
Yacht Plans & Blueprints
Download over 500 Boat Plans. Click on the link below.
-->click here<--.
Table of Contents
Key Takeaways – Yacht Plans & Blueprints
🚤 Yacht plans and blueprints are detailed drawings and specifications for building a yacht from scratch.
📐 They include information on dimensions, materials , tools , assembly, rigging, and performance data.
💰 Building a yacht from scratch allows customization, cost savings, and personal satisfaction.
🤔 Considerations before building include budget, skill level, time frame, purpose, and location.
⚠️ Safety precautions are crucial when undertaking the complex and risky task of building a yacht.
⛵ Yacht design involves hull , deck , cabin , and rig considerations, with various types like motor yachts, sailing yachts, catamarans, and trimarans.
🔄 Key components of a yacht include hull, deck, cabin, rig, engine, and rudder.
🤑 Factors in choosing yacht plans include budget, skill level, purpose, location, and design preferences.
✔️ Evaluating yacht plans for accuracy and completeness is essential before starting the construction.
🌐 Yacht plans can be found online on websites like Yacht Design Net, Boat Plans Online, Boat Builder Central, and CAD Boat Design.
💡 Tips for choosing the right yacht plans include defining needs, comparing plans, seeking expert advice, and reading reviews.
📏 Learning basic blueprint conventions is essential for interpreting yacht plans, and identifying components and dimensions.
🛠️ Troubleshooting common yacht plan issues involves addressing missing or incomplete information, incompatible or outdated details, and conflicting instructions.
🏗️ Building a yacht involves transferring plans to materials, cutting and shaping components, and following detailed construction notes.
🛠️ Cutting and shaping yacht components require the use of appropriate tools like saws, drills, cutters, and sandpaper.
🛠️ Assembling a yacht involves aligning, joining, and fastening components according to plans.
🌊 Rigging the yacht includes installing sails, mast, boom, and rigging, followed by testing its control and power systems.
If you have ever dreamed of building your own yacht , you might have wondered what yacht plans and blueprints are, and how to use them. In this article, we will explain everything you need to know about yacht design, construction, and maintenance, and how to find and acquire the best yacht plans and blueprints for your needs.
What are Yacht Plans & Blueprints and Why Use Them?
Yacht plans and blueprints are detailed drawings and specifications that show how to build a yacht from scratch. They include information such as:
- The dimensions and shape of the yacht hull, deck, cabin, and other components
- The materials and tools required for the yacht construction
- The assembly and installation instructions for the yacht components
- The rigging and wiring diagrams for the yacht sails, mast, rudder, engine, and other systems
- The performance and safety data for the yacht, such as speed, stability, buoyancy, and load capacity
Yacht plans and blueprints are essential for anyone who wants to build a yacht from scratch, because they provide a clear and accurate guide for the entire yacht building process. By using yacht plans and blueprints, you can:
- Save time and money by avoiding trial and error and unnecessary waste of materials
- Customize your yacht according to your preferences and requirements
- Learn new skills and gain confidence in your yacht building abilities
- Enjoy the satisfaction and pride of creating something unique and valuable
Benefits of Building a Yacht from Scratch
Building a yacht from scratch is not only a fun and rewarding hobby, but also a smart investment. Here are some of the benefits of building a yacht from scratch:
- You can choose the size, style, and features of your yacht, and make it as simple or as luxurious as you want
- You can control the quality and durability of your yacht, and ensure that it meets your standards and expectations
- You can save a lot of money by avoiding the high costs of buying a new or used yacht, or hiring a professional yacht builder
- You can increase the value of your yacht by adding your personal touch and creativity
- You can enjoy the freedom and adventure of sailing your own yacht, and explore new places and experiences
Essential Considerations Before Building a Yacht
Before you start building a yacht from scratch, there are some important things you need to consider, such as:
- Your budget: How much money can you afford to spend on your yacht project? You need to factor in the costs of the yacht plans, materials, tools, equipment, and maintenance.
- Your skill level: How experienced are you in yacht building? Do you have the necessary skills and knowledge to handle the yacht construction? Do you need any assistance or guidance from experts or other yacht builders?
- Your time frame: How long do you plan to spend on your yacht project? Do you have enough time and patience to complete the yacht building process? Do you have any deadlines or commitments that might affect your yacht project?
- Your purpose: What is the main reason why you want to build a yacht? Is it for personal use, for business, for recreation, or for competition? What are your goals and expectations for your yacht project?
- Your location: Where do you plan to build and store your yacht? Do you have enough space and facilities for your yacht project? Do you have access to water and electricity? Do you need any permits or licenses for your yacht project?
Safety Precautions and Guidelines
Building a yacht from scratch is a complex and challenging task that involves many risks and hazards. Therefore, you need to follow some safety precautions and guidelines, such as:
- Wear protective gear, such as gloves, goggles, masks, and boots, when working with tools and materials
- Use the right tools and equipment for the job, and follow the manufacturer’s instructions and recommendations
- Keep your work area clean and organized, and store your tools and materials properly
- Avoid working alone, and have someone nearby who can help you in case of an emergency
- Check your yacht regularly for any defects or damages, and repair them as soon as possible
- Test your yacht thoroughly before launching it, and make sure it is seaworthy and compliant with the regulations and standards
Understanding Yacht Design and Types
Yacht design is the art and science of creating a yacht that is functional, efficient, and aesthetically pleasing. Yacht design involves many aspects, such as:
- Yacht hull: The hull is the main body of the yacht that provides buoyancy, stability, and hydrodynamic performance. The hull can be classified into different types, such as displacement, planing, or multihull, depending on the shape and mode of propulsion.
- Yacht deck: The deck is the upper surface of the yacht that supports the crew, passengers, and equipment. The deck can be divided into different sections, such as foredeck, cockpit, aft deck, or flybridge, depending on the function and layout.
- Yacht cabin: The cabin is the enclosed space inside the yacht that provides shelter, comfort, and amenities. The cabin can have different rooms, such as saloon, galley, head, or berth, depending on the size and configuration.
- Yacht rig: The rig is the system of sails, mast, boom, and rigging that provides propulsion and control for the yacht. The rig can have different configurations, such as sloop, ketch, yawl, or schooner, depending on the number and arrangement of masts and sails.
Different types of yachts have different designs and characteristics, depending on the purpose and preference of the yacht owner. Some of the common types of yachts are:
- Motor yacht: A motor yacht is a yacht that is powered by one or more engines, and does not rely on sails for propulsion. Motor yachts are usually faster, larger, and more luxurious than sailing yachts, and can accommodate more people and equipment. Motor yachts are ideal for cruising, fishing, or entertaining.
- Sailing yacht: A sailing yacht is a yacht that is powered by sails, and uses the wind for propulsion. Sailing yachts are usually slower, smaller, and more economical than motor yachts, and require more skill and experience to operate. Sailing yachts are ideal for sailing, racing , or exploring.
- Catamaran: A catamaran is a yacht that has two parallel hulls connected by a platform or a bridge. Catamarans are more stable, spacious, and maneuverable than monohulls, and can sail in shallow waters. Catamarans are ideal for family, charter, or adventure.
- Trimaran: A trimaran is a yacht that has three hulls, with a main hull in the center and two smaller hulls on the sides. Trimarans are faster, lighter, and more agile than catamarans, and can handle rough seas. Trimarans are ideal for speed, sport, or thrill.
Key Components of a Yacht
A yacht is composed of many components that work together to provide functionality, performance, and comfort. Some of the key components of a yacht are:
- Hull: The hull is the main body of the yacht that provides buoyancy, stability, and hydrodynamic performance. The hull is made of materials such as wood, fiberglass , steel, or aluminum , and can have different shapes and sizes, depending on the type and design of the yacht.
- Deck: The deck is the upper surface of the yacht that supports the crew, passengers, and equipment. The deck is made of materials such as wood, fiberglass, steel, or teak, and can have different features and fittings, such as hatches, windows, doors, rails, cleats, or winches, depending on the function and layout of the yacht.
- Cabin: The cabin is the enclosed space inside the yacht that provides shelter, comfort, and amenities. The cabin is made of materials such as wood, fiberglass, steel, or plastic, and can have different rooms and facilities, such as saloon, galley, head, or berth, depending on the size and configuration of the yacht.
- Rig: The rig is the system of sails, mast, boom, and rigging that provides propulsion and control for the yacht. The rig is made of materials such as fabric, metal, or carbon, and can have different configurations and components, such as sloop, ketch, yawl, or schooner, depending on the number and arrangement of masts and sails.
- Engine: The engine is the device that converts fuel into mechanical power for the yacht. The engine can be either inboard or outboard, and can use different types of fuel, such as diesel, gasoline, or electric, depending on the power and efficiency of the yacht.
- Rudder: The rudder is the movable blade that controls the direction and steering of the yacht. The rudder is attached to the stern of the yacht, and can be operated by a tiller, a wheel, or a joystick, depending on the type and design of the yacht.
Factors to Consider When Choosing Yacht Plans
Choosing the right yacht plans for your needs is a crucial step in your yacht building project. Here are some factors to consider when choosing yacht plans:
- Budget: How much money can you afford to spend on your yacht plans? You need to compare the prices and quality of different yacht plans, and choose the ones that suit your budget and expectations. You also need to consider the costs of the materials, tools, equipment, and maintenance that are required for your yacht plans.
- Skill level: How experienced are you in yacht building? You need to assess your skills and knowledge in yacht construction, and choose the yacht plans that match your skill level and learning curve.
- Purpose: What is the main reason why you want to build a yacht? You need to define your purpose and goals for your yacht project, and choose the yacht plans that align with your purpose and goals. You also need to consider the intended use and function of your yacht, such as cruising, fishing, racing, or entertaining.
- Location: Where do you plan to build and sail your yacht? You need to consider the location and environment of your yacht project, and choose the yacht plans that suit your location and environment. You also need to consider the availability and accessibility of the materials, tools, equipment, and water for your yacht project.
- Design: What kind of yacht do you want to build? You need to consider the design and style of your yacht, and choose the yacht plans that match your design and style. You also need to consider the size, shape, and features of your yacht, such as hull, deck, cabin, rig, engine, and rudder.
Evaluating Yacht Plans for Accuracy and Completeness
After you have chosen your yacht plans, you need to evaluate them for accuracy and completeness. You need to check if the yacht plans:
- Are clear and detailed, and provide all the necessary information and instructions for the yacht construction
- Are accurate and reliable, and reflect the current standards and best practices of yacht design and building
- Are complete and consistent, and cover all the aspects and components of the yacht project
- Are compatible and adaptable, and can be modified or customized according to your needs and preferences
You can evaluate your yacht plans by:
- Reading and reviewing the yacht plans carefully, and looking for any errors, omissions, or inconsistencies
- Comparing and cross-referencing the yacht plans with other sources, such as books, magazines, websites, or experts
- Testing and verifying the yacht plans with simulations, models, or prototypes, and checking for any issues or problems
If you find any problems or discrepancies with your yacht plans, you need to contact the yacht plan provider and ask for clarification, correction, or replacement. You can also seek advice or assistance from other yacht builders or experts, or use your own judgment and creativity to solve the problem.

Finding and Acquiring Yacht Plans & Blueprints
Once you have decided to build a yacht from scratch, you need to find and acquire the best yacht plans and blueprints for your project. In this article, we will show you where to find yacht plans and blueprints, how to choose the right ones for your needs, and how to read and understand them.
Where to Find Yacht Plans & Blueprints
There are many sources where you can find yacht plans and blueprints, both online and offline. Some of the common sources are:
- Websites: There are many websites that offer free or paid yacht plans and blueprints, either as downloadable files or as online services. Some examples of websites that offer yacht plans and blueprints are:
- Books: There are many books that contain yacht plans and blueprints, as well as information and instructions on yacht design and building. Some examples of books that contain yacht plans and blueprints are:
- Magazines: There are many magazines that feature yacht plans and blueprints, as well as articles and reviews on yacht design and building. Some examples of magazines that feature yacht plans and blueprints are:
- Online Forums: There are many online forums where you can interact with other yacht builders and enthusiasts, and get advice and feedback on yacht design and building. You can also find and share yacht plans and blueprints with other members of the forum. Some examples of online forums that are related to yacht design and building are:
How to Choose the Right Yacht Plans for Your Needs
Finding yacht plans and blueprints is not enough. You also need to choose the right ones for your needs. Here are some tips for choosing the right yacht plans for your needs:
- Define your needs and preferences: Before you start looking for yacht plans and blueprints, you need to define your needs and preferences for your yacht project. You need to consider factors such as your budget, skill level, time frame, purpose, location, and design, and choose the yacht plans that suit your needs and preferences.
- Compare and contrast different yacht plans: After you have found some yacht plans and blueprints that match your needs and preferences, you need to compare and contrast them to find the best ones for your project. You need to consider factors such as the price, quality, reliability, completeness, compatibility, and adaptability of the yacht plans, and choose the ones that offer the best value and performance for your project.
- Seek advice and feedback from experts and other yacht builders: If you are not sure about which yacht plans and blueprints to choose, you can seek advice and feedback from experts and other yacht builders. You can consult with yacht designers, boat builders, or yacht owners, or join online forums or communities, and ask for their opinions and recommendations on yacht plans and blueprints. You can also read reviews and testimonials from other yacht builders who have used the yacht plans and blueprints that you are interested in, and learn from their experiences and insights.
Reading and Understanding Yacht Plans & Blueprints
Once you have chosen your yacht plans and blueprints, you need to read and understand them. You need to learn how to interpret the information and instructions that are provided in the yacht plans and blueprints, and how to apply them to your yacht project. Here are some steps for reading and understanding yacht plans and blueprints:
- Learn the basic blueprint conventions: Before you start reading and understanding yacht plans and blueprints, you need to learn the basic blueprint conventions that are used to represent the yacht design and construction. You need to learn the symbols, abbreviations, units, scales, and dimensions that are used in yacht plans and blueprints, and what they mean and how to use them. You can find the basic blueprint conventions in books, websites, or online tutorials, or ask for help from experts or other yacht builders.
- Identify the different components and dimensions: After you have learned the basic blueprint conventions, you need to identify the different components and dimensions that are shown in the yacht plans and blueprints. You need to recognize the parts and features of the yacht, such as the hull, deck, cabin, rig, engine, and rudder, and their shapes and sizes, as well as their positions and orientations. You also need to measure and calculate the distances, angles, areas, and volumes of the yacht components, and check for any errors or discrepancies.
- Read and understand the yacht construction notes: In addition to the drawings and specifications, the yacht plans and blueprints also provide the yacht construction notes that explain how to build the yacht from scratch. You need to read and understand the yacht construction notes, and follow the instructions and guidelines that are given. You also need to pay attention to any warnings, cautions, or tips that are provided in the yacht construction notes, and avoid any mistakes or problems that might occur during the yacht construction.
Troubleshooting Common Yacht Plan and Blueprint Issues
Even if you have chosen the best yacht plans and blueprints for your project, you might still encounter some issues or problems with them. Here are some of the common yacht plan and blueprint issues, and how to troubleshoot them:
- Missing or incomplete information: Sometimes, the yacht plans and blueprints might be missing or incomplete, and lack some of the information or instructions that are needed for the yacht construction. This might be due to the poor quality or reliability of the yacht plan provider, or the modification or customization of the yacht plans and blueprints. To troubleshoot this issue, you can contact the yacht plan provider and ask for clarification, correction, or replacement, or seek advice or assistance from experts or other yacht builders, or use your own judgment and creativity to solve the problem.
- Incompatible or outdated information: Sometimes, the yacht plans and blueprints might be incompatible or outdated, and not match the current standards and best practices of yacht design and building. This might be due to the changes or developments in the yacht industry, or the differences or variations in the yacht materials, tools, equipment, and regulations. To troubleshoot this issue, you can compare and cross-reference the yacht plans and blueprints with other sources, such as books, magazines, websites, or experts, and update or adapt the yacht plans and blueprints according to the current standards and best practices of yacht design and building.
- Conflicting or contradictory information: Sometimes, the yacht plans and blueprints might be conflicting or contradictory, and provide different or opposite information or instructions for the yacht construction. This might be due to the errors or mistakes of the yacht plan provider, or the customization or modification of the yacht plans and blueprints. To troubleshoot this issue, you can contact the yacht plan provider and ask for clarification, correction, or replacement, or seek advice or assistance from experts or other yacht builders, or use your own judgment and creativity to resolve the conflict or contradiction.
Building a Yacht from Plans
After you have found and acquired the best yacht plans and blueprints for your project, you are ready to start building your yacht from scratch. In this article, we will guide you through the steps of building a yacht from plans, and provide you with some tips and tricks for a successful yacht construction.
Transferring Yacht Plans & Blueprints to Building Materials
The first step of building a yacht from plans is to transfer the yacht plans and blueprints to the building materials. This means that you need to mark and cut the materials according to the dimensions and shapes that are shown in the yacht plans and blueprints. Here are some steps for transferring yacht plans and blueprints to building materials:
- Choose the right materials: Depending on the type and design of your yacht, you need to choose the right materials for your yacht construction. Some of the common materials that are used for yacht building are wood, fiberglass, steel, or aluminum. You need to consider the advantages and disadvantages of each material, such as the cost, weight, strength, durability, and appearance, and choose the ones that suit your budget, skill level, and preference.
- Use the right tools: To transfer the yacht plans and blueprints to the building materials, you need to use the right tools for the job. Some of the tools that you need are a scale ruler, a compass, a protractor, a tape measure, a pencil, a marker, a saw, a drill, a clamp, and a cutter. You need to follow the manufacturer’s instructions and recommendations for using the tools, and wear protective gear, such as gloves, goggles, masks, and boots, when working with the tools.
- Lay the building material on a flat and stable surface, and secure it with clamps or weights
- Use a scale ruler to measure the scale of the yacht plans and blueprints, and adjust it to the size of the building material
- Use a compass and a protractor to draw the curves and angles of the yacht components, such as the hull, deck, cabin, and rig, on the building material
- Use a tape measure and a pencil to mark the lengths and widths of the yacht components, such as the hull, deck, cabin, and rig, on the building material
- Use a marker to highlight the outlines and details of the yacht components, such as the hull, deck, cabin, and rig, on the building material
- Use a saw and a drill to cut and shape the yacht components, such as the hull, deck, cabin, and rig, from the building material
- Use a cutter to trim and smooth the edges and surfaces of the yacht components, such as the hull, deck, cabin, and rig, from the building material
Cutting and Shaping Yacht Components
The second step of building a yacht from plans is to cut and shape the yacht components according to the yacht plans and blueprints. This means that you need to use the tools and materials that you have prepared in the previous step, and follow the instructions and guidelines that are provided in the yacht plans and blueprints. Here are some steps for cutting and shaping yacht components:
- Place the building material that has the yacht component marked on it on a flat and stable surface, and secure it with clamps or weights
- Use the saw to cut along the outlines and details of the yacht component, such as the hull, deck, cabin, and rig, from the building material
- Use the drill to make holes and openings for the yacht component, such as the hull, deck, cabin, and rig, from the building material
- Remove the excess material and the clamps or weights from the yacht component, and set it aside
- Place the yacht component that has been cut from the building material on a flat and stable surface, and secure it with clamps or weights
- Use the cutter to trim and smooth the edges and surfaces of the yacht component, such as the hull, deck, cabin, and rig, from the building material
- Use the sandpaper to polish and refine the edges and surfaces of the yacht component, such as the hull, deck, cabin, and rig, from the building material
- Remove the dust and the clamps or weights from the yacht component, and set it aside
Assembling the Yacht According to the Plans
The third step of building a yacht from plans is to assemble the yacht according to the plans. This means that you need to use the tools and materials that you have prepared in the previous steps, and follow the instructions and guidelines that are provided in the yacht plans and blueprints. Here are some steps for assembling the yacht according to the plans:
- Place the yacht components that have been cut and shaped from the building materials on a flat and stable surface, and arrange them according to the layout and orientation that are shown in the yacht plans and blueprints
- Use the tape measure and the pencil to mark the positions and distances of the yacht components, such as the hull, deck, cabin, and rig, from each other and from the surface
- Use the marker to highlight the marks and the level to check the alignment of the yacht components, such as the hull, deck, cabin, and rig, from each other and from the surface
- Place the yacht components that have been aligned from the previous step on a flat and stable surface, and secure them with clamps or weights
- Use the screws, nails, glue, and brackets to join the yacht components, such as the hull, deck, cabin, and rig, from each other and from the surface, according to the instructions and guidelines that are provided in the yacht plans and blueprints
- Remove the clamps or weights from the yacht components, and set them aside
- Place the yacht components that have been joined from the previous step on a flat and stable surface, and secure them with clamps or weights
- Use the bolts, nuts, washers, and pins to fasten the yacht components, such as the hull, deck, cabin, and rig, from each other and from the surface, according to the instructions and guidelines that are provided in the yacht plans and blueprints
Rigging and Testing the Yacht
The final step of building a yacht from plans is to rig and test the yacht. This means that you need to use the tools and materials that you have prepared in the previous steps, and follow the instructions and guidelines that are provided in the yacht plans and blueprints. Here are some steps for rigging and testing the yacht:
- Place the yacht that has been assembled from the previous step on a flat and stable surface, and secure it with clamps or weights
- Use the sails, mast, boom, and rigging to install the rig system for the yacht, according to the instructions and guidelines that are provided in the yacht plans and blueprints
- Remove the clamps or weights from the yacht, and set it aside
- Place the yacht that has been rigged from the previous step on a flat and stable surface, and secure it with clamps or weights
- Use the rudder, engine, and instruments to install the control and power systems for the yacht, according to the instructions and guidelines that are provided in the yacht plans and blueprints
- Remove the clamps or weights from the yacht, and transport it to the water
- Launch the yacht into the water, and check the buoyancy, stability, and performance of the yacht, according to the data and specifications that are provided in the yacht plans and blueprints
- Make any adjustments or repairs that are needed for the yacht, and enjoy your yacht

FAQs – Yacht Plans & Blueprints
In this article, we have covered everything you need to know about yacht plans and blueprints, and how to build a yacht from scratch. However, you might still have some questions or doubts about yacht design and building. Here are some of the frequently asked questions (FAQs) that we have received from our readers, and our answers to them.
What are the most common challenges faced when building a yacht from plans?
Building a yacht from plans is a rewarding and satisfying project, but it also comes with some challenges and difficulties. Some of the most common challenges faced when building a yacht from plans are:
- Finding and acquiring high-quality and reliable yacht plans and blueprints that suit your needs and preferences
- Reading and understanding yacht plans and blueprints, and transferring them to building materials
- Cutting and shaping yacht components, and assembling them according to the plans
- Rigging and testing the yacht, and ensuring its safety and performance
- Dealing with any errors, mistakes, or problems that might occur during the yacht construction
To overcome these challenges, you need to follow the tips and tricks that we have provided in this article, and seek advice and feedback from experts and other yacht builders.
How can I ensure the safety and stability of my yacht?
Safety and stability are two of the most important aspects of yacht design and building. You need to ensure that your yacht is safe and stable, and can withstand the forces and conditions of the water. To ensure the safety and stability of your yacht, you need to:
- Choose the right yacht plans and blueprints that match the current standards and best practices of yacht design and building
- Choose the right materials and tools that are durable and suitable for yacht construction
- Follow the instructions and guidelines that are provided in the yacht plans and blueprints, and avoid any deviations or modifications that might compromise the safety and stability of your yacht
- Check and test your yacht regularly for any defects or damages, and repair them as soon as possible
- Follow the regulations and certifications that are required for yachts, and obtain the necessary permits and licenses for your yacht project
What are the regulations and certifications required for yachts?
Depending on the type, size, and purpose of your yacht, you might need to comply with some regulations and certifications that are required for yachts. These regulations and certifications are designed to ensure the safety, quality, and performance of yachts, and to protect the environment and the public interest. Some of the common regulations and certifications that are required for yachts are:
- Registration: You need to register your yacht with the appropriate authority, such as the coast guard, the maritime administration, or the local government, and obtain a registration number and a certificate of registration for your yacht. Registration is required for identification, taxation, and ownership purposes, and to prove that your yacht meets the legal requirements and standards.
- Inspection: You need to inspect your yacht periodically by a qualified inspector, such as a surveyor, an engineer, or a naval architect, and obtain a certificate of inspection for your yacht. Inspection is required to verify that your yacht is seaworthy and compliant with the regulations and standards, and to identify and correct any issues or problems that might affect the safety and performance of your yacht.
- Insurance: You need to insure your yacht with a reputable insurance company, and obtain a policy and a certificate of insurance for your yacht. Insurance is required to protect your yacht from any risks or damages that might occur during the yacht construction or operation, and to cover any liabilities or claims that might arise from your yacht project.
What are the ongoing maintenance and upkeep requirements for a yacht?
Owning a yacht is not only a one-time investment, but also a long-term commitment. You need to maintain and upkeep your yacht regularly, and ensure that it is in good condition and working order. Some of the ongoing maintenance and upkeep requirements for a yacht are:
- Cleaning: You need to clean your yacht frequently, and remove any dirt, dust, or debris that might accumulate on your yacht. Cleaning is required to prevent any corrosion, deterioration, or infection that might affect the quality and appearance of your yacht, and to keep your yacht hygienic and comfortable.
- Painting: You need to paint your yacht occasionally, and apply a fresh coat of paint or varnish on your yacht. Painting is required to protect your yacht from the effects of the sun, water, and weather, and to enhance the beauty and durability of your yacht.
- Repairing: You need to repair your yacht promptly, and fix any faults or damages that might occur on your yacht. Repairing is required to restore the functionality and performance of your yacht, and to avoid any further complications or consequences that might result from the faults or damages.
- Servicing: You need to service your yacht regularly, and check and tune the systems and components of your yacht, such as the rig, engine, rudder, and instruments. Servicing is required to optimize the efficiency and reliability of your yacht, and to prevent any breakdowns or malfunctions that might occur on your yacht.
Where can I find resources and support for building and maintaining a yacht?
Building and maintaining a yacht is not an easy task, and you might need some resources and support for your yacht project. Here are some of the resources and support that you can find for building and maintaining a yacht:
- Books: There are many books that contain yacht plans and blueprints, as well as information and instructions on yacht design and building. You can find these books in libraries, bookstores, or online, and use them as references and guides for your yacht project.
- Websites: There are many websites that offer yacht plans and blueprints, as well as articles and resources on yacht design and building. You can find these websites on the internet, and use them as sources and tools for your yacht project.
- Magazines: There are many magazines that feature yacht plans and blueprints, as well as articles and reviews on yacht design and building. You can find these magazines in newsstands, subscriptions, or online, and use them as inspiration and feedback for your yacht project.
- Online Forums: There are many online forums where you can interact with other yacht builders and enthusiasts, and get advice and feedback on yacht design and building. You can find these online forums on the internet, and use them as communities and support for your yacht project.
- Experts: There are many experts who are knowledgeable and experienced in yacht design and building, such as yacht designers, boat builders, or yacht owners. You can find these experts in person, by phone, or online, and use them as consultants and mentors for your yacht project.
Conclusion – Yacht Plans & Blueprints
Building a yacht from scratch using plans and blueprints is a rewarding endeavor that allows you to create a unique vessel tailored to your preferences and needs. From choosing the right plans to assembling and testing the yacht, the process involves careful consideration of various factors. By following safety precautions, adhering to design principles, and seeking guidance when needed, you can turn your dream of building a yacht into a reality.
Remember, the journey of constructing a yacht is not only about the final product but also about the skills gained, the challenges overcome, and the satisfaction of creating something truly special. Whether for personal use, business, recreation, or competition, building a yacht from scratch offers a fulfilling experience that combines craftsmanship, creativity, and the joy of sailing on your own creation.

Written by DIY Boat Building Plans

Yacht Painting Tips

Yacht Polishing Tips
Model Yacht Building

Introduction: Model Yacht Building
Model yacht building is a wonderful hobby for boaters who like the many different designs available for full scale yachts that can be made by several techniques. I started carving models of my ideas of boats at the tender age of 9 or 10. With a drawn knife, auger and bits, hammer and chisel, I made beautiful hull shapes emerge out of blocks of soft white pine. It was great fun. At age 11, I was given a Craftsman vibrating jig saw with 5" blades cut plywood frames and then planked them with strips of white pine. One of my first big models was of a Southbay Shore Bird. Its plans were found in "Sailing Craft" by Andrew Schoettle which has many other boat plans that I built from including the Larchmont "O" Boats. Uffa Fox published at leasst 4 large volumes of classic yacht plans with excellent descriptions of their characteristics which was wonderful reading to give me the feel of how things were done in those times. See my website at www.angelfire.com/fl/modelyachts and follow some of the links to learn more about what fun I have had over the years building models of boats I have owned or wished I had owned. I receive e-mails about once per month from those wanting the plans or frames I cut on my Ryobi 9" bandsaw with a 1/8" blade. My favorite yacht modle is the International One-Design 48" model of the full scale 33' 5" yacht class of that name started by the late Cornelius Shields of Larchmont Y.C., Larchmont, NY. I owned his famous "Aileen", IOD 25 which was his first boat of the class in 1935. I restored her in my backyard in Rye, NY and raced her in the Long Island Sound Fleet from 1972 to 1976. Upon retiring to Sarasota, FL in 1994, I started the IOD 48" Class of Vintage Model Yachts. Over 35 fiberglass hulls were made from my mold. I finished 6 models for others and have two on hand for match races in my backyard pond when visitors are interested. The keels had to be 3" deeper than to scale to achieve the stability for a model. They handle just like are real IOD. I started seriously building scale models while at Penn State in 1948 from "Your New Boat" a book by Yachting Editors that had many plans of popular boats of the times. One of my first models was a 36" model of the IOD. I hope whomever owns that model now will offer it back to me for sale. I still have a number of my first models of the Comet, Star, Snipe, Hampton, Blue Jay and Atlantic. I have built full scale Star and Jet 14 Class boats. Now, I have restired a 1970's Irwin 23 #24 to almost new condition. I extended the mast to carry a Star Class mainsail in light airs. The Irwin 23 is like a smaller version of the Pearson Ariel 25' 6" Class that I owned for 10 years. I founded the Ariel-Commander YRA which still flourishes in the San Francisco Bay Area. See my web site at www.angelfire.com/fl4/mft for photos of the Irwin 23 and links to other boats I have owned. Go to www.webshots.com for photos and slideshows of my boats by searching for "Thrasher's Boats". Click on some of the images to go to the slideshows. Join the AMYA at www.amya.org and follow the links to Vintage Model Yachts. There is a large group involved in building large model yachts like my 73" Vanja that had plans published by Popular Mechanics in 1936. I offer copies of Vanja and IOD 48" plans on my websites. I have fiberglass molds for the Vanja 73" and IOD 48". I have made 4 Vanja hulls and will make more for those who are interested in fiberglass copies. Many have ordered the Vanja plans to build from scratch. I have not yet seen finished scratch built Vanaja results from those for whom I made sets of frames. Some IOD 48" model builders have provided excellent photos of their boats which I plan to show on these pages. Stay tuned as I develop Model Yacht Building Instructables as the spirit moves. Sincerely, Milton Thrasher 941 966-9172 or 941 966-9179 for answering machine 4258 Hearthstone Drive Sarasota, FL 34238 [email protected] www.angelfire.com/fl4/mft www.angelfire.com/fl/modelyachts www.angelfire.com/fl5/mft
Step 1: Laser Cut Frames and Decks for Model Boats
Irwin Schuster, Secretary of the Tampa Bay Ship Model Society, ([email protected]) has laid out the IOD frames and decking for laser cutting. I offer them in various sizes on my web site at www.angelfire.com/fl4/mft The smaller sizes (13, 18 and 24) are true to scale. The larger sizes (33.4, 36 and 48) have deeper keels by 3" than the original plans so that they can be sailed by radio control.
Step 2: Solid Models
The best way to make solid models is by the bread and butter method. That is to make layers of wood that conform to the water line levels that as shown on the plans of the boats. They are glued together and then carved to shape. That saves a lot of effort compared to working with a solid block of wood. I offer templates for the layers which are called "lifts" that can be made any size on a copier. Small half models are very easy to make by use of templates. I cut a plexiglass profile and deck of the model on a band saw. I attach these to the lifts for the half model to prevent cutting too deeply when shaping the hull. This allows me to use a sanding machine with very rough grit without fear of cutting below the template.
Recommendations

Made with AI - Autodesk Design & Make - Student Contest

Make it Resilient

Books and Bookshelves Contest

Customer Support: (833) 936-3231
Find anything you need

You have %itemCount% in your cart. Total being %total%
How To Build A Dock On A Pond

Ahoy there everyone! If you’re looking to build a dock on a pond, then you’re in luck. Installing a dock on a pond is a great way for anyone to get the most out of their local waters and enjoy a spot of fishing, swimming, or simply relaxing by the shore. But of course, the question remains – how does one go about building a dock on a pond? Well, in this post, we’ll be providing a step-by-step guide to dock building and some top tips for making the process go as smooth as possible. So, sharpen your tools and get ready to get your hands wet when we take you on a nautical journey of dock-building success!
Quick Explanation of Key Question
Building a dock on a pond can be a complex project requiring detailed planning and preparation. Ensure you research and understand the local laws, regulations and possible environmental implications before beginning construction.
Measuring and Planning For A Dock
Before building a dock, it is important to measure the pond not just for size but also depth. This will help determine the size of the dock needed as well as its location in the pond. It is best to locate the dock near deeper parts of the pond so that boats can navigate into it easily, but if this isn’t possible then creating a slope towards the deeper section is an option. When deciding on where to put the dock, it is important to consider any plants and wildlife that live nearby. If there are local laws or ordinances regulating building docks in ponds, be sure to research these before beginning. Furthermore, it is vital to ensure that no permanent damage will be caused by building or anchoring the dock. If budget allows, another option is to hire a professional surveyor who can provide detailed surveys of your plans before beginning construction. This way you can make changes ahead of time and know exactly how much material you need and how large your dock should be built. Once all planned measurements are taken and approved, it’s now time to begin selecting an area of the pond for constructing the dock. In the following section we'll cover how to select an area and plan for a successful construction process.
Selecting an Area of the Pond
When selecting an area of the pond to build your dock, there are several factors to be aware of. First and foremost is ensuring that the proposed dock site is located in a safe location on the pond that is away from any busy boat traffic or other high-traffic areas. Additionally, it is important to select an area of the pond with relatively shallow water and that may have access to larger open spaces for swimming. It's also beneficial to consider the natural landscape around the pond; building a dock near trees, rocks, or bends in the water can provide cover and shade for those utilizing the dock throughout the day. On one hand, many people believe it’s better to select an area close to shore as this allows for easy access and possibly improved visibility of the dock from the house, but on the other hand it could be more beneficial to select a location deeper into the pond since it’s less likely to attract unnecessary attention. Ultimately, each person will need to evaluate their own situation and decide what layout works best based on their preferences. Once you’ve selected an ideal area of the pond to build your dock, it is important to create a map of the chosen spot in order to plan out precisely where you want your dock structure placed. In the next section, we will explain how to use a large scale map when outlining these plans.
Using a Large Scale Map
Using a large scale map for your dock-building project is an important way to ensure accuracy in the construction of your dock. With a map, you’ll be able to measure the exact length and width of your dock, as well as make sure you are placing it in a suitable area of the pond. Both sides of this argument should be taken into consideration before making a decision as each has its benefits as well as its drawbacks. On the one hand, using a detailed map is helpful in terms of understanding the terrain, water depth, and safety concerns that accompany any kind of lake-front or pond-front building project. You’ll be able to see the land clearly and determine ahead of time any potential issues that may arise from construction efforts. Additionally, you won’t have to worry about scaling down measurements from a full-size version of a map when determining the length and width of your dock. On the other hand, maps can also limit creativity and leave to little room for changes as works progresses. For some creative projects where materials can be easily manipulated and substituted on site, using pre-determined measurements from a map can interfere with building operations or even require additional materials to complete unexpected projects. Overall, using a large scale map when building your dock increases accuracy but may come at the expense of creativity during construction. Weighing both options carefully will lead you to your best choice for this project. Now let’s move onto gathering the necessary material so that you can start building your dream dock!
Gathering the Necessary Materials
Once you’ve identified the appropriate spot for your dock, it is time to begin preparing and gathering the necessary materials. Depending on what type of dock you plan to build, there are a variety of different materials that may come into play. Therefore, the first step in this process is to build an accurate list of materials that are needed to complete the project. Many builders opt for pre-manufactured wood such as pressure treated lumber, as it tends to be both more affordable and easier to work with. Another benefit of using pre-manufactured wood is that it usually comes with warranties, which can provide some security in the event of any defects or other issues down the road. However, many traditionalists choose to build their dock from all-natural products such as cedar or hardwoods like teak. These types of woods tend to be more expensive, but they also hold up better over time and provide a natural aesthetic look compared to pressure-treated lumber. When building a dock on a pond, your foundation pieces are arguably one of the most important components. Foundation pieces help keep your dock from tipping once it is placed in water and also helps keep your dock structurally sound against weather elements such as wind or rain. Many builders use large concrete blocks for these base sections, as concrete provides a much secure foundation than just stackable bricks or rocks due to its water-tight design. Ultimately, this decision is driven by personal choice and budget; however, when constructing a dock by a pond high quality foundations should always be considered -especially since those foundations must be able to withstand any shifting or heavy waves caused by boats passing by or otherwise entering the docks vicinity. At this point in the process, you should have a clear understanding of what materials are needed to complete the project safely and efficiently. Now that you know what materials will be necessary for your project, let’s discuss some of the specific tools and woods needed when building your dock on a pond in our next section.
Key Summary Points
When building a dock on a pond, it is important to have an accurate list of all the materials and tools needed in order to complete the project safely and efficiently. Pre-manufactured woods such as pressure-treated lumber or all-natural products like cedar or hardwoods like teak can be used for this purpose. For the foundation pieces, many builders choose to use concrete blocks for their water-tight design and ability to withstand shifting or heavy waves caused by boats passing by.
Tools and Woods Needed
Building a dock on your pond requires the right tools and wood materials. Starting with the essential tools for the project, you’ll need power saws, cordless drills, drill bits, finishing nails, hammer, measuring tape, screwdriver, screws and 4x4x12 inch pressure-treated lumber. For heavier applications such as attaching moorings to the dock, you might need an electric or cordless impact wrench. In addition, marine grade stainless steel hardware such as U-bolts, cleats, deck hinges and zip ties can be used to secure additional items like floats and screens to the dock frame. When it comes to selecting the right type of wood for your dock project, experts are divided in opinion. Some recommend using cedar due to its strong resistance to rot and decay however cedar tends to be lightweight making it less suitable for heavy use over time. Pressure treated pine is affordable and the most common choice but should be coated with a sealant every few years to protect it from moisture. Alternatively some homeowners opt for high-end composite wood materials such as redwood or mahogany for a sturdier long lasting surface. Whatever option you decide on for your dock project ensure that you calculate and choose the appropriate number of boards or planks accordingly. Once you have all the necessary tools and lumber ready, it's time to start building the structure of the dock.
- According to the United States Fish and Wildlife Service, pressure-treated wood is the most common material used for building docks on ponds.
- Pier blocks are recommended for the posts of dock foundations as they have superior load bearing capacity compared to standard deck blocks.
- Using metal screws or nails instead of steel bolts is not recommended when constructing a dock on a pond due to the corrosive nature of water.
Building the Structure of the Dock
Building the structure of the dock should be done with caution; it requires attention to detail and understanding the difference between different types of materials available for construction. Determine the area needed for your dock and the type of decking or support system to install, such as wood, aluminum, or steel. The dock must also be checked for buoyancy before installation. Wood docks provide a measure of cost-effectiveness, as they can usually be found locally. These docks offer better flexibility in design because they are more easily cut and shaped than other materials; however, wood is much more prone to rotting and decay over time. Aluminum is typically more expensive than wood, but holds up better against the elements due to its corrosion-resistance properties and relative strength. Steel offers excellent structural strength, but will likely require special construction techniques and may need more structural support. When building the framework, ensure that all measurements are exact; any discrepancies could result in a weak structure that could lead to failure during installation or operation. It is important to check for proper weight capacity for your specific dock setup; if it is not strong enough to accommodate people walking on it, you could be risking injury or damage later on. Lastly, do not forget about drainage for your dock; make sure that water does not accumulate around the edges of the frame and does not become stagnant under your dock. After creating a sturdy frame for your dock and ensuring that load capacity and drainage are properly addressed, you are ready to move on to installing and floating your dock.
Installation and Floating of the Dock
When it comes to installing the dock on a pond, there are both pros and cons to floating the dock or anchoring it to the surface. Floating docks make up the majority of installations due to their ease of installation and removal, while anchoring docks have more maintenance involved but provide a more secure footing. One major advantage of using floating docks is that they do not require any anchors or poles, which makes them a great choice for small ponds and those without secure surfaces that can hold anchors. A typical floating dock uses either barrels filled with air or foam bumpers as flotation devices to keep the dock in place. While these devices may require maintenance such as replacing broken parts or reinflating so that they remain afloat, this is generally still much less of a hassle than having to work with anchors and anchor lines. Floating docks also allow for faster installation and removal compared to other docks where fixed anchors must be placed before installing. Furthermore, because these types of docks move up and down with the water level, they are safer than traditional anchored docks which could become dangerous during changes in water levels, as well as being less prone to damage caused by waves lapping against them. Anchoring docks, however, offer more stability than floating ones do since they are held in place by large anchors secured into the bottom of the pond or lake bed. This type of dock also offers more protection from strong winds since it will stay secured to its spot no matter what weather conditions occur over time. Also, because an anchoring dock has several feet of lines connecting the dock and its anchors on either side of the pond, it eliminates all movement that typically occurs with floating docks, thus providing a more secure footing overall. Overall, both types of docks have their own unique advantages and disadvantages depending on your needs. Ultimately, whether you install a floating or anchoring dock on your pond depends on your desired outcome and how much effort you want to put into maintenance over time. Either way, proper installation should always consist of preparing the ground beneath your dock for optimal stability—no matter which type you choose! Now that you know about installing and floating a dock for your pond, let’s discuss securing the dock to its surface in the next section.
Securing the Dock to its Surface
Securing a dock to the surface of a pond is an important step to ensure that it stays in place when in use. There are several popular methods for securing docks, including tie-downs, anchors, and piling structures. Tie-Downs Tie-downs are the most common method for anchoring a floating dock. These are large straps or cables that connect the dock to shoreline posts, trees, or concrete blocks. Cable tie-downs can last for several years if properly maintained, but they do require periodic adjustment to remain tight, as they may loosen over time. Anchors An alternative option is attaching large anchors onto the dock and then attaching them onto the lakebed. This method requires more effort than tie-downs because you will need to drill holes and attach weights on each corner of the dock. Anchoring the dock into place is usually more secure than tying down because it creates a solid connection between your dock and the bottom of the pond. However, if you have a lot of wind or waves at your dock site, this may not be enough and you may need to use different anchor systems like piles. Piling Structures Piling structures involve drilling steel or wooden pilings into the lakebed around your dock and then bolting them securely into place. Pilings provide extra stability and security compared to other anchoring methods, and can accommodate larger boats than many cable tie-downs. However, installing piling structures can be costly and time consuming since you have to drill into the lakebed and sometimes hire additional labor for installation. Whatever method you decide to use for securing your dock to its surface, make sure that all connections are tight, secure, and regularly monitored. Maintenance must also be done on a regular basis to keep your dock safe and secure as well as looking great over time. With proper maintenance, care and attention your dock should stay safe and secure all year round! The next step in building a quality dock on a pond is properly maintaining and caring for it once completed. In the following sections we’ll discuss proper maintenance techniques such as cleaning plates, checking boards and caulking seams in order to extend the life of your durable structure.
Proper Maintenance and Care
Proper maintenance and care of a dock on a pond is essential to its longevity and safety. This section will provide key strategies for keeping it in good the condition over time. First and foremost, regular cleaning is necessary to prevent mold and algae build-up, particularly on the sides. It’s also important to check for any nails or screws that may be loose, as well as splinters in wood materials that may have become exposed to UV light or water damage. Any loose parts should be tightened for additional strength. For example, old boat cleats should be replaced if they are starting to lose their integrity due to rusting or other forms of deterioration. Regular inspection of the dock structure itself is also necessary. Be sure to check for rot, rust or other signs of aging, and address any revelations as soon as possible. The same holds true for any posts, pilings or supports that were used during construction. If visible corrosion is present it will likely cause additional damage over time and needs to be addressed before it gets worse. The type of lake, conditions it experiences and fluctuation levels should also be taken into consideration when looking at proper maintenance and care. In man-made lakes with low natural turbulence levels, structures can deteriorate much faster than in more turbulent settings where particles are constantly moving around. In addition to this, saltwater harbours tend to corrode material more quickly due to the higher saline content in the water. Therefore, an adequate protection system needs to be put in place if these environments are present. Some people argue that these measures are too costly and time consuming but this must not be seen as an excuse to neglect these important steps in maintaining your dock safe and sound. It's much cheaper than having to completely rebuild or replace the whole structure down the line because proper care was not taken from the start; a little elbow grease now could save you a lot of money later! With some consistent effort up-front you can rest assured that your dock will continue providing years of enjoyment for you and your family.
Frequently Asked Questions and Answers
What are the considerations for building a dock on a pond.
The main considerations for building a dock on a pond include location, depth, and size. You need to make sure the dock is in a safe spot within the pond; away from nearby homes and roads, or other potential dangers. Points such as depth and size should also be taken into account when planning for the dock. The ideal depth for providing stability is 4 feet or more, and you’ll want to choose a width that can accommodate your activities on the dock (fishing, swimming, picnicking, etc.). Additionally, make sure to consider the impact of weather: high winds, strong currents, and heavy rain can all adversely affect the shape of the dock. Lastly, it’s important to ensure permits are obtained before beginning construction, so that any professional building service is legally allowed to build your dock without any legal issues.
What materials do I need to build a dock on a pond?
In order to build a dock on a pond, you will need a variety of materials including deck boards, concrete pier blocks, posts, joists, galvanized fasteners and lag screws, deck screws, anchoring brackets, pieces of lumber for framing, plastic edging material, galvanized anchors, and treated wood. Deck boards are used to create the walking surfaces of the dock. It is important to use pressure-treated wood that is rated for ground contact in order to withstand the wet environment. Concrete pier blocks provide stability and elevation while posts provide support to the structure. Joists should be placed between posts in order to create a firm base for the deck boards. Galvanized fasteners and lag screws are necessary to ensure that joints between deck boards remain secure and safe. Deck screws should also be used when securing boards together. Anchoring brackets or pieces of lumber can be used to help secure the dock in place. Plastic edging material can be added for aesthetic purposes and to prevent soil erosion near the edges. Galvanized anchors can help make sure that your dock remains securely attached to the shoreline or pond bottom. Finally, treated wood is used when constructing any part of the dock that may come into contact with water.
What are the steps for constructing a dock on a pond?
1. Design and Plan Your Dock: The first step to constructing a dock on a pond is to design and plan your dock. Take measurements of the area where you intend to build your dock and consider what materials you’ll need, the size and shape of the dock, and any additional features you'd like it to have. 2. Choose Materials and Purchase Supplies: Once you have a clear idea of what kind of dock you’d like to build, choose the materials that will best suit your needs. You’ll want to make sure you purchase enough supplies to complete the project safely and efficiently. 3. Secure Permits and Obtain Professional Help (if Necessary): Depending on where you live, there may be certain laws or regulations regarding docks on ponds. Be sure to read up on any rules or permits that may be necessary in your area before beginning construction. If needed, seek help from a professional contractor who can provide the necessary guidance and advice. 4. Build Support Structure: Use high-grade lumber and strong bolts to construct a support structure for the dock that will be able to withstand wear and tear caused by water exposure over time. Position pilings at the dock's corners or sides according to your design specifications. 5. Connect Decking Materials: Once the support structure is built, connect decking material, such as pressure-treated wood or composite boards, directly onto it with galvanized screws or nails. Securely fasten all boards together so that they won't move or come apart under pressure from foot traffic or inclement weather conditions. 6. Install Ramp (Optional): For easier access from land to water, you may opt to add a ramp off of one end of the dock for launching boats or kayaks into the pond with less effort. 7. Finish Touches: To finish off your project, add on any features that weren’t included in original planning stages, such as lights or benches along the perimeter of the dock or railing around its edges for safety measures and aesthetics. Enjoy your newly built dock!
Free Shipping
Quality support, secure checkout.
[email protected] Monday-Friday (9Am-5PM MST) (833) 936-3231 312 W 2nd St, #5386 Casper, WY 82601
How to build a pond – a step by step expert guide
Learning how to build a pond and adding one to your garden will transform your garden
- Sign up to our newsletter Newsletter

If you want to make one change in your garden, then learning how to build a pond is a must. Not only will it benefit wildlife, but it can also evoke serenity, movement, and a relaxing soundtrack to your plot and create a thriving environment for a limitless array of wildlife.
Every animal, from tiny insects to larger mammals, needs a source of water in order to thrive. Including garden pond ideas in your outdoor space can dramatically increase the bio-diversity of your backyard ideas and as a result, will help your garden to flourish.
‘Insects are the base of the food chain and though they are less iconic than some of our familiar mammals, a water source will increase the number and the variety of insects in your garden very significantly’, says Barry Chambers founder of Garden Design Guru . Insects are vital to the well-being of our garden and ‘more diversity brings greater stability and less chance of a proliferation of any pest or even disease on your patch.’
How to build a pond
When researching how to build a pond and investigating a garden pond, it is crucial to figure out what you want from your pond. Do you want something that is a haven for wildlife or perhaps just a reflective space? This will influence your backyard landscaping ideas as it will define the style and size of your pond.
There are many different ways to build a pond, however, the three most popular methods are using a pond liner; using a preformed base, or creating a container pond.
- Lined pond - the traditional method of pond construction, a lined pond starts life as a large hole, dug into the ground. Ensure there are no stones in the hole as these could pierce the liner, then coat the hole with sand. Next, build a trench around the outside of the pond to accommodate the edges of the lining. Then lay your pond liner in the hole and tuck the edges into the trench, using large rocks to weigh it down. The Wildlife Trust recommends using a pond liner that is made of butyl rubber. From here the liner is then smoothed flat and the pond is filled with rainwater. Backfill the trench with soil to secure the liner.
- Preformed - this method utilizes a plastic base, which is buried in the ground and is much easier and more convenient than lining your own. However, you are limited to the size and shape of your pond. To install, dig your hole, coat it with a layer of sand and then install and backfill around your preformed pond.
- Container pond - the easiest to create, any watertight container can be transformed into a pond. Simply fill with rainwater and add your plants, immersed in pond baskets. You can then create slopes in your pond by sinking rocks and old bricks.
After you've built your pond, the next step is incorporating it into your garden ideas and adding pond plants . Container ponds are the easiest to integrate as their appearance is predominantly provided by the container. This means that so long as the container you choose fits into your garden style, then your pond should fit perfectly into your scheme.
On the other hand, you have a lot more freedom to design the space around a sunken pond. Once built, the way you decorate is pretty much the same regardless of whether you used a liner or a preformed mold.
Consider edging your pond with rocks and alpine plants to create a rockery feel that is befitting of cottage garden ideas . Alternatively, you can try surrounding your pond with a more formal deck or paving which draws on patio ideas . For something more out-there, consider drawing on Japanese garden ideas when decorating around your pond. Ponds are a requisite feature of this design, so embrace elements of this reflective style of gardening and create a sanctuary in your backyard.
How to build a container pond
Finding out how to build a pond in a container is one of the quickest and easiest ways to build a pond in your backyard. In fact, you can turn almost any watertight container into a miniature wildlife pond. From troughs and buckets to barrels and urns, there is no size or shape that can’t be transformed into a haven.
The steps for how to build a pond in a container are really straightforward. Simply select your container, then sink stones and bricks to create slopes. Then fill with rainwater and immerse your chosen pond plants in pond baskets. Once you've figured out how to build a pond in a container, you can then incorporate it into your other container gardening ideas for a beautiful display.
Container ponds are also a brilliant way of gardening with children as they are much safer than a traditional pond, while still bringing the delights of frogs, tadpoles, and dragonflies into the garden.
How deep should I dig a pond?
How deep you should dig a pond depends on what you want to achieve with it. If you are hoping to have fish in your pond then a depth of at least 20 inches and a minimum capacity of 2000 liters is recommended. However, if you are hoping to create a wildlife pond then shallower is better.
'A wildlife pond should have lots of shallow water – roughly 50% shallows, and the deep area is not more than 30 cm,' says Dr Jeremy Biggs, CEO at FreshWater Habitats Trusts 'Most garden ponds are too deep for their area: if you want a half meter deep pond, or deeper, it needs to be much bigger or you end up with very steep sides.'
The size of your pond will largely depend on the size of your garden, even a small pond is a beneficial addition both to wildlife and to your garden's aesthetics.
However, regardless of the size, 'it is important that you ensure that almost all pond slopes are shallow, less than 1:5 (12°) and preferably less than 1:20 (3°),’ continues Dr. Jeremy Biggs. Opting for sides at gentle angles will ensure that any animals that accidentally find themselves in the pond can escape.
How to fill a pond?
For all ponds, filling them with the correct water is vital. The best option is rainwater, which has a pH level supporting the most extensive range of plants and wildlife. Start collecting rainwater in water butts before you begin to build your pond. You can then use this to fill your pond quickly and efficiently.
‘When topping up your pond it’s a good idea to use collected rainwater or tap water that has stood in a watering can for a few days to allow some of the chemicals to evaporate,’ recommends gardening expert Leigh Clapp.
How do I get rid of green water in my pond?
Oxygenating and nutrient-absorbing plants are the best way to get rid of green water in your pond.
‘Green water is caused by algae. Although some algae are beneficial to the pond a sudden bloom can cause real issues. The key is trying to keep the nutrient level low and the water well-oxygenated,’ explains Ian Jelley, director of Landscape Recovery at Warwickshire Wildlife Trust .
Reducing nutrients can be achieved by ensuring plenty of plants absorb the nutrients between your borders (which are likely to be fertilized) and your pond. ‘Let the grass or other vegetation grow longer around your pond to intercept nutrients before they enter the pond. Some of the best pond plants include: rushes; Sedges; Water mint; Meadowsweet,’ adds Ian. ‘In the pond you can plant species like Common Reed which can help act as a filter, reducing nutrients and pollution.’
The second method is to increase the amount of oxygen in the water, the easiest way to achieve this is also with plants. Ian recommends varieties such as hornwort; marestail; spiked water-milfoil and water starwort. While adding native plants can help to remedy problems relating to algal bloom, it is important not to go overboard. ‘Keep your pond healthy by maintaining the natural balance. You should aim to keep around 50 percent of the surface free of vegetation by thinning out plants occasionally during the summer,’ Ian adds.
These ideas can also be used to keep natural swimming pools clean too.
Is a pump necessary in a pond?
No, a pump is not necessary for a pond. ‘If you get the balance of native plants right, you shouldn’t need a pump. Ponds in the natural world don’t have pumps. In some situations, it may take a few years for the plants to establish and during that time you may experience algal issues,’ says Ian Jelley, director of Landscape Recovery at Warwickshire Wildlife Trust.
However, this doesn’t mean that pumps can’t bring an aesthetic benefit to your pond and help oxygenate the water. One of our favorite sensory garden ideas is to include a garden fountain that will look stunning when incorporated into a pond. ‘If a pump is used, though, then the critical thing is ensuring that the filter on the pump is fine enough to prevent wildlife from being sucked into it,’ says Ian.
How to build a pond that is safe
With any sunken pond, safety is key, especially if you have children or pets.
The most traditional method is to surround your pond with a fence, however, this does come with aesthetic costs. Pond covers are also popular but they also come with aesthetic compromises and will restrict the amount of wildlife that can benefit from the addition to your backyard.
A pond grate, on the other hand, offers invisible protection. A simple plastic grid is installed just below the surface of the water meaning that if someone or something should fall in, it cannot sink. However, since the grate also has holes it doesn't have a detrimental effect on any wildlife that wants to enter the pond. Once the pond is full of water and plants have been added the grate becomes nearly invisible. You can find all types of pond grates at Amazon .
How do I attract wildlife to my pond?
Knowing how to build a pond is essential if you want to incorporate wildlife into your plot. Whether you create a small pond in a container or a large pond in your lawn, they will quickly become a safe haven for all sorts of wildlife.
‘Generally, wildlife can 'sniff out' water when it's there! Animals and insects will turn up, as if by magic and you could argue that those which come are those to support,’ says Barry Chambers founder of Garden Design Guru. However, there are a few things you can do to make your pond more appealing to wildlife.
Plants are a great way to encourage wildlife to your pond. ‘If you aim to cover around 50 per cent of your pond, they can do a great job at keeping the water cool and algae growth down,’ says experts from the RSPB . However, when selecting plants be sure to opt for a mix that offers food for pollinators as well as protective habitats or food for insects, amphibians, and mammals. ‘It is important to avoid invasive species like Canadian Pond Weed ( Elodea canadensis ) and those like Rushes ( Typha species) which can puncture the liner,’ recommends Barry.
Also when thinking about how to build a pond, you must also consider whether you want to incorporate water feature ideas . Additions such as a fountain will not only provide a bubbling soundtrack to your garden but will also add visual interest and help to attract birds and wildlife to your pond.
There are many options for fountains, from those with pumps that help to aerate the water to solar options that simply float on the surface and recirculate the water below.
Can a pond be built anywhere?
Yes, a pond can be built anywhere. Though if you want to figure out how to build a pond as part of your small garden ideas , it might be better to opt for a container pond over a permanent structure.
You also need to consider the location of your pond. The optimum location would be one that receives between four and six hours of sunlight. However, it is better to have a pond in a less optimal location than to not have one at all.
The other key factor that will influence the site is how the pond is going to be fed water. ‘Although you may be able to pipe water from a roof to reach the pond this ideally does not want to be an afterthought – rainwater is best and of course, the sustainable way to go,’ says Barry Chambers founder of Garden Design Guru.
'Increasingly we need to consider what wildlife is already using the garden so as not to destroy existing habitats but ensure we add without subtracting. You could set up a wildlife trail camera to see if there are visitors which you don't know about, like hedgehogs for instance,' continues Barry.
How to remove a pond
Total removal of a pond should always be a last resort. ‘Ponds are critical to all wildlife so avoid filling in a pond unless totally unavoidable. The decline in ponds in gardens and in the wider landscape has significantly contributed to the decline in our wildlife, this means that every garden pond has an invaluable role in nature’s recovery,’ explains Ian Jelley, director of Landscape Recovery at Warwickshire Wildlife Trust.
If you are concerned about the safety of the pond, look into methods to boost its credentials – try fencing, grates, or similar. If you don’t want to take on the burden of managing a pond, consider reimagining it as a low-maintenance bog garden that will be self-sustaining and invaluable to semi-aquatic wildlife.
However, if alternatives are proving impossible, ensure that your efforts to remove your pond have as little impact on wildlife as possible. ‘If a pond has to be filled in then the work should be undertaken in the autumn to minimize the disruption to wildlife. During this time of year, most species will have moved out of the pond into the terrestrial habitat. Any remaining animals can be relocated to a nearby pond – ideally less than a mile away.’
Never move pond plants or wildlife into local streams, rivers, or lakes as this can invite infection, disease, or non-native plants into the natural environment and can have severe long-term consequences. It is also worth noting that some fish and amphibians may also require a license or consent to move.
Sign up to the Homes & Gardens newsletter
Decor Ideas. Project Inspiration. Expert Advice. Delivered to your inbox.
Having graduated with a first class degree in English Literature, Holly started her career as a features writer and sub-editor at Period Living magazine, Homes & Gardens' sister title. Working on Period Living brought with it insight into the complexities of owning and caring for period homes, from interior decorating through to choosing the right windows and the challenges of extending. This has led to a passion for traditional interiors, particularly the country-look. Writing for the Homes & Gardens website as a content editor, alongside regular features for Period Living and Country Homes & Interiors magazines, has enabled her to broaden her writing to incorporate her interests in gardening, wildlife and nature.
The rock legend's London home championed 'dopamine decor' long before it was a trend
By Sophie Edwards Published 4 March 24
The storage solutions, decluttering, and organization techniques to eliminate visual clutter, and enhance both the aesthetics and functionality of your kitchen
By Lola Houlton Published 4 March 24
From cascading fountains to wildlife ponds, there are plenty of ways to create a tranquil water garden
By Leigh Clapp Published 5 March 23
Find out how to grow poppies to enjoy the beauty of these brightly colored tissue paper-like blooms
By Leigh Clapp Published 8 January 23
Find out how to grow delphiniums from seed and enjoy these colorful cottage garden favorites filling beds and borders
By Leigh Clapp Published 17 December 22
Learn how to grow ferns to enjoy the texture and form of these versatile plants in many areas of your garden
By Leigh Clapp Published 19 October 22
Find out how to grow sweet peas and where to enjoy their wonderful color, ruffled blooms and sweet fragrance in your garden
By Pippa Blenkinsop Published 12 October 22
Learn how to make fat balls for birds to ensure their wellbeing throughout the winter
By Holly Reaney Published 20 August 22
Planning a kitchen garden is easy with this expert advice – whether yours is in beds, borders or a dedicated patch – you're guaranteed success
By Leigh Clapp Published 26 July 22
Extend your growing season with the best fall flowers for pots – from pretty annuals to hardy perennials
By Melanie Griffiths Last updated 16 October 23
Useful links
- How to design a kitchen
- How to design a bathroom
- How to design a patio
- Interior design: advice and tips
- How to clean a washing machine
- Living room ideas
- Bedroom ideas
- Kitchen ideas
- Bathroom ideas
- Backyard ideas
Buying Guides
- Best mattress
- Best cordless vacuum cleaners
- Best pillows
- Best coffee makers
- Best blenders
- Contact Future's experts
- Advertise with us
- Terms and conditions
- Privacy policy
- Cookies policy
Homes & Gardens is part of Future plc, an international media group and leading digital publisher. Visit our corporate site . © Future Publishing Limited Quay House, The Ambury, Bath BA1 1UA. All rights reserved. England and Wales company registration number 2008885.
- - Build logs for subjects built 1901 - Present Day

- Remember me Not recommended on shared computers
Forgot your password?
Marblehead model yacht by Michael_A - Radio - 1:1 - 1940s design by J. Selmer Larson
By Michael_A May 26, 2021 in - Build logs for subjects built 1901 - Present Day
- Reply to this topic
- Start new topic
Recommended Posts
Hello everyone,
I started this model a few months ago and am creating this build log (my first) so I can show the progress to date and get advice moving forward. I have to say I am feeling a little nervous! The boat is a 50" model yacht of the Marblehead class. This class was started in the Depression era when, like now, people had more free time on their hands. These models were designed to sail in ponds (like the one in Central Park in NYC). Initially they would sail on their own and be redirected by the owner at the edge of the pond, with a stick. Now, they are mostly radio control. I'm more interested in building than sailing so we'll see how far I progress in that area.
The design is by J. Selmer Larson, a well-known sculptor during that time. I love the hull design and am interested in working with aircraft plywood.

I am really interested in seeing how well I can do using the tools I already own – I don't want to buy a lot of stuff just for this model. Here's the strongback (materials from Home Depot) and the beginning of the keel. It's in two halves to make it easier to form. I don't own a table saw so most of my timber will be standard dimensional spruce.

Here are the molds, and my first pass at the keel fin. Parts of the fin will extend up to the deck to support the mast. Molds are made of MDF and the fin is two layers of 1/16" aircraft plywood epoxied together; to be built up and strengthened later on. I do admit, I bought a nice jigsaw just for this model; even so the molds do not feel very accurate. I can fair up the hull later as I get more into it (I hope).

Here's the framework with the sheer clamps installed. It all feels a bit wobbly so I put some dowels between the molds to add some rigidity. If you look carefully you can see my high-tech twisted wire clamps. The green tape will help keep the boat itself from being glued to the molds. At least that is the plan. I"m not sure how I will get the boat out once it is planked either.

That's all for now! My main takeaway so far: A huge amount of thought and planning is required for each step. Once the planning is done the actual "work" takes very little time at all. I was surprised how far you have to think ahead to make sure everything will work out at the end. I'm guessing this is an experience most of you all are very familiar with.
Thank you all for your attention and I hope to post more soon.
- aechmea , GrandpaPhil , yvesvidal and 4 others

Link to comment
Share on other sites.

I assume that most of our members already realize this, but it's worth mentioning that the build is 1:1 because it's not a scale model -- it's a full-size replica of a craft that was designed from the get-go as a pond yacht. Should be interesting -- good luck!
- Moab and mtaylor
Chris Coyle Greer, South Carolina When you have to shoot, shoot. Don't talk. - Tuco
Current builds: Brigantine Phoenix
Exactly! There are a lot of forces on a sailing model so the hull and rig have to be very strong. The bow will have a "bumper" to reduce damage in the case of a collision.

Class M models are fun to sail. I encourage you to consider RC-ing her. Just need a single winch to control the two sheets and a rudder servo....
Ian, Thanks for the encouragement. I've pretty much made up my mind to complete this with RC. I may try to find someone to help me to the RC setup when I reach that point.
Now that I have the molds in place I decided to use a block for the stem and transom. It weighs a little extra but gives me plenty of gluing surface, and I don't think the weight will make a big difference. Fun to get all the angles squared away! I am using the second power tool I purchased for this project; a 12" disc sander from Harbor Freight. It works great.

I glued the keelson over the molds and attached it to the sheer clamp using the blocks at both the stem and stern. Twisted wire worked well for the clamps.
Here's a view of everything so far, including the chine logs which I bevelled in advance.

Note, the spruce keelson was too thick (too stiff) so I had to cut into it every few inches to make it more flexible.

Starting to look more like a boat now! I have glued the keel fin into the keelson to make it one solid structure. I will reinforce the keel later as it has to hold a 10lb lead bulb.

Thanks for reading and I will post more progress soon. I hope you all had a great weekend!
- aechmea , Roger Pellett , yvesvidal and 2 others
Time to put on the two side planks! These are made from 1/16" 3ply birch plywood, from Boulter Plywood in Boston. It's an amazing material – stiff and very light – and the surface is very clean. Here's my first try at wrapping the ply around the hull:

I epoxied the side onto the framework, holding it on with as many clamps as I own. I guess you can never have too many clamps!

I pinned the planks to the chine using toothpicks to prevent any shifting as the glue dried. The epoxy has no holding power when it is wet ....

Finally, I made a tiny transom to cover the blocks at the stern (and bow). Eventually the bow will have a rounded "bumper" in case there are any collisions.

Next step is to put on the bottom. Back to you all soon!
- mtaylor , aechmea , G.L. and 2 others

That looks a very nice project, Michael.
- 7 months later...

What a great project and it looks like this will be a very well built boat. You are within 30 miles of 3 AMYA clubs who I'm sure could help you with fitting the RC equipment. Although I don't think they race vintage Marbleheads. You are also only 60 miles from Marblehead, MA where this class originated and they still race vintage Marbleheads like the one you are building. I picked up a 1970's Marblehead late this past summer that I can't wait to start racing in April. I will be attending the Wooden Boat School in June to take a pond yacht restoration class and have found a vintage Marblehead hull/keel that was damaged in a flood. So I'll need frames in the interior, a deck, radio equipment and all rigging to build during the week in ME.
You might also consider joining the US Vintage Model Yacht Group ( USVMYG.org) which is the group who enjoys building, restoring and racing model yacht designs from before 1970. The vintage Marblehead is one of the largest classes. There are all kinds of resources available on the USVMYG web page including locating and installing radios. Last October we hosted the US Vintage Nationals outside of Philadelphia. Here is a link to the video of the Marblehead class races. I was racing number 150 and came in 12 out of about 20 boats which was fine since I just started racing this past summer. "Pirate" the orange number 150 was a loaner from the commodore of our club since I did not have a Marblehead yet.
Please also post your build pictures on the USVMYG Facebook Page or send them to me, I'll make videos of them and post them to the YouTube channel if you want.
I can't wait to see your progress.
Roger Pellett
A recent WoodenBoat magazine article had a recent feature article about a present day reimagined model yacht class that is popular in the Pacific Northwest. Interesting stuff.
Join the conversation
You can post now and register later. If you have an account, sign in now to post with your account.

× Pasted as rich text. Paste as plain text instead
Only 75 emoji are allowed.
× Your link has been automatically embedded. Display as a link instead
× Your previous content has been restored. Clear editor
× You cannot paste images directly. Upload or insert images from URL.
- Insert image from URL
- Submit Reply
Recently Browsing 0 members
- No registered users viewing this page.
Modelshipworld - Advancing Ship Modeling through Research
SSL Secured
Your security is important for us so this Website is SSL-Secured
NRG Mailing Address
Nautical Research Guild 237 South Lincoln Street Westmont IL, 60559-1917
Model Ship World ® and the MSW logo are Registered Trademarks, and belong to the Nautical Research Guild (United States Patent and Trademark Office: No. 6,929,264 & No. 6,929,274, registered Dec. 20, 2022)
Helpful links.
- Articles Database
- NRG Home Page
- NRG Online Store
- Important: Our Guidelines
- Terms of Use
- Buildlog Index
About the NRG
If you enjoy building ship models that are historically accurate as well as beautiful, then The Nautical Research Guild (NRG) is just right for you.
The Guild is a non-profit educational organization whose mission is to “Advance Ship Modeling Through Research”. We provide support to our members in their efforts to raise the quality of their model ships.
The Nautical Research Guild has published our world-renowned quarterly magazine, The Nautical Research Journal, since 1955. The pages of the Journal are full of articles by accomplished ship modelers who show you how they create those exquisite details on their models, and by maritime historians who show you the correct details to build. The Journal is available in both print and digital editions. Go to the NRG web site (www.thenrg.org) to download a complimentary digital copy of the Journal. The NRG also publishes plan sets, books and compilations of back issues of the Journal and the former Ships in Scale and Model Ship Builder magazines.
Our Emblem ®
Nautical Research Guild ® and the NRG logo are Registered Trademarks, and belong to the Nautical Research Guild (United States Patent and Trademark Office: No. 6,999,236 & No. 6,999,237, registered March 14, 2023)
- Existing user? Sign In
- Latest Posts
- All unread content since my last vist
- Unread topics I have posted in
- Create New...
IMAGES
COMMENTS
I want to build a real old school type, all wooden pond yacht. i've built scale models, but I'm after a specially designed pond yacht. all I can find on the net is sight unseen "plans", usually no more than one 8x11 sheet. it would be nice if a sailplan was included, as well a bit of rigging detail.
A Conversation with Thom McLaughlin and WoodenBoat School Director Rich Hilsinger.Subscribe: https://buff.ly/3YTn45b More from WoodenBoat: https://www.woode...
Materials needed Carving the hull Making and fixing the keel Making a rudder Paint and Finishes for hull, keel, rudder, mast, etc. The rig Sailmaking Boat stands Going for a sail Living with a pond model Other boats to build Appendices: Glossary, Materials, Miscellaneous Helps by M. de Lesseps 86 pp., hidden wire-o-binding, softcover
Building a wooden pond yacht
Build a Wooden Mini Yacht this weekend. ... and about six years later we decided to try building a larger boat for the pool and local ponds we fished. Here's the result of our experimentation: a simple and worthy pond sailer that's rigged and scaled like a real yacht. You can build it in a weekend using readily available materials and tools.
Pond Yacht III: $35 (Shop supplies to help you continue your project.) In this course each student will begin the construction of his/her own pond sailboat using the plank on frame process. This practice is similar to those used in building full-sized boats and allows for a flowing hull form that is beautiful on display and swift on the water.
Step by step instructions on how to build a wooden boat for fishingThis video shows you how we built ours and it floats very well.The basic flat-bottomed boa...
After taking Thom McLaughlin's class on building pond yachts at the WoodenBoat School in 2009, John Stoudt spent the rest of that year into the early winter of 2010 working on this model. It is a 50/800 Marblehead Vintage class design that John built with very thin planks, tacked to wood frames. John also planked the deck. All of the fittings are solid brass.
Wow. What a great book! I've spent many hours reading "how-to" articles on building projects in magazines like Wooden Boat, Fine Woodworking. In Pond Yachts, the level of detail, information, crisp creative illustrations (in full-color reproduced from original watercolours) make this book a must-have for anyone even remotely interested in how boats are built, why they sail, and how you can ...
Boat designing can be a life long pleasure. In fact it can very easily turn into an addic. tion. Boat design addiction may lead to a new 12 step program. Simplicity Boats is about sharing information that helps people expereience the fun of boat building for the least investment of time, skills, or materials.
Free Boat Plans You Can Build This Week (with PDFs) 1. The Wanigan. PC Duckworks Boat Builders Supply. The Wanigan boat began as a garvey design, which is one of the older boat plans known to the Americas. Traditionally, these boats were built as work scows and were very popular among American summer camps.
The work might include repairing a damaged hull, building a new rig, making fittings, repairing a vane gear, getting the electronics working, installing new electronics, or re-rigging the boat. An unfinished boat could have a planked deck built and installed, hatch openings framed, hatches built and fitted, spars constructed, electronics ...
Build a Vintage Marblehead class pond yacht designed for radio control. In this course each student will build his/her own pond yacht. This type of small boat originated in 1932 using minimal design requirements of 50 in LOA and 800 in2 of sail. The class is still actively sailed today under the guidance of the US Vintage Model Yacht Group.
A website that offers over 500 boat plans, including yacht plans, for various types and sizes of boats, as well as materials and tools for boat building. $30-$300 per plan. Boat Builder Central. A website that sells boat plans, kits, and materials, as well as provides online support and tutorials for boat building.
A short video of a recently built 24" vintage style gaff rigged Pond Yacht under sail. She is currently available for sale at http://www.haycroftpondyachts.c...
Anybody can build a replica pond yacht today, but the "weathering" of age is not easily duplicated. As they say on the PBS Antiques Roadshow TV show, "If you hadn't refinished it, the value would be $100,000, but, having been refinished, it's value is probably around $2500." That said, your best source of information is likely to be the old ...
Model yacht building is a wonderful hobby for boaters who like the many different designs available for full scale yachts that can be made by several techniques. I started carving models of my ideas of boats at the tender age of 9 or 10. With a drawn knife, auger and bits, hammer and chisel, I made beautiful hull shapes emerge out of blocks of soft white pine.
18. #2. Posted May 5, 2015. Blue Jacket Ship Crafters, in their book department sells two books on pond models. Both books are by M. de Lesseps. They are Pond Models and Pond Yachts How To Build And Sail Them. These books may have the information you're looking for. JerseyCity Frankie. 1.
1. Design and Plan Your Dock: The first step to constructing a dock on a pond is to design and plan your dock. Take measurements of the area where you intend to build your dock and consider what materials you'll need, the size and shape of the dock, and any additional features you'd like it to have. 2.
Let's build a model lobster pond boat. A great toy boat and pond yacht for use on beaches, in pools, or just to display. The lobster boat pond yacht is made ...
Ensure there are no stones in the hole as these could pierce the liner, then coat the hole with sand. Next, build a trench around the outside of the pond to accommodate the edges of the lining. Then lay your pond liner in the hole and tuck the edges into the trench, using large rocks to weigh it down.
The boat is a 50" model yacht of the Marblehead class. This class was started in the Depression era when, like now, people had more free time on their hands. These models were designed to sail in ponds (like the one in Central Park in NYC). Initially they would sail on their own and be redirected by the owner at the edge of the pond, with a stick.
A six metre class model racing yacht, designed by Bill Daniel's, the most successful model yachtsman between the great World Wars.Constructed by Grove Pond Y...